
Warehouse Мission Рules
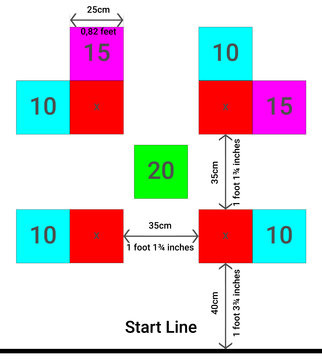
Below is an example of a robot competition field along with the scoring system used to evaluate performance.
- #2606
- 25 Mar 2026
This page shows all the robotics tutorials listed without specific grouping. Each tutorial is short, on specific topic, has a video. Tutorials are structured in sequence in Courses.
Below is an example of a robot competition field along with the scoring system used to evaluate performance.

Here you can find a cheat sheet with the most commonly used commands. There are also more advanced commands that are not included in the built-in API, but the available ones cover most, if not all, of the students’ needs.
Below is an example of a function definition and how to read it:
move_for_degrees(pair: int, degrees: int, steering: int, *, velocity: int = 360, stop: int = motor.BRAKE, acceleration: int = 1000, deceleration: int = 1000) → Awaitable
...
Parameters
pair: int
The motor pair to be used.
degrees: int
The number of degrees the motors should rotate.
steering: int
The steering value (from -100 to 100).
Optional keyword arguments:
velocity: int
The speed of the motor in degrees per second.
...
stop: int
Defines how the motor behaves after it stops. Use constants from the motor module.
...
acceleration: int
The acceleration in degrees per second squared (1–10000).
deceleration: int
The deceleration in degrees per second squared (1–10000).
Let’s take a closer look at the function definition:
The parameters before the "*" symbol are required parameters. You must provide them in the correct order. For example, the first parameter is "pair", so the command expects the motor pair first. The same applies to "degrees" and "steering".
The parameters after the "*" symbol are optional parameters. To change them, you must use their names. This means you cannot just write a number - you need to specify which parameter you are changing. For example:
motor_pair.move_for_degrees(motor_pair.PAIR_1, 360, 0, velocity=280)
Finally, the "Awaitable" keyword means that this command can be used with "await". This allows the program to wait until the command has finished before continuing with the next one. For example:
await motor_pair.move_for_degrees(motor_pair.PAIR_1, 360, 0, velocity=280)

The await command tells your robot:
“Wait until this action is finished, then continue!”
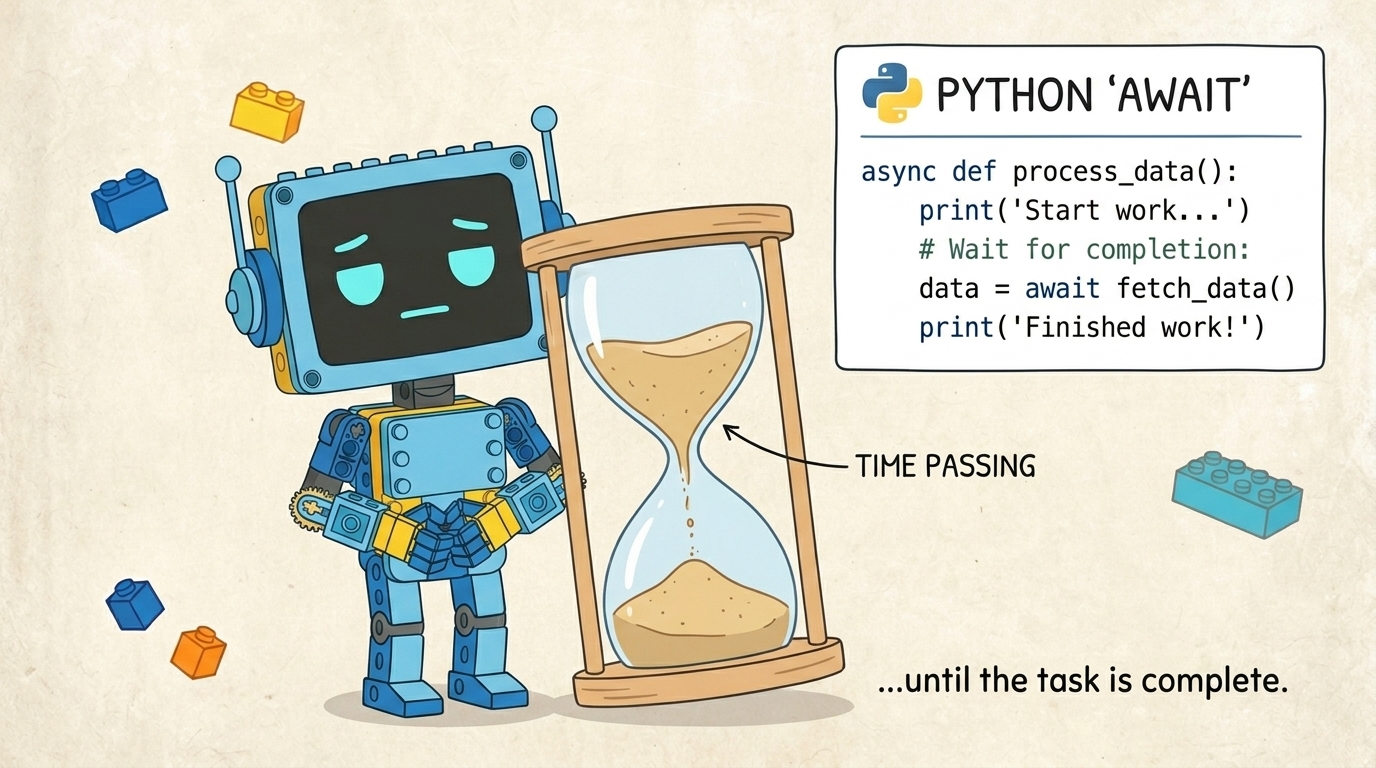
Without "await", the robot may move on too quickly and not finish its actions properly.
You can only use "await" inside an "async" function.
async def main():
    await motor.run_for_time(port.A, 1000, 1000)

Before we can run Python programs on the robot, we need to open the SPIKE software, create a Python project, and connect the Hub to the computer. In this tutorial, you will learn how to do each of these steps using the LEGO SPIKE software.
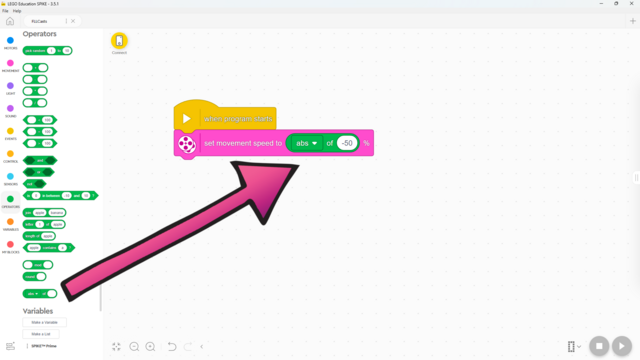
It is part of the Functions block, but what does it do?

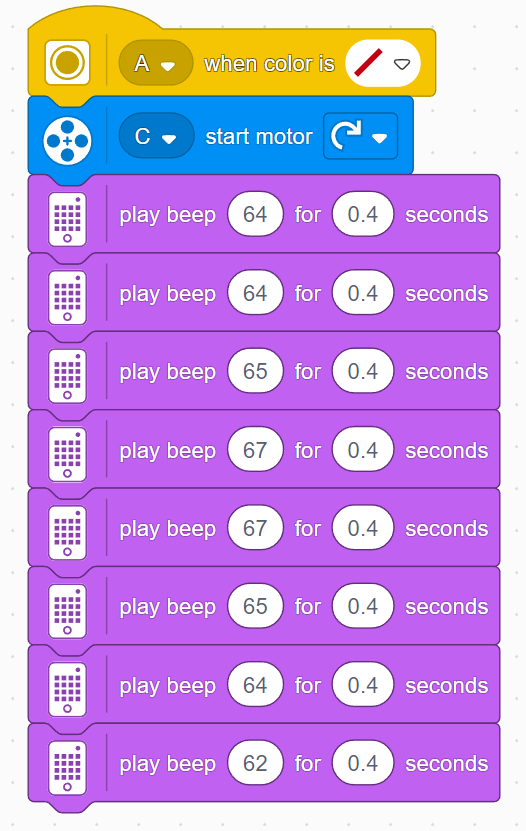
Due to the long construction, you need to be careful with time in this lesson. Don’t let the students spend too much time building. If you think you can manage it, you may let them find their own sheet music and adapt it, but we recommend sticking to the short section from Ode to Joy as shown in the tutorial. This melody also serves as preparation for the next lesson, where a ready melody will again be needed. Here’s what the program looks like:
Because this is the musical level, it’s important to set some rules for the sounds the robots make. Students often don’t realize how loud it can get, so remind them to keep the volume lower so they can hear the hubs, and to stop their programs in time, since continuous sounds can become quite loud.
In this lesson, students will learn many of the key concepts needed for the rest of the course. That’s why there is little construction and mainly exploration with a single force sensor. Make sure they understand the difference between pitch and volume. Although there are many new blocks introduced, they are mostly simple and similar to previous ones. These blocks will also be used in many future lessons, giving students plenty of time to become familiar with them. By the end of the lesson, students should have tried the following two programs:

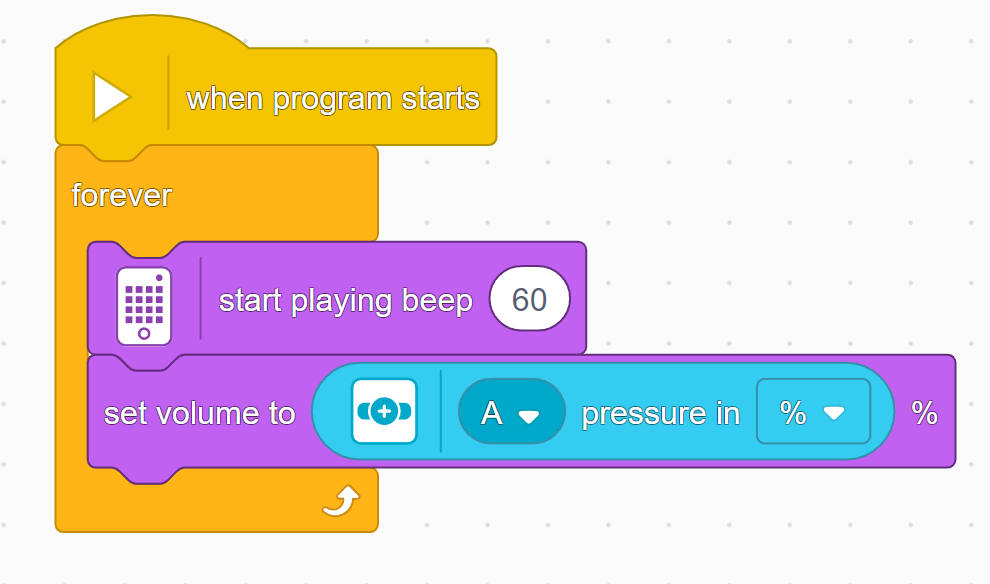
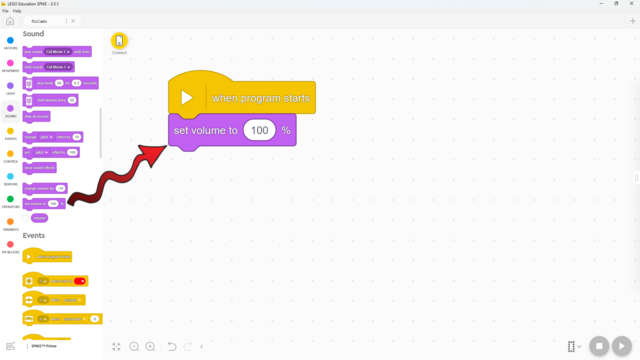
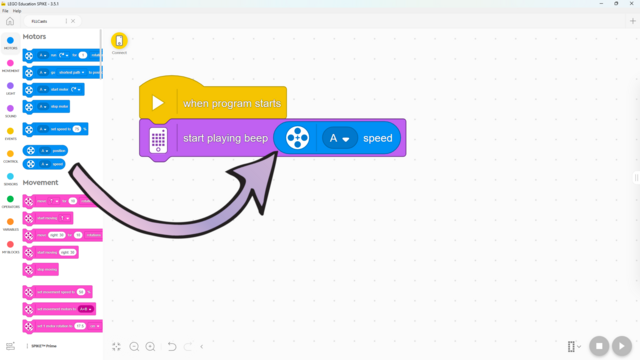
A big part of a sound is its volume. Here's how to change it!
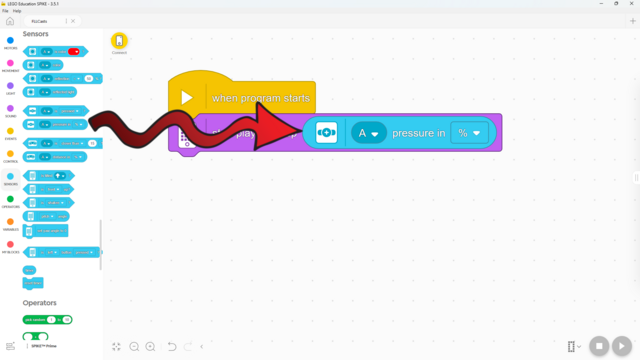
The force sensor can detect how hard it’s being pressed! Here’s how:
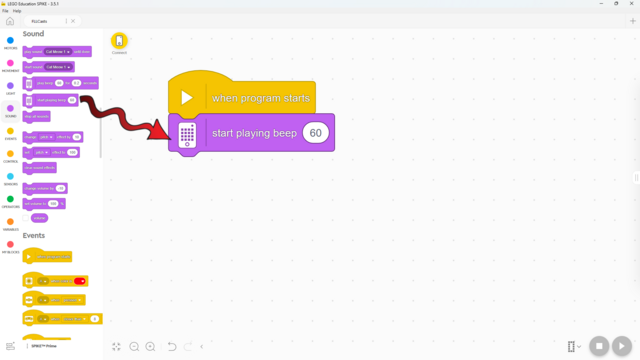
Did you know that your hub can play a sound? Here's how!
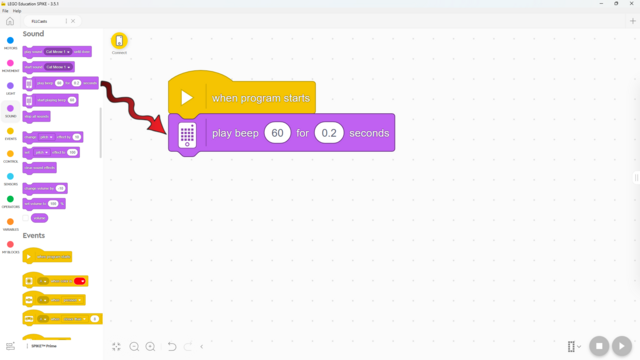
Did you know that your hub can play a sound? Here's how!
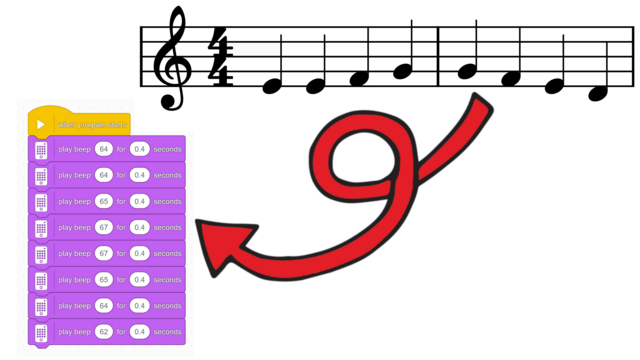
Have you ever wanted to program your favorite music on SPIKE Prime? Here's how!
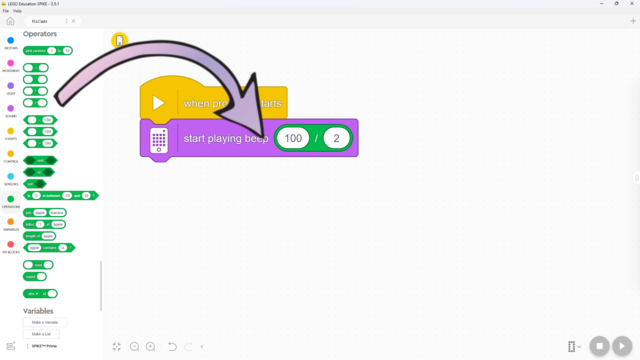
You already know how to do division in mathematics - here’s how to do it in SPIKE Prime!
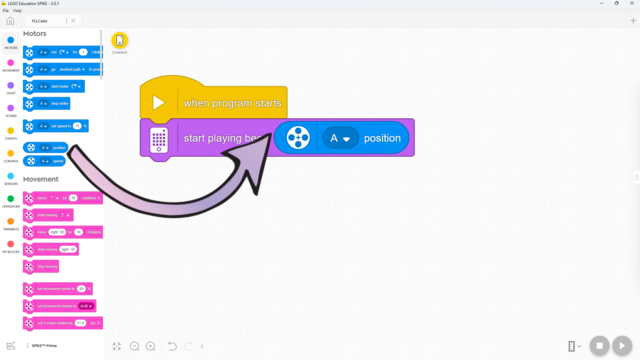
Did you know you can use the motors as sensors? Here's how!
Did you know you can use the motors as sensors? Here's how!
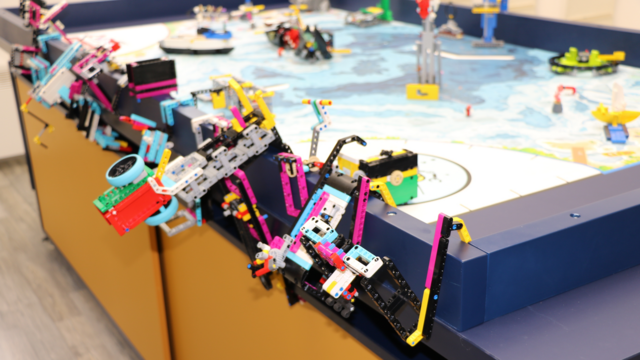
In this tutorial, we share a tip for organizing robot attachments in the FIRST LEGO League challenge. By designing attachments to hook onto the table edge, you can keep them close at hand for quick swaps, saving time and reducing mistakes.
Options include building hooks into the attachment design or using small separate hooks. This method is used by many teams and is a practical way to stay organized during competitions.