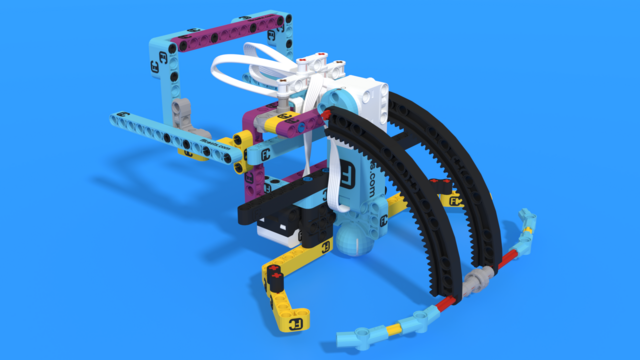
How to build SUV Box Robot for LEGO Competitions
There are a few main challenges with box robots and in the following tutorial we would like to resolve them. Read on and let's see how we could do this.
- #971
- 19 Aug 2018
There are a few main challenges with box robots and in the following tutorial we would like to resolve them. Read on and let's see how we could do this.
It's a box! It's a robot! It's a box robot. Box robots are very popular on different robotics competitions involving LEGO Mindstorms like the FIRST LEGO League or World Robotics Olympiad. Let's start with a brief introduction and continue in the next videos with explanation on the features of the robot and why such robots are frequently used.
Don’t worry about which electrical contact you connect to the positive or negative output terminals of the speed controller. The cables can always be swapped later.
This video tutorial is part of the series on how to make your robot 100% precise and accurate. We accomplish the Emergency Walk mission 10 out of 10 times. The attachment works. Every time the attachment is started in successfully accomplishes the mission and this is one of the most difficult missions on FIRST LEGO League competitions ever.
Do not solder anything to the speed controller.
Here is Lintu. It is a marvelous LEGO Mindstorms EV3 Animal robot that looks like Kiwi, the famous New Zealand bird. It is quite rare to see a Kiwi bird in person. But fear not, we've prepare a robot that looks almost exactly like the original.
Here we start with a second box robot that we would like to build. It is in a way improvement to the first robot and we would take a look at its features.
The robot should park in the parking positioned in the north-east corner of the field.

At the end of the match the robot is completely in the parking area in the north-east corner of the field: 50 points.
With the shape of a box it is very easy to align this robot to different wall and to add very stable pinless attachments to it. The goal of the video is to discuss this feature of this particular robot construction.
If you screw the bolts too far into the motor, it may stop working. This won’t be an issue later, but if it causes problems now, place a few nuts on the bolt before using it. This will stop the bolt from going too deep into the motor.
The EV3 Gyro sensor is quite powerful, but there are some little tricks when using it. In the previous episode we showed a hardware solution to the problem and now we are exploring how could the sensor be calibrated from the EV3-G software. Thanks to Sharon and Faye (full names omitted) for the request for this video.
The second construction of the series along with a comparison with the first construction. The new robot requires more parts, but has a few more advantages.
The dip switch is mounted by using the holes that are already placed on the PCB board.
Many teams are having troubles with the EV3 Gyro Sensor and its drift. In this video we are showing one way to fix this behaviour and get an accurate measurement from the sensor.
Five different robot chassis. This is the goal of the series. To present ideas for different design of the robots and especially the robot bases. If the base is stable and balanced, then in could easily be extended. Let's start with the most simple of the five.
If you’ve connected everything correctly, you can now turn on the motor and control its speed using the potentiometer.
The potentiometer is the small knob on the motor speed controller that you can rotate.
We should how to build a frame that could hold the attachments for specific competition missions. This frame is added in a pinless manner. This means very fast and easy without any glitches of the pins.
In this tutorial we present a way to align your robot to a black line. Go through common difficulties, that the teams face, when they need to align their robot, and provide a solution for them.