

EV3 Phi. Turning around a pole - introduction to the module
Let's make a competition - there is a pole that the robot must turn around and return home.
- #381
- 17 Mar 2017
Let's make a competition - there is a pole that the robot must turn around and return home.

Now that you have tried and solved a challenge involving a series of instructions, we would like to share a few best practices.

Specific challenge on programming the robot to move as a Yo-Yo

How to align the wheels and how much should you push for this solution?

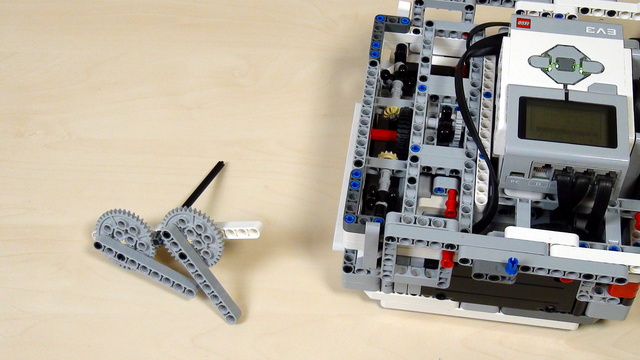
There were a few problems with the 40 teeth gears that we were using. Let's list some of them

Build a similar mechanism to this one. Similar, but for your robot. This is the task for you. Try, give yourself half and hour or even an hour.
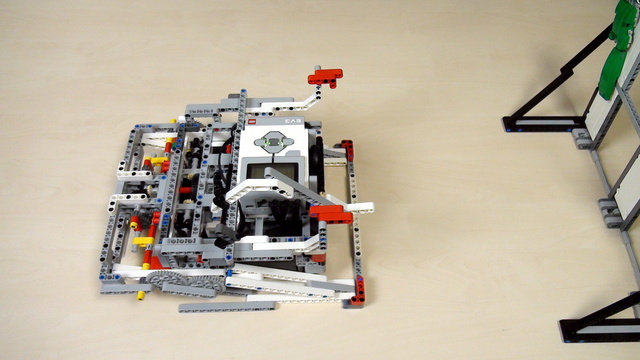
Time to lift the robot. The first approach is by using the 40 teeth gear wheels that come with the LEGO Mindstorms EV3 and NXT robotics sets.

Remember the passive/active attachment separation that we are making at FLLCasts.com. This applies for all the attachments and in this Episode, we are looking at how to use a passive attachment.

What is the end result? - have the attached on the mission model. What is the mechanism the would make the robot hang on the mission model.

Note for the teacher on how to organize the class to use different robot base constructions to accomplish the mission for lifting.

Build a robot base to use in the course. You can use the robot base provided by us or you can build one yourself.

Don't limit yourself to the box and think of different ways to lift the robot.

How to organize the different robots and group of students when working on lifting the robot.

Where should you lift the robot? Especially if you don`t have the mission model that we are using

How should an instructor use this course when working with students and a group of students in school

We've already build a number of resources for lifting at FLLCasts.com. But at the end of this course we would have a robot that lifts itself and hangs on the mission model.
The FIRST LEGO League competition is similar each year. With a little experience you could accomplish most of mission. The goal of this episode is to introduce you to the course, its purpose and approach.

In this episode we combine in a single program the previous two programs for moving forward and backward.

Now that we know how to make the robot move forward let's see we can make it move backward.

In the RobotC software we could make the robot wait for a couple of seconds by using the wait function. This will give the motors a chance to work and this will actually move the robot.

We are ready to build the first program for moving the robot forward and backward. We learn how to build simple programs for moving the program. But it is not that easy...downloading to the robot does not always result in the robot moving.
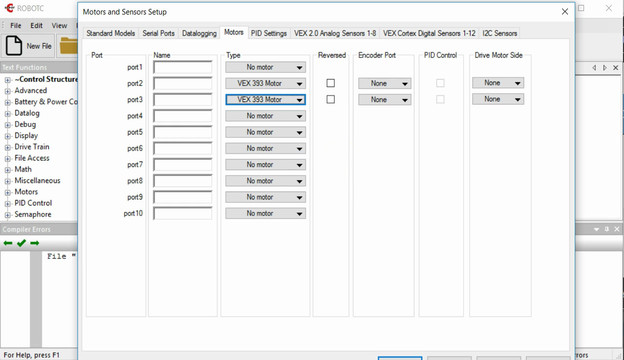
The comunication between the motors and the controller should be configured in the RobotC software. Each motor could be connected on a different port and the goal of the video is to show you how.
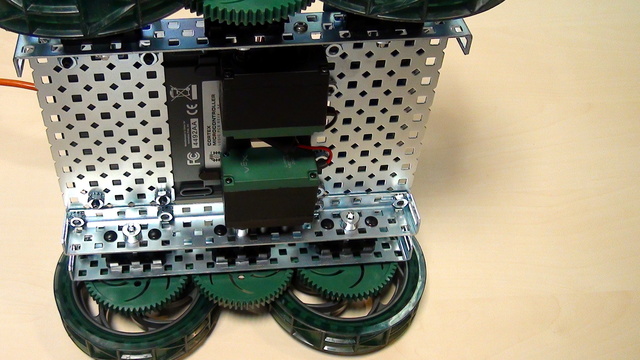
Conenct the motors of the VEX EDR motor to the VEX Corted Controller. For connecting we need the motor drivers.

Let's move with the VEX EDR robot using its motors, the wheels and some RobotC programming. We devide the program in three parts - Connect the motors, program the controller and turning.

After we've download the software we must install it and most importantly configure it. Without propertly configuring the software it would be difficult to use the Cortex Controller.

To control the VEX Cortex controller we must use a software. In this episode we would download the software from the VEX site. Strange thing is that you must select your region correctly even if you are not in this region

Unpacking the VEX EDR set and learning the names of the different parts included in the set