We will demonstrate an alternative way to make the robot move backward
- #377
- 04 Feb 2017
- 3:41
The power option
The second option in the Move Steering block regulates the power of the motor. It is measured in percent and could be from -100% to +100%. A hundred percent means to use the maximum power that the motor is able to provide. Zero power means that the motor does not move at all. Negative power means a backward movement.
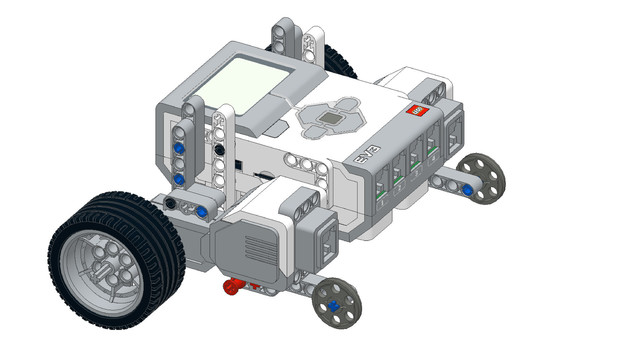
Default positive direction of a motor
It is important to know what the default turning direction of a motor is when constructing a robot and when planning the usage of a construction.

It is easy to remember - do you see the small appendix to the motor next to the rotating end? Use it as a starting point and make a circle in the air around the motor. This is your positive direction of a large motor.
English
You can make the robot move backward by using minus rotations. But there are also other ways to make the robot move backward. And this also sets the question what is forward and backward from the motor perspective.
In the EV3 software I'll just zoom this block so that you can see it on the screen
we can change the number of the rotations to minus 1 and this will make the robot move backward and we can also change the power. This option here is the power of the motor. And you can think of the power as a value between 0 which means the robot stops, to 100 which means 100% of the power that the motor could output. So, that's the maximum power of the motor. And it's generally a good idea to use 50 because it is round and it won't drain the battery that fast. But if you set -50 like this you can use the slider for setting or you can use the keyboard -50. This will also make the motors move backward. Download and run.
As you can see the whole robot moves backward. And this is the program with the modification for minus power. The next question is what is the default positive power for rotating of the motors. If you take a motor and this motor could be placed on the robot in many different ways. You can place it like this or like this, or like this, or like this. So, in an unlimited amount of configurations. So, you should be able to directly find the positive direction of the motor just by looking at it. And a simple trick for this is if you take the motor and if you place your finger right here at this side of the motor. You can distinguish this side from the other side because they're different. And then what you try to do is move from this side to the bottom with the finger. And this is the positive way of rotating of the motor. You see that you cannot do it in reverse because you'll have to cross the motor but just place your finger here. And this is the positive side. So, even if the motor is placed like this below, you know that when you're programming to move forward it'll rotate like this - from here to here. And you can then customize, modify your program.
Courses and lessons with this Tutorial
This Tutorial is used in the following courses and lessons
EV3 Phi. Introduction to robotics with LEGO Mindstorms
The things that you will be able to do with your EV3 robot by the end of this course are:
Freely move your robot towards desired target;
Avoid obstacles on the path of your robot using sensors;
Follow lines of any shape;
Detecting and picking up objects of any kind;
- 92
- 220:20
- 36

Series of instructions make a program
The challenge is to make the robot move back and forth with ever decreasing distance.
- 11
- 0
- 4
- 3d_rotation 0

Instructors Remote Training
If you are working with students and you want to introduce Robotics to your class or you want to mentor a FLL team, but you are insecure about your technical knowledge in the Robotics field, then this is the right place for you. Having in mind teachers' busy schedule, we have design two different schedules and added an option to design one just for you. FLLCasts's Mindstorms EV3 Robotics Online Training is the perfect match for any teacher.
After the completion of each task the participant has to upload his solution for verification.
- 183
- 280:11
- 156
How to make the robot move
Let's review the LEGO Mindstorms EV3 Intelligent Brick
The EV3 brick is the main computer of your LEGO robot and it has a display, a few buttons and various ports.
- 24
- 0
- 11
- 3d_rotation 0

Robotics with LEGO - Level 1.0 - Adventure in Space
The first level of the Robotics with LEGO curriculum for students in fifth to twelfth grades.
Various constructions with robots are built. Learn how to control the motors so that the robot navigates around the Moon and Earth in various ways. Getting to know the first two sensors. The robot can feel its surroundings with the help of the Touch sensor and avoid obstacles.
The Ultrasonic distance sensor can help the robot avoid obstacles. Students work with concepts like loop, degrees and medium motor. Robots can now do two different actions at the same time - while solving missions on a field, the third motor clears detected obstacles.
- 126
- 123:52
- 150

Lesson 1 - Moving like a Yo-Yo
Introduction
Today, you will get to know your classmates and your teacher, learn how the lessons are conducted, construct your first robot, and learn how to program it to move. The end goal of this lesson is to make the robot move like a Yo-Yo. How does a Yo-Yo move?

If you have ever owned a Yo-Yo, you know that it's meant to fall down and rise back up to your hand. But in order for it to move successfully, we need to move our arm in such a way that we provide it with the required velocity. Otherwise, it will decrease the distance on the way back up on each drop until it stops.
Try to make a good impression on the rest of your class, because you will be doing this course with them until the end.
- 19
- 4
- 9
- 3d_rotation 1
Level A1. Introduction. Robotics with LEGO
Introduction to robotics - The first level of the Robotics with LEGO curriculum for students in second, third or fourth grades. A journey in space, with robots. Various constructions with robots are built. Learn how to control the motors so that the robot navigates around the Sun, the Moon and Earth in various ways. Getting to know the first of the sensors. The robot can feel its surroundings with the help of the Touch sensor and avoid obstacles.
- 142
- 133:42
- 187

Lesson 2 - Yo-yo challenge
Introduction
Today we will learn to program the robot to perform more than just one action, as well as program it to move like a yo-yo. Have you ever played with a yo-yo? How does it move? Did you know that from Filipino yo-yo means "to return".
- 18
- 3
- 8
- 3d_rotation 1