Now we have to program the robot. The steps that we will cover are starting the software, writing a program and downloading it to the robot.
- #364
- 04 Feb 2017
- 2:08
Find the EV3 icon on your desktop
The icon could be white for the educational version, or black - for the retail version of the software.
Creating a new EV3 project
In both versions, you must press the plus icon in the upper left corner of the program to start a new project.
All of your programs are organized into projects.

What is a project
Think of projects as a central store-place for all your programs related to one task/goal/context.
Initially the context is the lesson you are attending. Each lesson will have one project with a few programs that solve different tasks in the lesson.
Later on one project could store all programs for your competition robot.
Маке extra working space
After a project is opened, close the documentation pane by clicking on the black icon in the upper right corner.
English
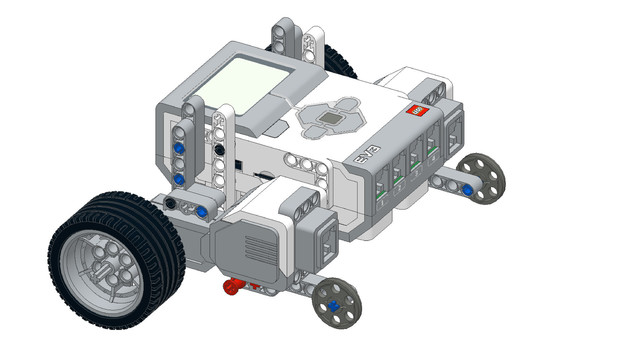
As you've built the EasyBot EV3 and as you've connected the cables to the controller it's now time to program this robot. For programming we'll use a software on our computer and we'll connect the cable to the brick, the other end of the cable to the computer implement the software and download the program on the brick. Let's start with starting the software.
First, on your desktop find the Lego Mindstorms Education EV3 icon. And this is only if you're using Windows. So, you have this icon and click on it. When you click on it the Lego Mindstorms software will start and it has two different versions. It has an Education version and Retail version. My version is an Education version, so it might be a little different from yours but the program is used in the same way, you have the same menus. The first thing that you need to do is to click on this + sign here. This creates a new project. Think of projects as a container of all your programs. Think of project as something that contains all the experiments, all the tries, all the different tasks. In our course we'll use the project to contain all the programs in a single class. So, we'll just create new programs for the new experiments that we're doing with the robot. And this is how the software looks like and this is how you start it. It is most of the time a good idea to close this paint here because it takes some space from the screen that we can use to actually write the programs.
Courses and lessons with this Tutorial
This Tutorial is used in the following courses and lessons
EV3 Phi. Introduction to robotics with LEGO Mindstorms
The things that you will be able to do with your EV3 robot by the end of this course are:
Freely move your robot towards desired target;
Avoid obstacles on the path of your robot using sensors;
Follow lines of any shape;
Detecting and picking up objects of any kind;
- 92
- 220:20
- 36

First challenge - Yo Yo task
Overview of what is going to happen that part of the lessons.
- 14
- 0
- 4
- 3d_rotation 0

Instructors Remote Training
If you are working with students and you want to introduce Robotics to your class or you want to mentor a FLL team, but you are insecure about your technical knowledge in the Robotics field, then this is the right place for you. Having in mind teachers' busy schedule, we have design two different schedules and added an option to design one just for you. FLLCasts's Mindstorms EV3 Robotics Online Training is the perfect match for any teacher.
After the completion of each task the participant has to upload his solution for verification.
- 183
- 280:11
- 156
How to make the robot move
Let's review the LEGO Mindstorms EV3 Intelligent Brick
The EV3 brick is the main computer of your LEGO robot and it has a display, a few buttons and various ports.
- 24
- 0
- 11
- 3d_rotation 0

Robotics with LEGO - Level 1.0 - Adventure in Space
The first level of the Robotics with LEGO curriculum for students in fifth to twelfth grades.
Various constructions with robots are built. Learn how to control the motors so that the robot navigates around the Moon and Earth in various ways. Getting to know the first two sensors. The robot can feel its surroundings with the help of the Touch sensor and avoid obstacles.
The Ultrasonic distance sensor can help the robot avoid obstacles. Students work with concepts like loop, degrees and medium motor. Robots can now do two different actions at the same time - while solving missions on a field, the third motor clears detected obstacles.
- 126
- 123:52
- 150
Създайте и качете първата си програма
Children tend to imitate. The easiest way to do something is to first see how it’s done. So, sit down and show your students how to program.
- 8
- 0
- 1
- 3d_rotation 0
![Image for [In Development] The fun level - Game-oriented introduction to LEGO robotics](https://d2nmr6p48f8xwg.cloudfront.net/content_pictures/pictures/000/002/636/a4f229bae5979562f6bfe32adc6281e577e312674a0cc5c98f8fdfe15e7c7da9b89f826a037575a5LEGO-Mindstorms-Ev3-Yolanda-Sailship-Robot-Fllcasts.png)
[In Development] The fun level - Game-oriented introduction to LEGO robotics
A level, designed for introduction in LEGO-robotics, focused mostly on games. We use goal-oriented challenges to make the students want to accomplish a certain task, learning a lot in the process. Some of the games we have included here are football, bowling, paper-plane competition and many more. It is suitable for studens 8 to 12 years old, but even older students will have a lot of fun with the activities.
This is a brand new course that we are experimenting with in a groups in June 2019. Keep in mind that it is possible to use it for summer camps and groups, but there are a few lessons that will be improved on the fly.
- 38
- 42:14
- 40

Lesson 1 - Introduction
Introduction
Today the robot we are building is a spaceship once again. The aim for today, however, is exact - to reach the further (dark) side of the moon!
Where is located the dark side? Why is it so hard to be reached? Why is it called "dark"?
- 23
- 3
- 15
- 3d_rotation 1

Level A1. Introduction. Robotics with LEGO
Introduction to robotics - The first level of the Robotics with LEGO curriculum for students in second, third or fourth grades. A journey in space, with robots. Various constructions with robots are built. Learn how to control the motors so that the robot navigates around the Sun, the Moon and Earth in various ways. Getting to know the first of the sensors. The robot can feel its surroundings with the help of the Touch sensor and avoid obstacles.
- 142
- 133:42
- 187
Create and upload your first program
Children tend to imitate. The easiest way to do something is to first see how it’s done. So, sit down and show your students how to program.
- 8
- 0
- 1
- 3d_rotation 0