This is a 10 out of 10 tutorial on doing 5 things. Push, collect a loop, deliver a loop, push again to release the shark right here.
And also an additional push to move some of these corals across. We've discussed it in the previous tutorial. Now it's a 10 out of 10. Five things in a single run. It's like three or four missions here.
This 10 out of 10, it takes about five minutes for us to record it and to explain it. The whole mission run. It's not a mission run. In the whole run here it takes about, let's see, 18, 20 seconds. 20 seconds is the time that it takes for this robot to go out of base and to accomplish 1, 2, 3, 4 missions. Like, it's a little bit more complex than that. Because, for example, for the Scuba Diver, if we just remove it from the first mission model, that is the Scuba Nursery, we get certain points, but we also, if we manage to deliver it to the second mission model, which is the Coral Reef, we get additional points. So you can think of this like one or two missions, but they are described as one mission that gives points for two things that are accomplished at the end.
The robot is quite stable. It's very consistent and reliable. The only thing that you should be careful here is where you start the robot from. You can see that the robot for these missions, it does not use any color sensors for following line or trying to align itself using the color sensors.
The other thing is that the strategy is to accomplish mission models that are close to each other. If possible, with the same attachment.
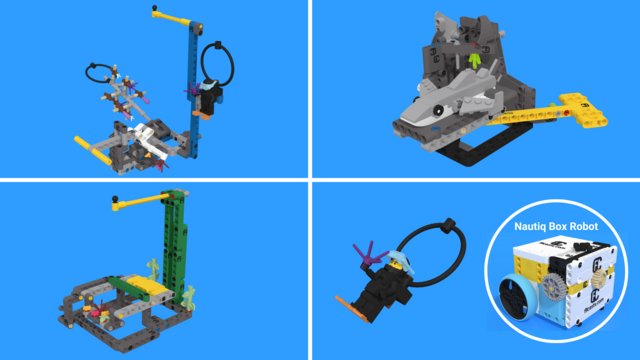
Now, what do we mean by the same attachment? You can see at the front of the robot, we have this attachment that now will push down. And we also have the same attachment here for the shark that will push down.
One attachment, two mission models. Not bad, because it gives us a chance to accomplish them in the same run. And this will save time. And by saving time, we can get more points in the 2.5 minutes.
Move forward, push, push again. Take the Scuba Diver. Return. Deliver the Scuba Diver. Rotate, push, get back to base.
It seems easy, but actually it is not very easy to get it to this level of consistency and reliability. The attachments are small here, and it helps using small attachments in tight places. The front attachment is just a few beams at an angle.
The back attachment is a few beams again at an angle. And the top attachment is an active attachment with a few axles. Now, it's debatable. There is an argument whether the attachments should be bigger or smaller. Sometimes we see that some big attachments are a little bit more interesting in the way that they approach the missions. And you can see this is, in some cases, an advantage there.
A little bit more complex attachment might give you a chance to kind of like, look at the mission next to the current one and try to accomplish it with the same attachment. But generally the simpler the attachment, the more consistent and reliable the behavior is.
We did, like, this is the eighth or the ninth run, like last run. 10 out of 10. Very consistent, very reliable robot.
I hope this is helpful, and I'll see you in the next tutorial.