Introduction
In this lesson we are going to build a robot which resembles a scorpion. Have you ever seen scorpions? Where?
We know that scorpions usually live in deserts. They feed on absolutely everything that crosses their path, waiting in ambush. An ambush means to suddenly attack someone or something after hiding and waiting for them. This technique was used billion years ago by The Tyrannosaurus Rex and today it is preferred by many species, including people.
But how does the scorpion hide in the desert?
Scorpions use their legs to make shallow holes in the sand where they bury themselves. Thus scorpions blend into the environment.
Can you notice the scorpion in the picture?

It is well hidden and is waiting for a bug to pass by so it can have a snack!
Construction and Theory
Our robot today not only looks like a scorpion by also teaches students an important lesson with its claws. Note the difference between the two types of claws and think of appropriate applications for each one of them.
Antares - a simple LEGO Mindstorms EV3 Scorpion robot
Antares is the brightest star in the Scorpius constellation.
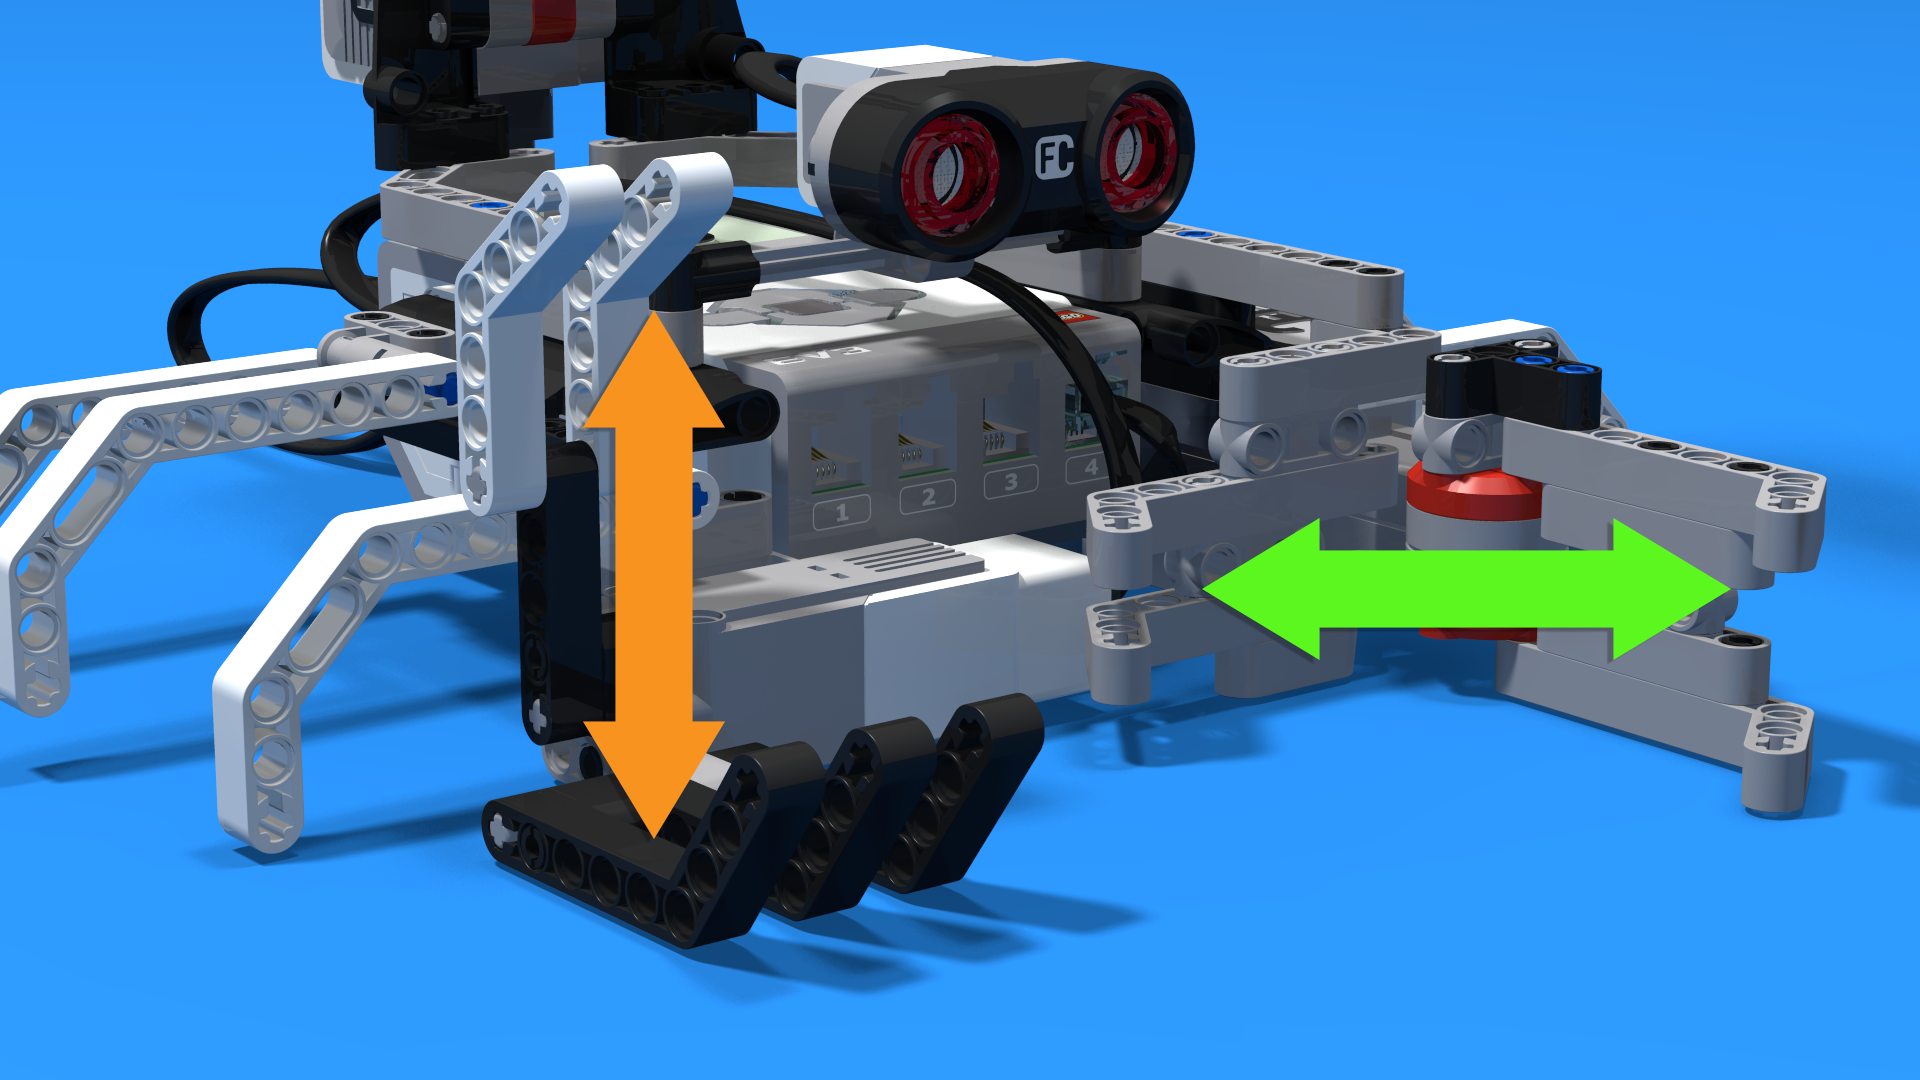
The robot's main purpose is to show two different grabbing mechanisms - one vertical and one horizontal. The vertical pincers use a medium motor and the horizontal pincers use a large motor. Additionally the robot has a sting mechanism which uses another large motor. For a head it uses an EV3 ultrasonic sensor. With the sensor, the robot can sense when the prey is close enough for a suprise attack.

![]()
 After building the robot, close the box to keep the desk clear.
- Gather all the parts from the desk and put them back in the box.
- Close the box and move it aside so it's out of your way.
Programming and Theory
The scorpion should detect whether it has caught anything with its claws by using the rotation sensor. If there is a catch, the scorpion should sting it with its stinger. In order to accomplish this task, you will use something we call “expected degrees” and a familiar block with a new application.
*whispering* We will set the program to move for seconds. Well done to those who have reached this point and well done to those who have come up with the idea beforehand! But can we know whether the claw has grabbed something if we program it to close for seconds? We use the expected degrees!
This means that every time the claw closes we expect it to have turned the degrees we set in the beginning. If not, this means there is something in the claw and the scorpion should sting it!

The block which replaces the word “if” in the program you know as Switch. That is how it is used for the rotation sensor:
Motor Rotation Sensor - Switch Block
We already know how to use the rotation sensor. Now it’s time to explore more of its functions.
The rotation sensor, just like any other sensor, has its own setting in the switch block.
As you can see, the switch block has only one mode – compare. If you drag your mouse over the compare mode, you will see there are three sub-modes there:

- Degrees
 The robot compares the number of degrees the motor has rotated to a value, which is 90 by default. The block checks whether this comparison evaluates to true and depending on the result it performs the corresponding commands.
- Rotations
 The robot compares the number of rotations the motor has made to a value, which is 1 by default. The block checks whether this comparison evaluates to true and depending on the result it performs the corresponding commands.
-
Current Power
 The robot compares the current power at which the motor rotates to a value, which is 50 by default. The block checks whether this comparison evaluates to true and depending on the result it performs the corresponding commands.
Unlike the other sensors, the rotation sensor is not connected to ports 1 to 4. As the sensor is located inside motors, the ports where it should connect are from A to D, port A by default. Always check whether the sensor is connected to the correct port.

 Tasks to finish a class
- Take pictures and make videos of your robots
- Disassemble and arrange the robot
- Arrange your workplace
- It is important to arrange the electronics of the robots on the cover of the box.
- Wind up the programming cable so that it is assembled.
- Put the robot cables next to the electronics.
- Wind up the mouse cable around the mouse.
- Wind up the cable of the laptop charger in a way that your teacher will show you.
- When you turn off the computer, leave it next to the robot box.
- Turn off all programs on your computer
- Exit FLLCasts
- Shut down your computer
- Put your chair under the desk.