Introduction
In this lesson, we will build and program a Guitar robot! How could it play music?

The guitar’s origins trace back over 3,000 years to ancient instruments like the oud in the Middle East and the lute in Europe. By the Renaissance, the guitar had evolved into a popular instrument with four double strings, later expanded to six single strings in the 18th century. In the 20th century, innovations like the steel-string acoustic and the electric guitar transformed it into one of the most influential instruments in modern music.
Construction and Theory
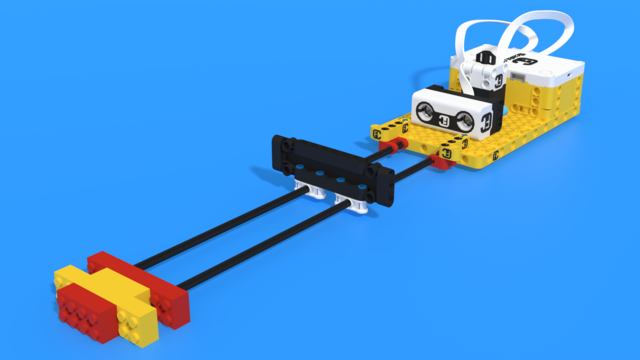
This robot uses the long axles as rails for a plate that controls the distance a distance sensor detects. This distance will control the pitch of the guitar and the touch sensor will actually play the sound. Just like a real guitar!
How to build a robot when working in pairs: High efficiency method
As you already have experience building robots, it is time to learn how to build robots super-fast. That is not done by hurrying up and skipping important steps.
The trick is to simulate an assembly line. A constantly loaded one.
How to assemble a robot
- the Builder looks at the step in the assembly instructions;
- the Partner looks for the next part and passes it. The Builder waits;
- the Builder assembles the part in this step. The Partner waits;
- the Builder moves to the next step;
- the Partner looks for the next part and passes it. The Builder waits;
- the Builder assembles the part in this step. The Partner waits;
and so on...
How to build and assemble a robot fast
As you can see from the description, there are a lot of moments when both the Builder and the Partner just wait. How can we reduce that time?
- while the Builder is assembling, the Partner is looking and checking what the next required part is and finds it;
- after that, just in case, the Partner returns to the current step;
- the Builder moves to the next step, and the required parts are already prepared. The Builder is not waiting for the Partner and starts assembling;
- the Partner is again looking for the parts required for the next step. Finds them and prepares them for the Builder;
- the Builder moves to the next step.
By simulating an assembly line, you can complete building the robot at least 15 steps ahead of the other students.
We usually do not compete when assembling, and we should not. We are giving this example for you to understand how much faster this approach is.
Carlos - LEGO SPIKE Prime guitar robot
Carlos, named after the famous Mexican guitarist Carlos Humberto Santana Barragán.
The robot uses the distance sensor to determine the pitch of the sound and the force sensor to play the sound. You can shred pretty good with this one!
![]()
 After building the robot, close the box to keep the desk clear.
- Gather all the parts from the desk and put them back in the box.
- Close the box and move it aside so it's out of your way.
Programming and Theory
In this lesson, we will program the guitar to play higher-pitched notes as the slider moves closer to the distance sensor. But first, let’s begin with a simple sound check!
Bonus Tasks
These tasks are optional and should only be attempted by students who have completed all the main tasks and received confirmation from their teacher.
 Tasks to finish a class
- Take pictures and make videos of your robots.
- Disassemble and arrange the robot .
- Arrange your workplace :
- It is important to arrange the electronics of the robots on the cover of the box.
- Wind up the programming cable so that it is assembled.
- Wind up the mouse cable around the mouse.
- Wind up the cable of the laptop charger in a way that your teacher will show you.
- When you turn off the computer, leave it next to the robot box.
- Turn off all programs on your computer.
- Exit FLLCasts.
- Shut down your computer.
- Put your chair under the desk.