

Типични причини моторите да не се движат
Ще разгледаме типичните причини защо роботът ви изобщо не иска да се движи.
- #2003
- 01 Jul 2022
Ще разгледаме типичните причини защо роботът ви изобщо не иска да се движи.

In this video tutorial we follow a line 10 consecutive times. In this way we demonstrate whats the consistency that you could expect from the robot when following a line with a multi-states algorithm.

On the topic of following lines with a robot there is a way to make the robot follow the line a little more precisely. This method is called "Multi-states" program. Or at least we call it like this. In this tutorial you will see how we program 5 state for the robot line following program. This could be particularly important with FIRST LEGO League competitions where we must build consistent and reliable robots.

With this 10 runs we demonstrate the consistency and reliability that could be achieved with a LEGO Education SPIKE Prime robot and a 2-states simple line following algorithm. It is not bad. Still there are some things you should consider when using this program and one of the things is the use of the timers

In this video tutorial we demonstrate the classic algorithm for following a line with robots. It is widely used in FIRST LEGO League competition and could be applied to LEGO Education SPIKE Prime and to other robots also. The algorithm follows a line by moving to the left and to the right and trying to stay at the edge of a black line.

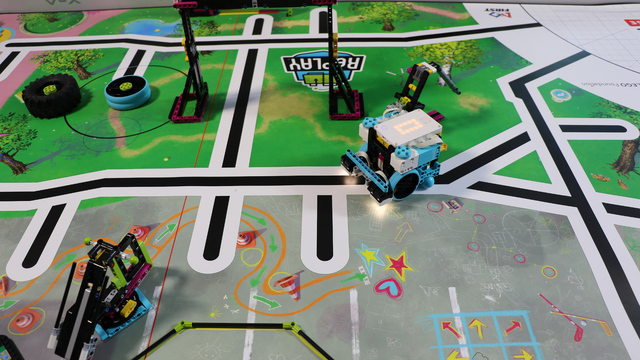
We use a sensor so the robot must be reliable and accurate right? Wrong. The robot is not reliable and accurate only because we use sensors and that's really important during FIRST LEGO League competition. There is a reason for this and in this tutorial we demonstrate and explain how the robot behaves with a basic use of the Motion Sensor to move straight. As a result you will learn why is it important not to stop at this stage and to go to the next level with more advance use of sensors.
In this video tutorial we use the LEGO Education SPIKE Prime Motion Sensor to reach a mission model on the field. It's a basic use of the motion sensor that we will extend in the next few tutorials and in the same time we take the opportunity to demonstrate what a MyBlock is and how to develop one. As a result of this video you will learn how to make the program easier to read and maintain by organizing the blocks in the program in special MyBlocks that couple them all together.

One of the easiest ways to improve the accuracy of LEGO Education SPIKE Prime robots is to use acceleration and deceleration when moving. This also applies to LEGO Mindstorms EV3 and LEGO Mindstorms Robot Inventor and generally to most robots that we know of. This tutorial demonstrates how acceleration and deceleration could be used and what improvement in accuracy and consistency you could expect. This is quite useful for FIRST LEGO League and other robotics competitions.

In this video tutorial we take a look at the consistency of a robot that uses acceleration and deceleration to turn precisely. We use the motion sensor. In 10 consecutive runs we demonstrate what could you expect from the robot when it comes to consistency.
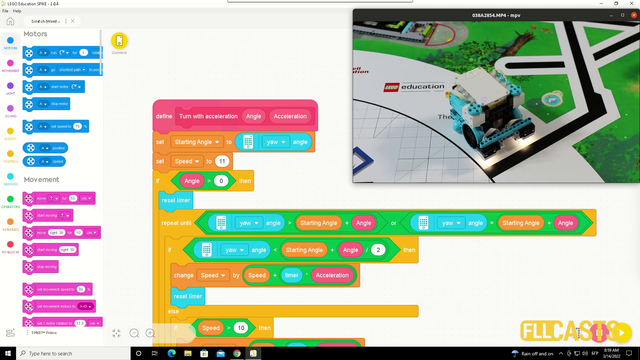
In this video tutorial we explore acceleration and deceleration and how to make the robot turn precisely by using acceleration and deceleration. The goal is for us to demonstrate a program that turns the robot to 90 degree. In the first 45 the robot is accelerating and in the second 45 it is decelerating.
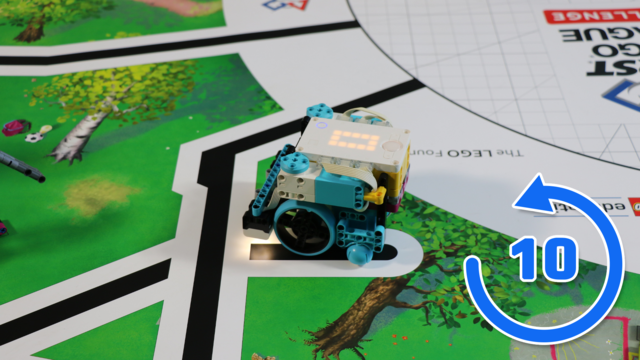
This LEGO Education SPIKE Prime video tutorial demonstrates the difference in turning slow and turning fast and using the Motion sensor to understand the orientation of the robot. We do 10 consecutive runs. The goal is to understand what can you expect from the robot behavior in terms of consistency.

Is it better to do fast turns or slow turns? Should you save some time by turning fast or should you be more precise by turning slow. Where is the balance? This video tutorial demonstrates exactly this for LEGO Education SPIKE Prime robot, their motion sensor and an ever occurring question on FIRST LEGO League competition which is how to find the balance and where is the balance.

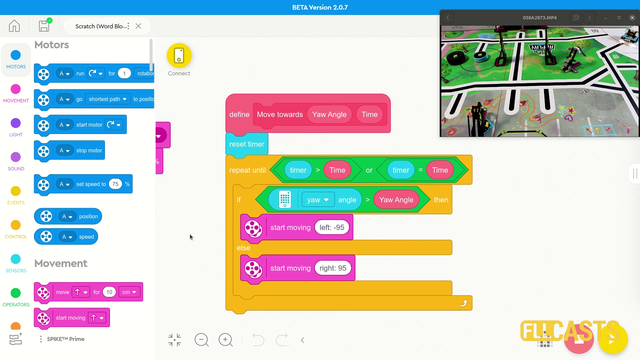
In this video tutorial we will reach a specific location on the field 10 times. This programs demonstrates the accuracy and consistency of a program that used the Motion Sensor to detect the angle at which the robot rotates. At the end of the tutorial you will have a visual and clear picture of what you could expect from this basic usage in terms of consistency and accuracy. This might be enough for some cases and it might not be enough for others.
This is the first, but not the last video tutorial of the course where we reach a specific mission model in a consistent way. We use the Motion sensor and only some basic principles like turning to an angle. If we use the principles in this tutorial and then build an attachment for the mission model we will have a pretty consistent way of accomplishing the FIRST LEGO League mission

In this video tutorial we demonstrate how the robot could accomplish the Power Switch mission. Power Switch consists of a cube with a lever and the lever should be rotate to 180 degrees. This mission model was very close to a FIRST LEGO League 2012 competition mission which was called - Oven. The robot, the attachment adn the mission model are built form a single LEGO Mindstorms Robot Inventor 51515 set and with the tutorial you will learn how to use an active attachment with 2 gear wheels to complete such missions.

This animation demonstrates a vertical lift attachment. This is an attachment that transfer a circular motion from the motors to a linear motion and is a very powerful concept. We demonstrate it with a LEGO MINDSTORMS Robot Inventor robot build from 51515 set. This is arguably one of the most complex attachments in this course.

This animated video tutorial demonstrate the use of a lift attachment to accomplish loops mission. It is a lift attachment with a circular motion

This animation demonstrate the use of an LEGO MINDSTORMS Robot Inventor attachment to lift a lever of a mission model. The mission model is the Power Switch mission model where you have to move the lever from one side of the mission model to another. The principle of the attachment is powerful and easy to implement for all kinds of missions.

In this video tutorial we look at Acceleration and Deceleration with a LEGO Education SPIKE Prime robot. The goal of the tutorial is to demonstrate the accuracy of the robot when we us default acceleration and slow acceleration.
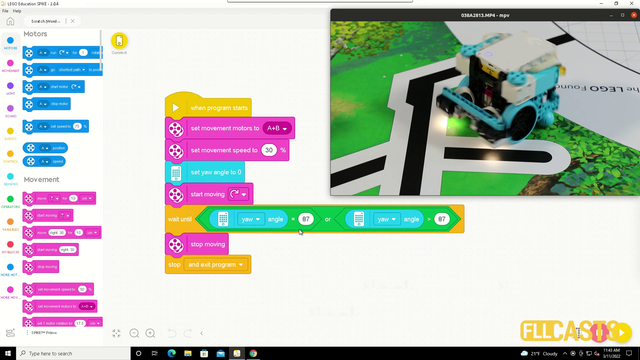
In this video tutorial we demonstrate the use of the motion sensor and how it could be use to turn precisely to 90 degrees. We demonstrate some of the caveats of the sensor and how sometimes it does not work as expected. Like you set the robot to turn until the sensors detects 90 degrees and at the end the robot is not at exactly 90 degrees.

This videos tutorials demonstrated the robot accuracy in 10 runs one after the other. 5 of them are with the robot moving slow and 5 are with the robot moving fast. See for your self what is the accuracy achieved only with the move blocks of the robot.

In this tutorial we demonstrate how accurate the robot is when we are moving it slow vs when moving it fast. The point of the tutorial is to show that moving slowly is generally much more accurate. It is not accurate enough for a FIRST LEGO League competition, but if you have to move without the use of the sensors you can at least move slow.

This video tutorial demonstrates the accuracy and consistency of the robot behavior when we use only the blocks for moving the robot without any sensor. Spoiler alert - the robot is not consistent and it is not accurate.

In this video tutorial we start with the basic of the basic, eg. how to move. We use the block from LEGO Education SPIKE Prime Word Blocks software. It is based on Scratch. The goal of the tutorial is to demonstrate how we can move and to teach something very important - the robot moves inaccurately

In this video tutorial we demonstrate the user of a quick 'pinless' attachment. As all pinless attachment it is not that they are completely pinless, but that they do not require the "click" of the pins that is often difficult to achieve in a quick pace environment as during FIRST LEGO League competition rounds.

In this video tutorial we look at Vertical Lift Attachments. The attachment, the root and the mission model are all build from LEGO MINDSTORMS Robot Inventor 51515 set. We've found that vertical lift attachments that could lift missions models vertically could be quite useful for FIRST LEGO League competitions. This attachment is one of the more complex attachments and some say it has an "eye opening" mechanism as you can learn so much from it. It uses gear wheels and two levers connected to those gear wheels to lift a part vertically.
