
Warehouse Мission Рules
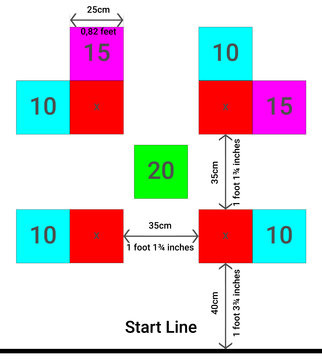
Below is an example of a robot competition field along with the scoring system used to evaluate performance.
- #2606
- 25 Mar 2026
Below is an example of a robot competition field along with the scoring system used to evaluate performance.

Here you can find a cheat sheet with the most commonly used commands. There are also more advanced commands that are not included in the built-in API, but the available ones cover most, if not all, of the students’ needs.
Below is an example of a function definition and how to read it:
move_for_degrees(pair: int, degrees: int, steering: int, *, velocity: int = 360, stop: int = motor.BRAKE, acceleration: int = 1000, deceleration: int = 1000) → Awaitable
...
Parameters
pair: int
The motor pair to be used.
degrees: int
The number of degrees the motors should rotate.
steering: int
The steering value (from -100 to 100).
Optional keyword arguments:
velocity: int
The speed of the motor in degrees per second.
...
stop: int
Defines how the motor behaves after it stops. Use constants from the motor module.
...
acceleration: int
The acceleration in degrees per second squared (1–10000).
deceleration: int
The deceleration in degrees per second squared (1–10000).
Let’s take a closer look at the function definition:
The parameters before the "*" symbol are required parameters. You must provide them in the correct order. For example, the first parameter is "pair", so the command expects the motor pair first. The same applies to "degrees" and "steering".
The parameters after the "*" symbol are optional parameters. To change them, you must use their names. This means you cannot just write a number - you need to specify which parameter you are changing. For example:
motor_pair.move_for_degrees(motor_pair.PAIR_1, 360, 0, velocity=280)
Finally, the "Awaitable" keyword means that this command can be used with "await". This allows the program to wait until the command has finished before continuing with the next one. For example:
await motor_pair.move_for_degrees(motor_pair.PAIR_1, 360, 0, velocity=280)

The await command tells your robot:
“Wait until this action is finished, then continue!”
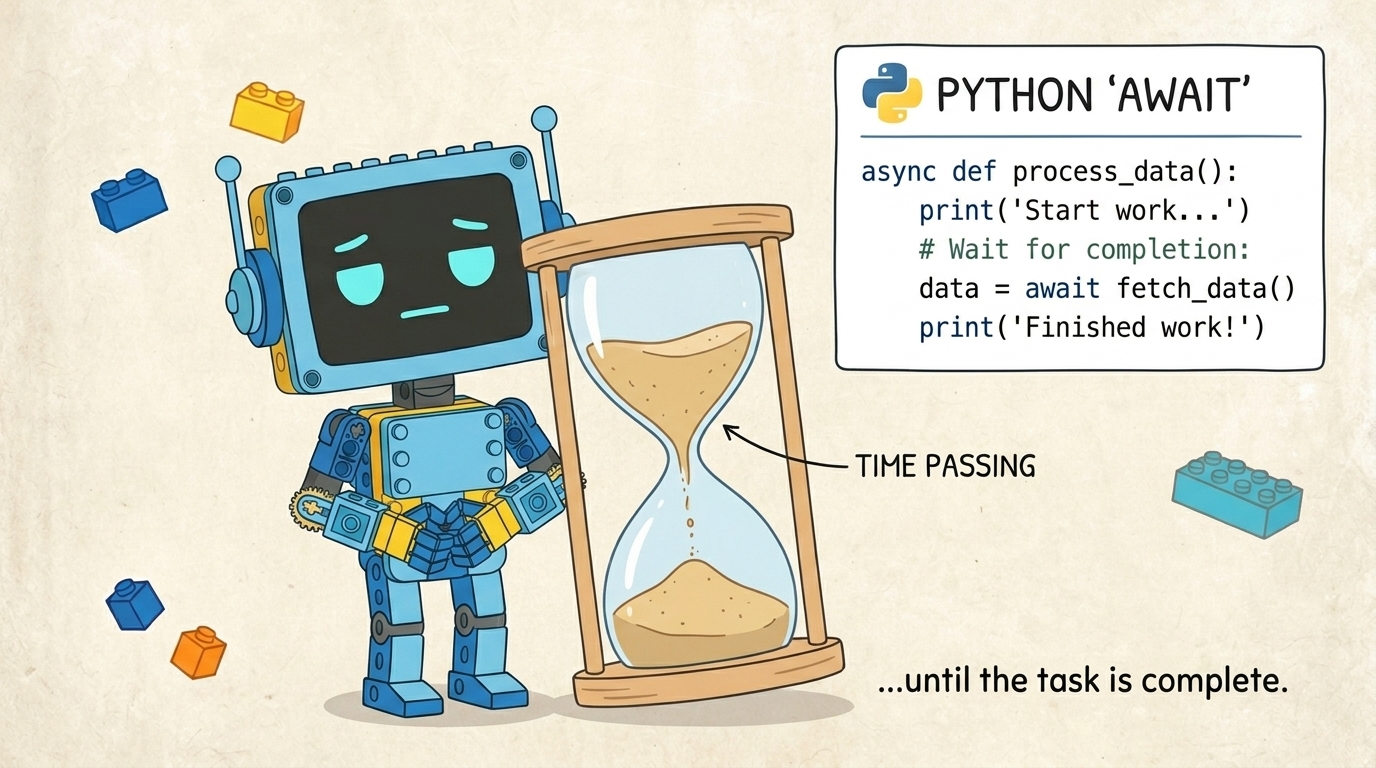
Without "await", the robot may move on too quickly and not finish its actions properly.
You can only use "await" inside an "async" function.
async def main():
    await motor.run_for_time(port.A, 1000, 1000)
Before we can run Python programs on the robot, we need to open the SPIKE software, create a Python project, and connect the Hub to the computer. In this tutorial, you will learn how to do each of these steps using the LEGO SPIKE software.
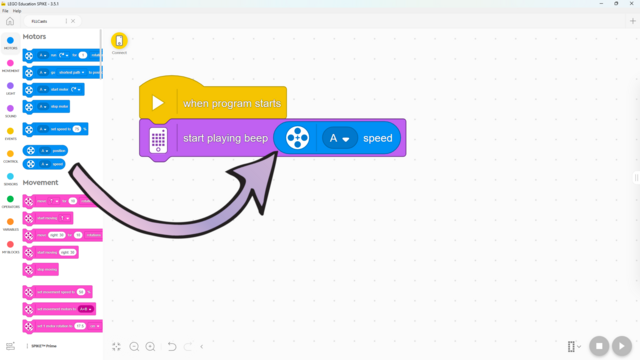
Това е част от блокчето с функции, но какво прави?

Тъй като това е музикално ниво, е важно да се установят някои правила за звуците, които роботите издават. Учениците често не осъзнават колко шумно може да стане, затова им напомнете да намалят силата на звука, за да чуят хъбовете, и да спрат програмите си навреме, тъй като непрекъснатите звуци могат да станат доста силни.
В този урок учениците ще научат много от ключовите концепции, необходими за останалата част от курса. Ето защо има малко конструиране и основно изследване с един сензор за сила. Уверете се, че разбират разликата между височина на тона и сила на звука. Въпреки че са въведени много нови блокове, те са предимно прости и подобни на предишните. Тези блокове ще бъдат използвани и в много бъдещи уроци, което ще даде на учениците достатъчно време да се запознаят с тях. До края на урока учениците би трябвало да са изпробвали следните две програми:

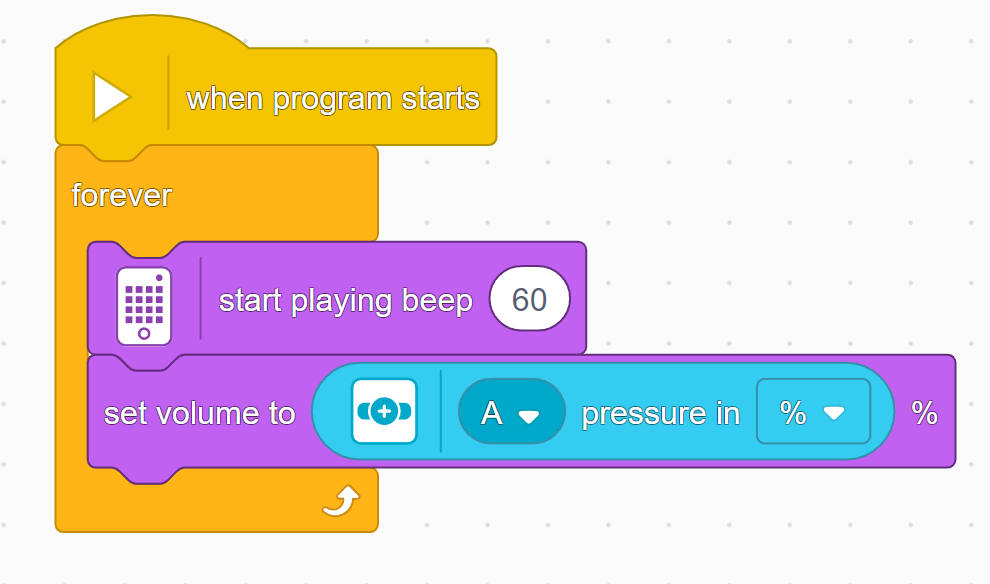
Голяма част от звука е силата му. Ето как да я промените!
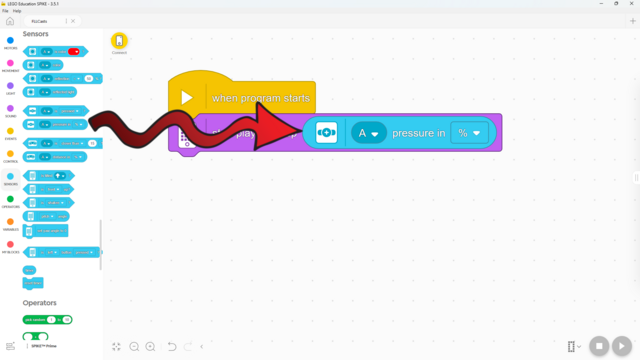
Сензора за сила може да засече колко силно го натискаме! Ето как:
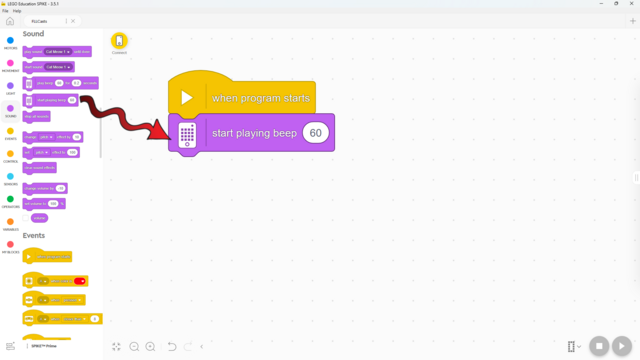
Знаете ли, че хъба ви може да пуска звук? Ето как!
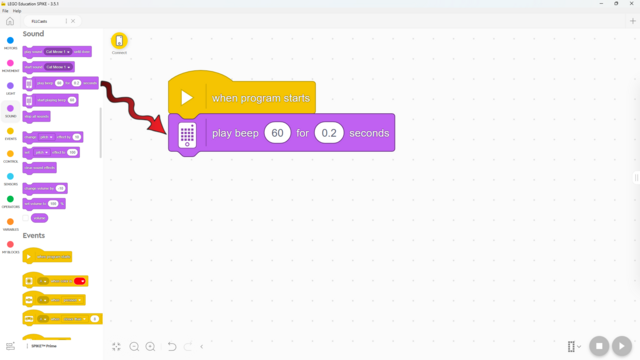
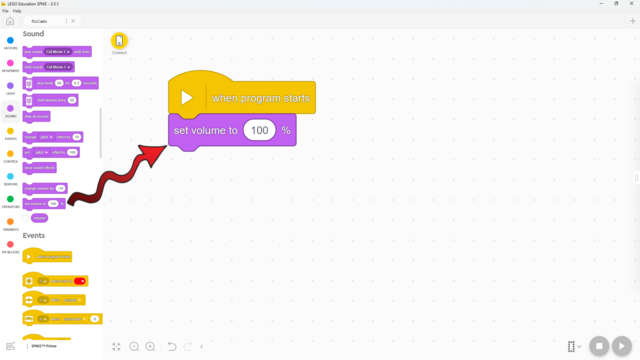
Знаете ли, че вашият хъб може да възпроизвежда звук? Ето как!
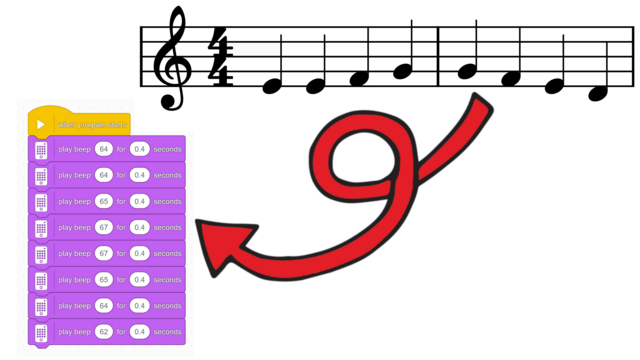
Искате ли да програмирате любимата си музика на SPIKE Prime? Ето как!
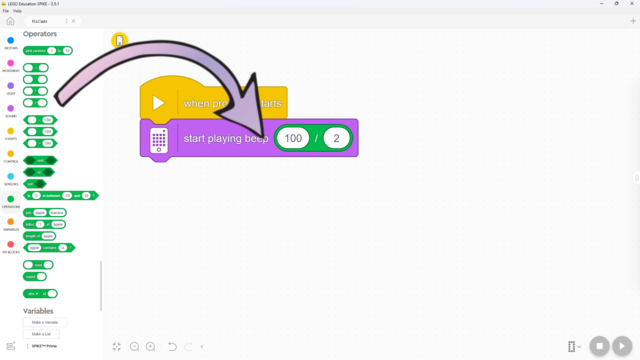
Вие знаете как работи делението в математиката - ето как да го направите в SPIKE Prime!
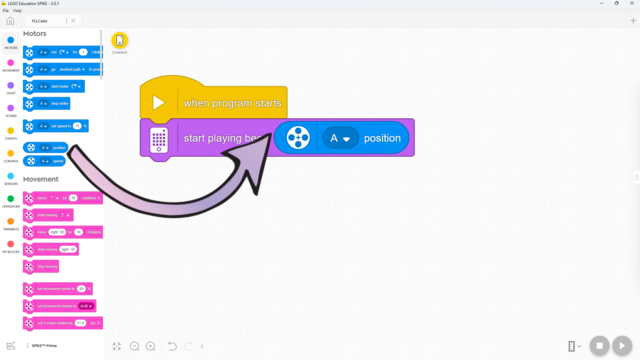
Знаете ли, че можете да използвате моторите като сензори? Ето как!
Знаете ли, че можете да използвате моторите като сензори? Ето как!
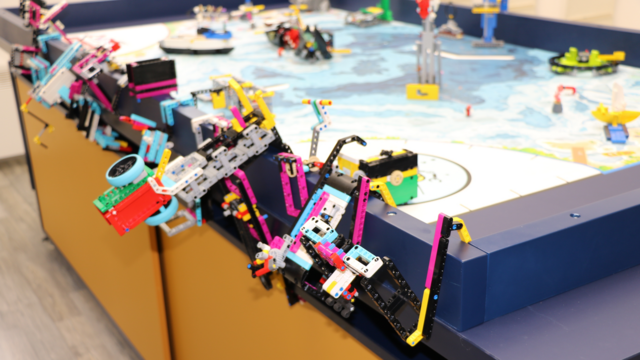
In this tutorial, we share a tip for organizing robot attachments in the FIRST LEGO League challenge. By designing attachments to hook onto the table edge, you can keep them close at hand for quick swaps, saving time and reducing mistakes.
Options include building hooks into the attachment design or using small separate hooks. This method is used by many teams and is a practical way to stay organized during competitions.