

EV3 Phi. Move tank block - finish the whole 180 degrees turn
Once you start turning how to do you a whole 180 degrees turn. The robot almost does it, but not completely
- #384
- 17 Mar 2017
Once you start turning how to do you a whole 180 degrees turn. The robot almost does it, but not completely

Build a similar mechanism to this one. Similar, but for your robot. This is the task for you. Try, give yourself half and hour or even an hour.

In this episode we combine in a single program the previous two programs for moving forward and backward.

Now that we know how to make the robot move forward let's see we can make it move backward.

In the RobotC software we could make the robot wait for a couple of seconds by using the wait function. This will give the motors a chance to work and this will actually move the robot.

We are ready to build the first program for moving the robot forward and backward. We learn how to build simple programs for moving the program. But it is not that easy...downloading to the robot does not always result in the robot moving.
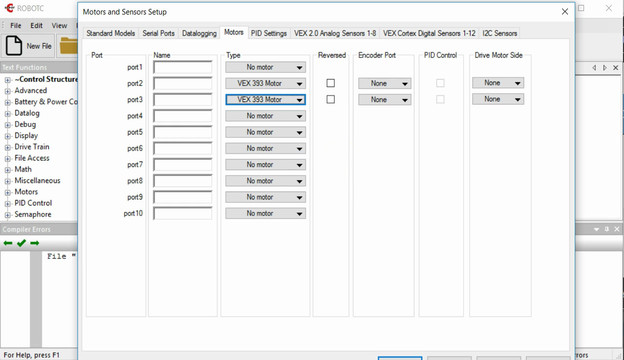
The comunication between the motors and the controller should be configured in the RobotC software. Each motor could be connected on a different port and the goal of the video is to show you how.
Conenct the motors of the VEX EDR motor to the VEX Corted Controller. For connecting we need the motor drivers.

Let's move with the VEX EDR robot using its motors, the wheels and some RobotC programming. We devide the program in three parts - Connect the motors, program the controller and turning.

We will demonstrate an alternative way to make the robot move backward

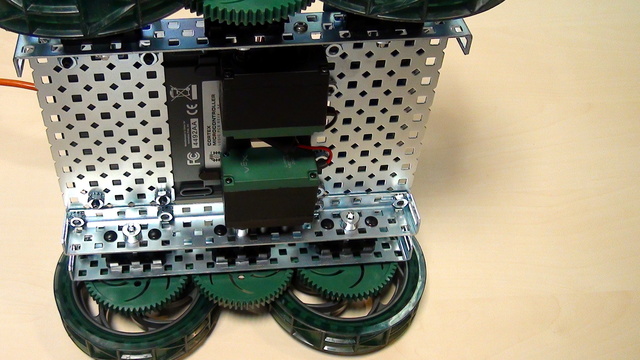
Based on a request we are showing the robot construction with two rear motors instead of a differential. In this way, as a construction, it is closer to more students, but much more challеnging for programing.

This third way of positioning the LEGO Mindstorms EV3 motors on the robot seems to be the most productive with the most advantages. We have named it "correct", but we completely understand there might be other even more efficient ways to position the motors on the robot.

This second way of positioning the LEGO Mindstorms EV3 motors on the robot leaves more space for the Mindstorms brick and for attaching a third motor. We are experimenting and showing the advantages and disadvantages of this particular construction.

We are showing the first way we could position the motors on the robot construction. This seems to be challenging for many robot builders and that's why we are going to do it in a few different ways in the next few video tutorials from the series.