In previous tutorials we have learnt how to Create and Import My blocks in the EV3 Mindstorms Software. However, we often need to edit the blocks we have created. Even more often we need to edit the blocks we have imported, so that they match our setup. Now we will take a look at how we can achieve that.

To access the full video please subscribe to FLLCasts.com
- #996
- 04 Jan 2018
The Setup
Let us say that we have either created the Dummy My block within our current project or imported it from another. You can download it from the bottom of the tutorial if needed. The block is the same as the one from the Create and Import My blocks tutorials.
The first step is to open the content of the my block. It can be achieved in two ways - either by a double click on the block within a program:
or by selecting the name of the block from the drop down menu ![]() :
:
LEGO Mindstorms EV3 Dummy My Block
This is an example My block used in tutorials to demonstrate the process of creating, importing and editing My blocks.

![]()
Courses and lessons with this Tutorial
This Tutorial is used in the following courses and lessons

Instructors Remote Training
If you are working with students and you want to introduce Robotics to your class or you want to mentor a FLL team, but you are insecure about your technical knowledge in the Robotics field, then this is the right place for you. Having in mind teachers' busy schedule, we have design two different schedules and added an option to design one just for you. FLLCasts's Mindstorms EV3 Robotics Online Training is the perfect match for any teacher.
After the completion of each task the participant has to upload his solution for verification.
- 183
- 280:11
- 156

My Blocks
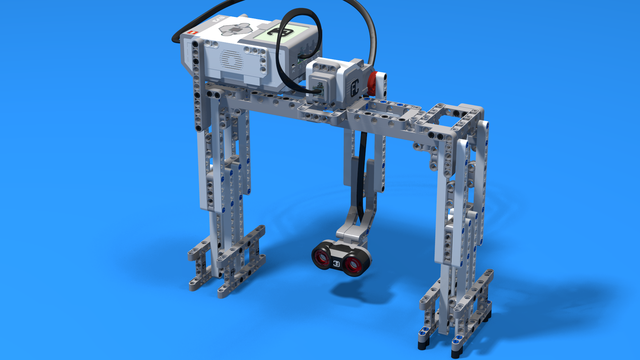
In this section we will learn how to create, edit, import and use My blocks. First we begin with ilustrating a use of My blocks. There is a whole group of robot constructions called steering robots. Today we will build a steering robot and learn more about the way it is driven through a differential. Then you will have to download a My block that implements the Proportional Line Following algorithm for steering robtos. You need to download, import and modify the block to fit your robot setup. Finally, you will have to create a block of your own and learn how to add parameters.
- 8
- 1
- 10
- 3d_rotation 1
Robotics with LEGO - Level 3.5 - Measuring tools
The sixth level of the Robotics with LEGO curriculum for students in sixth or seventh grade.
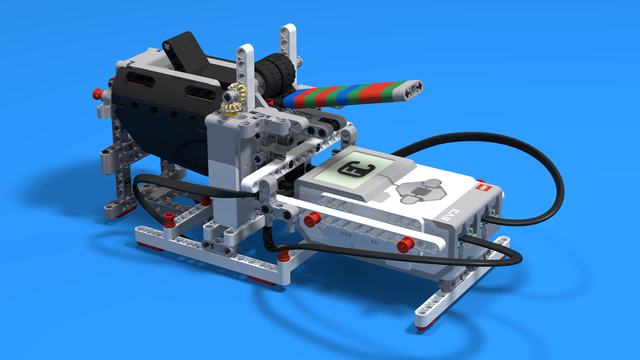
In this level, we introduce student-created myBlocks. Any functionality that is used in several places in a program is grouped into myBlock thus shortening the program's length. Students create blocks that return the result of calculations as an output parameter. Input parameters can change the calculations in the myBlocks. The robot constructions measure physical properties like linear or rotational speed, the fuel level in a tank, or length, area and volume.
- 58
- 0:00
- 185
Lesson 7 - ATM: Account and password match
For students who will not take two levels in a row today is their last lesson.
- 7
- 6
- 5
- 3d_rotation 1
Robotics with LEGO - Level 3.5 - Measuring tools
The sixth level of the Robotics with LEGO curriculum for students in sixth or seventh grade.
In this level, we introduce student-created myBlocks. Any functionality that is used in several places in a program is grouped into myBlock thus shortening the program's length. Students create blocks that return the result of calculations as an output parameter. Input parameters can change the calculations in the myBlocks. The robot constructions measure physical properties like linear or rotational speed, the fuel level in a tank, or length, area and volume.
- 58
- 0:00
- 185

Level 3.7 - Smart Robots
В много от занятията отборите работят върху един робот, като всеки отбор е отговорен за правилното реализиране на поетата от тях функционалност. Задълбочено се разглеждат задаването на входни стойности и използването на изходните стойности на всички блокове. Широко се използват променливи от трите основни типа: Integer, Boolean, Text. Роботите вече пазят богато вътрешно състояние, могат да броят, да изчисляват, да се обосновават логически, с помощта на което взимат много по-правилни решения. Въвежда се използването на паралелно изпълняващи се блокове.
- 15
- 1:03
- 111
Занятие 1 - Ball Hunter, броене на топки
Цел
Целта на занятието е да се реализират програми за робота BallHunter по-сложни от тези реализирани в Роботика Фи. Продължава се с използването на променливи, групиране на действията в блокове. Въвежда се прочитането на стойности от блокове. Въвеждане на блокове, които връщат резултат.
Необходими материали
Сини и червени топки от няколко комплекта. Поне 5 топки общо.

- 8
- 13
- 21
- 3d_rotation 1