Now that you have tried and solved a challenge involving a series of instructions, we would like to share a few best practices.
- #413
- 15 Mar 2017
- 2:51
- LEGO MINDSTORMS, LEGO Education SPIKE Prime, LEGO MINDSTORMS EV3
- EV3, Basic, Classes with students, Programming
Try blocks one by one
It is a bad practice to place several blocks before testing your program. The problem is that when there is an error, you can't pinpoint which block causes the problem.
Understand the challenge
To solve a task correctly, you must understand what is expected from you. So, you should articulate how you understood the challenge and ask your teacher if that understanding is correct.
You can also ask us in the comments section below.
Test each step of the program with the robot
This is the most important message we have here! Follow this algorithm:
- Place one or two blocks in your program and adjust them;
- Download the program from the computer to the robot;
- Place the robot on the floor and place it at the marked starting position;
- Select the program from the brick menu and start it;
- Observe the results and assess if the robot behaves as desired:
- If the robot's behavior is "correct" as desired, carry on.
- Add new blocks to the program to extend it.
- If there is an error, it is in the new blocks you just added.
- Correct the error and test it again.
- Correct the error and test it again.
- If the robot's behavior is "correct" as desired, carry on.
Use the download option of the software
Thus, you can control where and when you start the robot. If necessary, you can start the program from the brick several times.
English
When building a program with a series of instructions at the end we have the following program.
That was the Yo-yo challenge. And there are a couple of best practices of how you should develop such programs and in this video I'd like to discuss these best practices.
Now, this is a complex program because it involves several blocks. And it is not a good idea to place all the blocks at once and to try to run the program because it will not work correctly. So, you should try do develop the program in small steps. First, the most important thing, understand the challenge. You can ask for some clarification from the instructor, from the teacher. You can also comment below the video or look for answers in the comment sections. So, you should understand the whole challenge. Then create a program using only one or two blocks. Download the program from the computer to the robot. And you can use Bluetooth, you can use USB. But after you've implemented a program with one or two blocks you just download this program to the brick. And now I'll download my program right here.
Just download without running. Then you take the robot, place it on the floor where you have the starting position and from the menu you select the program that you want to run. And press the button.
So, we have the first two blocks of the challenge. We observe them and we decide, okay, this is something correct. Then we can extend this program. If the behavior is not correct, we can change it. But if it is correct, we just extend it. In this way we have in small steps developing the program. And we know exactly where the error is if there is an error. Because we don't move forward until we have the small fragment of the program working, these small one or two blocks. That's why it's important that you use the download option. Because you can actually take the robot, place it, run and then observe the behavior of the robot.
Courses and lessons with this Tutorial
This Tutorial is used in the following courses and lessons
EV3 Phi. Introduction to robotics with LEGO Mindstorms
The things that you will be able to do with your EV3 robot by the end of this course are:
Freely move your robot towards desired target;
Avoid obstacles on the path of your robot using sensors;
Follow lines of any shape;
Detecting and picking up objects of any kind;
- 92
- 220:20
- 36

Series of instructions make a program
The challenge is to make the robot move back and forth with ever decreasing distance.
- 11
- 0
- 4
- 3d_rotation 0

Instructors Remote Training
If you are working with students and you want to introduce Robotics to your class or you want to mentor a FLL team, but you are insecure about your technical knowledge in the Robotics field, then this is the right place for you. Having in mind teachers' busy schedule, we have design two different schedules and added an option to design one just for you. FLLCasts's Mindstorms EV3 Robotics Online Training is the perfect match for any teacher.
After the completion of each task the participant has to upload his solution for verification.
- 183
- 280:11
- 156
How to make the robot move
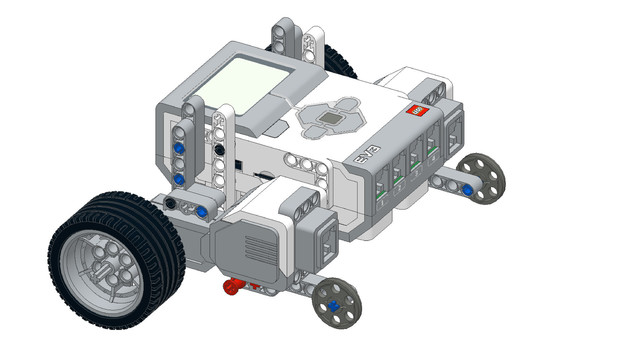
Let's review the LEGO Mindstorms EV3 Intelligent Brick
The EV3 brick is the main computer of your LEGO robot and it has a display, a few buttons and various ports.
- 24
- 0
- 11
- 3d_rotation 0

Robotics with LEGO - Level 1.0 - Adventure in Space
The first level of the Robotics with LEGO curriculum for students in fifth to twelfth grades.
Various constructions with robots are built. Learn how to control the motors so that the robot navigates around the Moon and Earth in various ways. Getting to know the first two sensors. The robot can feel its surroundings with the help of the Touch sensor and avoid obstacles.
The Ultrasonic distance sensor can help the robot avoid obstacles. Students work with concepts like loop, degrees and medium motor. Robots can now do two different actions at the same time - while solving missions on a field, the third motor clears detected obstacles.
- 126
- 123:52
- 150

Lesson 1 - Moving like a Yo-Yo
Introduction
Today, you will get to know your classmates and your teacher, learn how the lessons are conducted, construct your first robot, and learn how to program it to move. The end goal of this lesson is to make the robot move like a Yo-Yo. How does a Yo-Yo move?

If you have ever owned a Yo-Yo, you know that it's meant to fall down and rise back up to your hand. But in order for it to move successfully, we need to move our arm in such a way that we provide it with the required velocity. Otherwise, it will decrease the distance on the way back up on each drop until it stops.
Try to make a good impression on the rest of your class, because you will be doing this course with them until the end.
- 19
- 4
- 9
- 3d_rotation 1

Level A1 - Space Adventure - Robotics with LEGO SPIKE Prime
This is the first level of the LEGO Robotics Curriculum for second, third, and fourth-grade students.
A "space adventure" but with robots. Different robot structures are built in Level A1. The motors are controlled so that the robots perform precise movements around the "Earth", "Moon" and "Sun". We use the force sensor to overcome various obstacles we bump into. We learn interesting facts about the solar system and space vehicles.
- 65
- 30:30
- 76

Lesson 2 - Tidal waves
Introduction
Today, we will focus on an interesting effect caused by the Moon: tidal waves.
You may know that massive bodies have an attractive force - gravity. The Moon's gravity pulls the water in the oceans, which causes the sea level along the ocean coasts to temporarily rise or fall. The increased level is called high tide, and the decreased level is called low tide.
How much, do you think, can the difference between high and low tide be in the world?

The distance between high tide and low tide sea levels can reach up to 16 meters in the Bay of Fundy in Canada, and the lowest differences are in the Mediterranean, Baltic, and Black Seas, where they are only a few centimeters. We will use 50 cm as an average value as it is convenient for the task.
- 10
- 5
- 12
- 3d_rotation 1
Level A1. Introduction. Robotics with LEGO
Introduction to robotics - The first level of the Robotics with LEGO curriculum for students in second, third or fourth grades. A journey in space, with robots. Various constructions with robots are built. Learn how to control the motors so that the robot navigates around the Sun, the Moon and Earth in various ways. Getting to know the first of the sensors. The robot can feel its surroundings with the help of the Touch sensor and avoid obstacles.
- 142
- 133:42
- 187

Lesson 2 - Yo-yo challenge
Introduction
Today we will learn to program the robot to perform more than just one action, as well as program it to move like a yo-yo. Have you ever played with a yo-yo? How does it move? Did you know that from Filipino yo-yo means "to return".
- 18
- 3
- 8
- 3d_rotation 1