
Task - Calibrate more than one sensor with the Advanced Calibration technique
Following the previous tutorials from the course, implement the calibration of the minimum and maximum values.
- #640
- 04 Oct 2017
Following the previous tutorials from the course, implement the calibration of the minimum and maximum values.


Implement a program for stopping at a black line with the blocks containing the implementation details for the InitArray, Calibration and Getting the calibrated result.

Following the Advance Light/Color sensors calibration for a minimum value for a single sensor tutorial, in this one, we continue with finding the maximum value detected by a sensor and storing this value in an array.

A common question is how to display arrays on the LEGO Mindstorms EV3 brick screen. Displaying values from an array is not different from any other display operation. In this tutorial, we would look at displaying two specific values. The minimum and the maximum for a specific sensor from the Advance Calibration Course Section

In this tutorial, we show you how to display all the values from an EV3-G array on the EV3 brick display. We are using an array Read Operation along with a loop. We are also detecting the loop counter and using it as an index to an array. It's basically the only viable way to do it. The process is commonly referred to as - "Iteration over an array" (although we still do not have an iterator in the programming language, we promise that one day we would do the super advance videos on "iteration" using the LEGO MINDSTORMS robots")

One of the smartest things you could do in any software program is to extract logic in small reusable, simple, understandable units. In EV3-G these are called Blocks and we are going to extract the logic for finding a minimum and maximum for each of the sensors in a new block.

Following the Advanced Sensor Calibration course section, it is time to extract the logic for getting a calibrated value into a new block. This block will have an input and on this input, we give the port number. The block will return the calibrated value for this port number. We've built all the other blocks only because of this almost final video here.

Sometimes when we are working with sensors it is important that the time between two consecutive samples is the same. This will make each sample equally important and independent of how much time it took to take it. In this video tutorial, we would use the EV3-G timer block to make a "WaitForTick" program where the time between each sample of the EV3 Gyro takes exactly 0.02 seconds.

After we take each sample, we perform calculations and these calculations could take different time. It is important to know how much time does it take to perform the calculations. In this video tutorial, we would data log the time and plot the data.

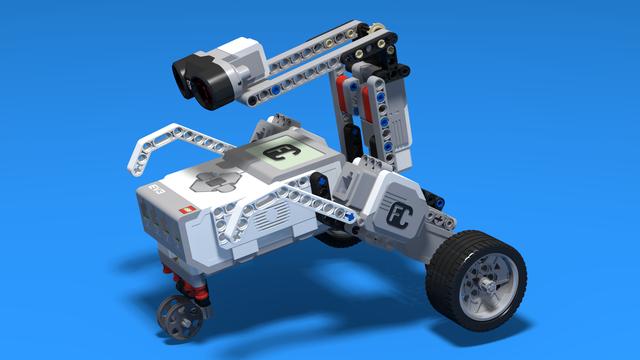
This is the simplest possible line following robot. It has just one sensor in the front between the two driving wheels and uses beams as pivots instead of a third wheel. Try it out. Follow the building instructions and start following lines in a number of minutes.
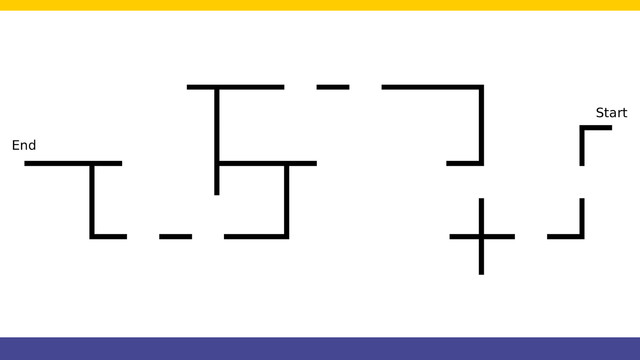
There comes a time when you need to program the robot to "follow a line, but if another sensor detects something you would like to stop, do some work, and then continue following the line". This is applicable to competition robots as it is applicable to real-life robots.
There comes the State Machine Pattern. An advanced and very powerful concept that allows you to easily implement complex robot behaviours with a simple, well-organized, extensible, bug-free program where the robot could be in 1,2, 10 or 100 states and you will still be able to manage the complexity of the world around the robot.

This package contains the three blocks used in the advanced calibration section of the FLL course.
The blocks contained are:

This is the example program using the blocks available at Blocks Package for Advance Calibration of LEGO Mindstorms EV3 Color/Light sensors. The program makes the robot find the minimum and maximum values and to calibrate the current sensor value depending to the min and max.

These are the programs for our boxing robots and their Joysticks. They are made for a game of two fighters with their respective joysticks, fighting until one is knocked out or its "heart" touch sensor is punched by the other robot. The fighters require the two "leg" motors to be connected on ports B and C and the hand medium motors on port D. The touch sensors should be connected on port 1, however keep in mind that the game may be better without them. The distance sensor has no purpose in the program as it is used only for aesthetics. The joysticks require the motor for forward and backward to be connected on port B and the motor for left and right to be connected on port A. The touch sensor operates the hands and must be connected on port 4.
The third level of the Robotics with LEGO curriculum for students in second, third or fourth grades.
In these lessons, we stress on more complex and challenging robots. The concept of Condition is introduced. Students learn about physics concepts of inertia and center of mass. Robots with two sensors are built and students program both of them. Programming becomes more complex as robots now can make complex decisions. "Spy"-robots sneakily follow their targets, trying to be undetected.
The firfth level of the Robotics with LEGO curriculum for students in second, third or fourth grades.
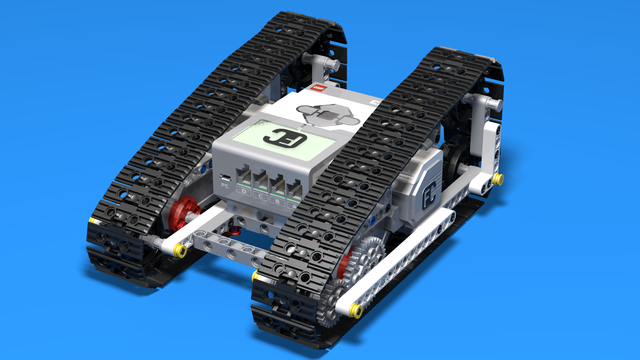
The students build many robots with chain-treads. The Color Sensor is introduced and robots use it to recognize the colors of the objects around them. Students learn about gears, basic gear constructions, and their application. Robots now can stop on a black line and can follow a line using their sensor.

Umjaho - from the language of the Zulu tribe. It means "competition"
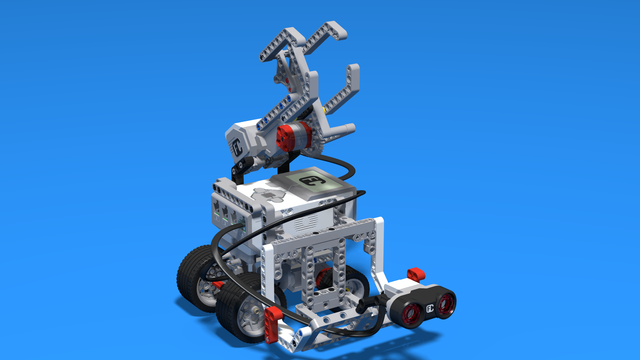
This LEGO Mindstorms EV3 robot has three sensors - touch, color and ultrasonic. When the touch sensor is pressed the robot starts moving. The color sensor is used for following lines and the ultrasonic sensor is used to detect any robots in front of the robot.
Mintonet (engl. Mintonette) comes from the name of the first iteration of volleyball.
The robot can move only forward and backward, without turning, with the help of a large EV3 motor. Another large motor is used to shoot. The robot uses an EV3 ultrasonic sensor to detect its partner and throw a ball at it.

Mintonette comes from the first iteration of Volleyball with the same name.
The robot uses two EV3 Touch sensors to control the turret left and right. It uses the EV3 Color sensor to trigger the shooting mechanism, which consists of an EV3 Large motor which pulls a lever to shoot a ball.
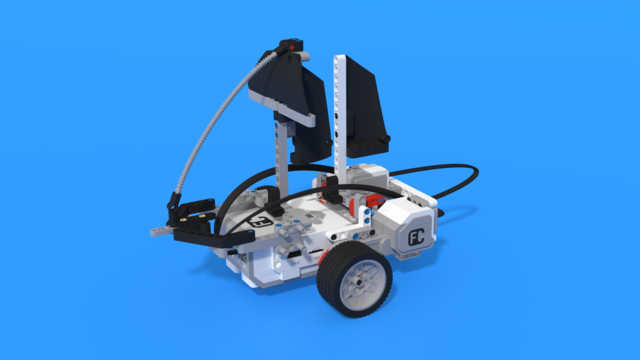
Barco from spanish means boat.
The robot is made to look like a sail ship. The sails are made out of technic panels, attached in various ways to create the best look. Otherwise the robot uses two motors with tyres to move. At the back of the robot there is a Gyro sensor, which helps it maneuver.
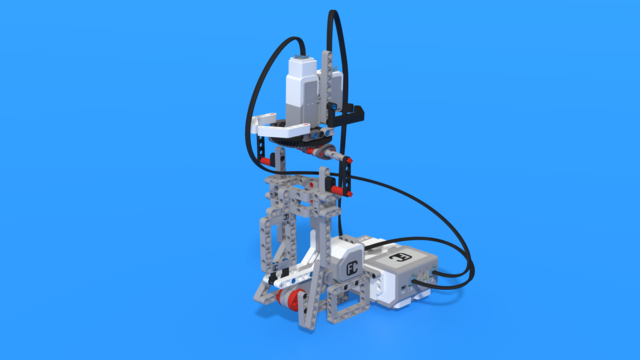
Uylam is a robot that simulates a stormy environment for its ship. It is made using two piston-like mechanisms powered by a Large motor and offset by 90 degrees to create shaking similar to that of big waves. The ship itself is made out of a medium motor on a turntable and a gyro sensor attached to them. The purpose of this is to explore what is the best position of a ship compared to the waves, so that it sustains the least amount of shaking.