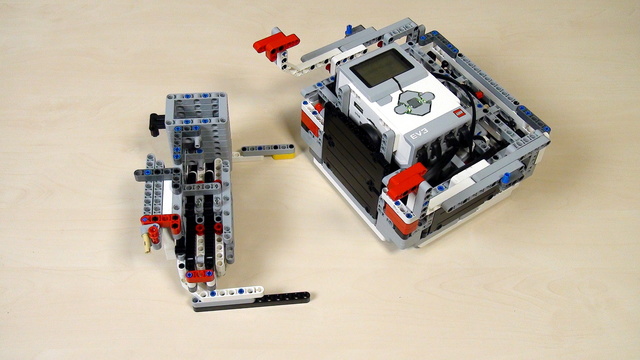

Improving FLL Robot Game. The robot base for Lifting – center of gravity
Don't limit yourself to the box and think of different ways to lift the robot.
- #439
- 06 Mar 2017


Don't limit yourself to the box and think of different ways to lift the robot.

Build a robot base to use in the course. You can use the robot base provided by us or you can build one yourself.


Remember the passive/active attachment separation that we are making at FLLCasts.com. This applies for all the attachments and in this Episode, we are looking at how to use a passive attachment.


The next step of lifting a robot to a mission model is to try to use a rack.


In this Episode, we create the next attachment for the box robot two. It is again a pinless attachment, attached to the frame that transfers the motion to a vertical axle.

Try to build the attachment following the instructions. Use it to actually solve a mission from any competition (like taking loops)


This one is very special- an attachment that could lock itself on purpose while working.


Sometimes the way an axle is placed is just not suitable for a certain attachment and you should transfer the motion to another axle a few LEGO units above the current.


Need to transfer circular into a linear motion. You need a rack. Here is an attachment with a rack for our box robot.


Recap on the attachments, their purpose and how you should use them.


Before moving forward here is the simple task of building the mechanism and extending the legs. Extend the legs to fifteen LEGO units.

So far we know how to make a turn in an arc, just like the real cars do.
Today we will see what other options our robots have for turning.

Experiment with the software for about five minutes, before we even give you any directions.


A spin turn is a turn around the center of the robot. Let's learn how to program it.


Why we will never use seconds in our lessons.

How far will the robot move for one second?

Building instructions for the EasyBot LEGO Mindstorms robot using in many of our courses and tutorials. This EasyBot has two motors and two front wheels. The third wheel is...well, check it out, see how the third wheel is built.

Building instructions for a LEGO Mindstorms Base Chassis with a reversible motor
Note: This robot contains wheels that are from the NXT set.

The instructions for building the improved EV3 Competition Robot by Mic Lowne

A LEGO Mindstorms EV3 Chassis with wheels at the front. Built with the EV3 set you can use this robot chassis as a base for extending with attachments.

Building instructions for the robot build with LEGO Mindstorms EV3. It is called "Frankenstein" because the two motors are in two different directions.