
Instruction for building the Quick Attachment
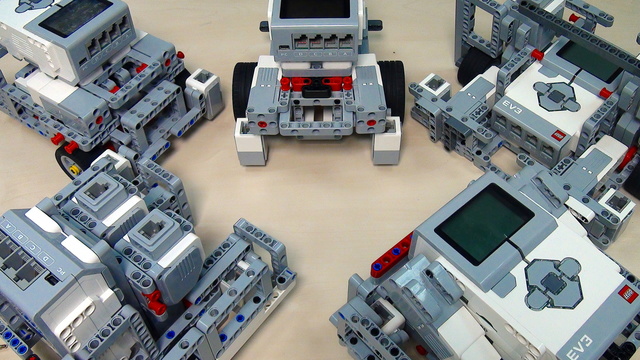
Instructions for building the quick attachments for this LEGO robot
- #229
- 30 Nov 2014
- 1
Instructions for building the quick attachments for this LEGO robot

Another example for a quick pinless attachment build with LEGO Mindstorms EV3 robots.

Probably the simples trick for pinless attachments that we've found. It is a construction build in just three steps. Simple as that. But it has a lot of potential to teach you how to use pinless attachments. Pinless attachments are very useful during FIRST LEGO League and World Robot Olympiad competitions.

Building instructions for the One Attachment. Built from LEGO Mindstorms EV3 parts and with an Ultrasonic sensor we've used this attachment to accomplish most of the missions at FIRST LEGO League 2013.
SIngle robot attachment, many points.

If you think that the quick pinless attachments shown in video 63 are quick enough, see this tutorial and you will find out that the quick pinless attachments could be even quicker. These attachments can work without motors but by using the inertia forces.


Robotics competitions with LEGO Mindstorms robots are very popular. One of the more popular types of robot constructions that are build for such competitions are the so-called "Box Robots". In this course we are gathering a series of videos on this box robots along with building instructions and recommendations of improvements.

After the first box robot course and its enormous success, we decided to build a second box robot. This time with fewer parts and with only three motors. The EV3 set comes with one medium motor and this robot will be easier for new teams. It is also lighter and more simple. Take the course and learn the ideas that we have in mind in simplifying a robot. Use this course with students and try to experiment to make the attachments and construction even simpler.
This course if used by teams, mentors and students to structure the preparation for the Robotics Game of the FIRST LEGO League Robotics Competitions. One thing that is common each year at FLL is that experience matters a lot. Our goal with this course is to quickly bring new teams up to speed with experienced teams and to share some new tricks, patterns, constructions with the more experienced teams.

This attachment accomplishes the Into Orbit Space Walk Emergency mission from the FIRST LEGO League Into Orbit 2017-2018 competitions. The base robot is the SUV Competition Box Robot from LEGO Mindstorms EV3.
The program for this attachment is at Programs/w415dz-fll-2018-attachment-to-accomplish-the-into-orbit-space-walk-emergency-07-robot-game-missions-program.
Soon we would publish and a video of how the attachment works.

Lifter is an pretty fast and pretty strong attachment that lift up... things... like exercise machine, astronauts and other stuff.
A program for that attachment in Into Orbit 09 - Strength Exercise challenge is located at programs/hm9c06-lifter-an-attachment-for-suv-box-robot-and-into-orbits-m09-strength-exercise-program.

One of the spacers that the Nightbeast team used in FLL 2018/19 Into Orbit Challange

The FLL season is great, but has one disadvantage - it ends. We have prepared that course for those of you that does not want to stop! The course presents a whole new challenge with custom designed field and mission models, that can be built from just 2 LEGO Mindstorms EV3 sets (core+resource). It is a great way to keep the momentum going after the end of the FLL season and prepare in the best way possible for the next.


In this video tutorial we would look at the mission run for M09. STRENGTH EXERCISE. The mission is to lift a heavy object in the air. And that could a complex mission. It requires to use gear wheel and the attachment should be quite strong. The tutorial contains only the mission run on the field. We accomplish a single mission.

This is one of the spacers that the Nightbeast team used in FLL 2018/19 Into Orbit Challange

In this attachment two knob wheels "(32072 ) Technic Gear 4 Knob" engage at 90 degrees angle. One of the knob wheels is a part of the robot and the other is a part of a pinless active attachment. The purpose of this attachment is to demonstrate How NOT to build attachments.
Build the attachment and experiment. See for yourself how it "jumps" up and down when the knob wheels are rotating and you hold the lever by hand.

This is a simple pinless active attachment for the SUV Box Robot.
In this attachment we use "(32498) Technic Gear 36 Tooth Double Bevel". There are four pins added to the wheel and it it this pins that engage with the "(32072 ) Technic Gear 4 Knob". The more important thing is that the knob wheel and the gear wheel are parallel to each other.
While the motor rotates the attachment has 4 points of contact (instead of one or two when two Knob Wheels are in contact) with the robot knob wheel. There are no forces that drive the attachment to jump and lose engagement with the robot.

This attachment uses a connector ("(98585) Technic Connector Circular With 2 Pin Holes and 3 Axle Holes") with 4 pins to connect with a knob wheel ("(32072 ) Technic Gear 4 Knob") of the robot. Because both elements are parallel one to another there is no jumping effect.
The attachment uses two pins, but it is easy to attach and detach because it uses "(6558) Technic Pin Long with Friction and Slot". When you attach or detach the attachment the slots are keeping the pins strong on to the attachment.
Also an attachment connected to the robot in this way, can be move to the rigth knob wheel or to the left knob wheel.

This is a frame for the SUV Box Robot. Tis frame is an adapter between the robot and the attachments. You can add-in several attachments on it and mount them on the robot simultaneously with one movement.
The frame has two locks that make the attachments stick to the robot. Also the front Knobs must not be used for very powerful activities due to jumpings, unless the frame with attachments become heavy enough to prevent any jumping of the frame.