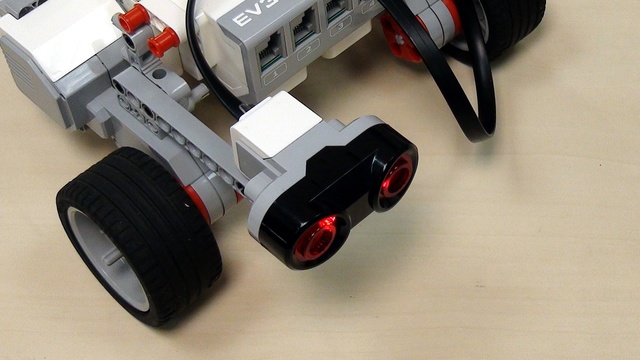
Задача: Надградете робота, като му добавите сензор за допир
Опитайте сами да поставите сензор за допир на робота.
- #431
- 03 May 2017
Опитайте сами да поставите сензор за допир на робота.
In this video tutorial we will show you three ways for making your robot stable on the field. We will present each one of them with their advantages and disadvantages - it's up to you to choose which one is the best for your case.
This one is very special- an attachment that could lock itself on purpose while working.
In this video we are solving one of the most important challenges on the FIRST LEGO League competition, i.e how to cover your Mindstorms NXT light sensors so that they are not affected by outer light sources at the day of the competition. Once again you would find 3 solutions and more will come in the next videos.
Cable management is very important on each competition. Cables could get in the way of attachments, levers, different wheels and so on. Brick accessibility is also very important. Do not forget that the brick should be charged from time to time and that you should also be able to access the buttons.
The way you move the robot is always imprecise. Don't TRY to fight with this. Programming motors for competitions like the FIRST LEGO League (FLL) or World Robotics Olympiad (WRO) is not very different from programming the motors in the STEM classes. But there are a few things you should have in mind.
The color sensors supports different modes of working. In this video we are working with the Reflected light, which is not actually the detected color. Most robotics sensors actually work with reflected light and you should definitely learn how to use this mode.
Enchansing a previous attachment, but only this time we are solving the FIRST LEGO League 2012 Medicine mission. There is a lever and a rubber band. When the lever is released the rubber band activates the attachment.
Let's try to integrate more of the things we have learned into a single attachment. One that could accumulate energy, conserve it and use it at the appropriate time. All this because of a Rubber Band and a Flywheel - and if you don't know what a flywheel is you should definitely watch this videos
You need to pull. And also catch. You need a carabiner. We have done a number of videos on carabiners and this is one of the ideas for the FIRST LEGO League 2015 Trash Trek competition.
Here we continue examining FLL 2014 World Class missions. We show different ways, for putting the insert in place as well as taking the loop from the robotics arm. Some of them are quite specific, which reminds us, that you need to think out of the box, while solving the missions.
One of the very good things about box robots is that you could easily align with them both to the front, to the back or to the rear sides. This aligning is helpful for FIRST LEGO League, World Robotics Olympiad or other robotics competitions with LEGO Mindstorms EV3/NXT robots.
In this video tutorial we experiment with different ways of solving the sports mission for throwing the ball. We show seven different LEGO MIndstorms EV3 and NXT robot constructions and attachements. Most of the techniques could be applied for any mission involving throwing a ball or an object.
With the EV3 Mindstorms set you receive three motors. Two are large and one is medium. These three motors could be used in different configurations and in this video we show how to use the motors on the second box robot for competitions that we build.
We list the number of decisions that the robot is making while following the line. Then, we group them and decide on the number of sensors to be used.
In this Episode, we create the next attachment for the box robot two. It is again a pinless attachment, attached to the frame that transfers the motion to a vertical axle.
Given the large number of gear wheels and axles in each EV3 and NXT sets there are many possibilities for building gear mechanisms. We are developing something like a gear box that has different axles that could all turn in different directions.
The first part of making the robot move straight is to keep it oriented straight. While it moves it could make an error and turn slightly to the right and then the program should turn in back to the left to make its orientation straight. In this video tutorial, we would discuss how to implement a program to keep the robot orientation straight even when we are pushing or pulling it to either side and in the same time it has different wheels.
In this video lesson I will show you how to follow a black line using just one sensor, but fast enough so that you could use it during any robotics competition without wasting any time.
Програмирайте робота да се придвижи 50 см напред.
We are introducing the LEGO Mindstorms EV3 Ultrasonic Sensor. The first program is actually to detect an object and stop near it, at about 4 inches/10 centimeters. The ultrasonic sensor could be used during robotics competitions, but most of its use is for experiments.
Sometimes the way an axle is placed is just not suitable for a certain attachment and you should transfer the motion to another axle a few LEGO units above the current.
We follow a line. We start from the Smooth Proportional Line Following program and modify it a little for this program. We follow the line with the middle sensor attached on port 2.
Завоят на място е завой около центъра на робота. Да видим как се програмира.
This robot has a color sensor and this sensor is used for following lines. Additional Mindstorms EV3 sensors could be place on the robot, like a Gyro sensor or a second Color sensor.
In part one we build an attachment that uses a rubber band to solve a competition challenge. The rubber band was released with the use of a motor. In this video we are removing the dependency on the motor and you could use the motor for other missions.
You are not using sensors?! You are positioning the mindstorms robot only by moving forward, backwards and rotating it. That`s one of the BIGGEST mistakes teams make on the FIRST LEGO League competitions. In this video we are showing a robot with chains and how imprecise are the results are when you are not using sensors.