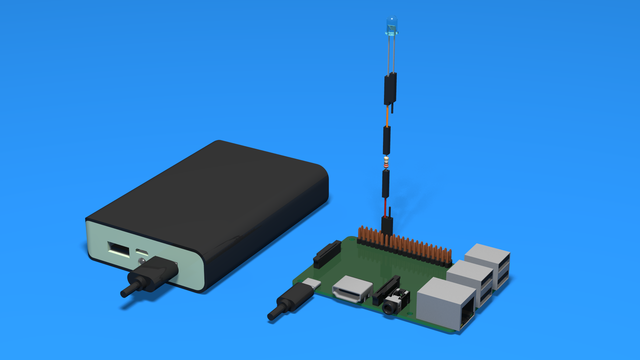
How to Add a diode to indicate controller power up - 3D Scheme
3D Instructions on how to add a diode to the Raspberry Pi and indicate when the Raspberry Pi is turned on.
- #502
- 10 Apr 2018
3D Instructions on how to add a diode to the Raspberry Pi and indicate when the Raspberry Pi is turned on.

In this 3D scheme, you can see how the motor driver is connected to the Raspberry Pi and to the motor. Follow the steps in the instructions one by one and you will have successfully connected the motor to the Raspberry PI

3D scheme on how to connect the L298N Motor Driver to the Batteries. Follow the step-by-step instructions. Be careful about the PCB terminal connectors.

3D scheme with instructions on how to connect the L298N driver to the batteries and to the motor. Just that. Connecting to the Raspberry Pi is at a later stage of the course.

A 3D scheme on how to connect the front steering motor to the Raspberry PI. This includes the Motor Driver and the batteries. The rear motor is also on this scene.

Инструкции за построяване на Катапулт от ЛЕГО Mindstorms EV3. Роботът има мотор, съединител, с който ръчно се контролира кога катапултът да стреля, и сензор за допир, който позволява автоматично зареждане. Долната рамка е махната, което означава, че роботът няма да може да се върти. В същото време обаче без нея катапултът става достатъчно малък, за да може да се построи по време на занятие.
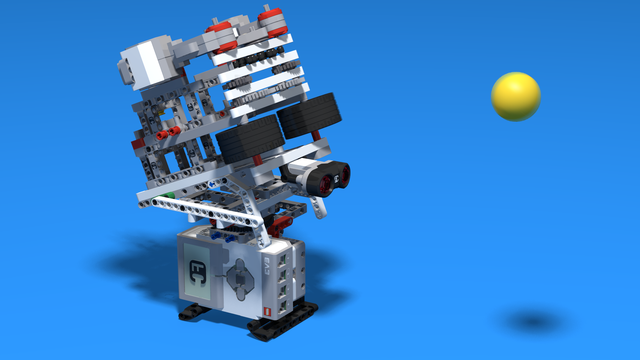
Инструкции за конструиране на количка от Лего, която може да изтрелва 40мм пластмасови топки за пинг понг. Роботът се задвижва от два големи EV3 двигателя, а приставката, изстрелваща топките, от среден EV3 мотор. Роботът може да носи до 6 топки и разполага със сензор за разстояние.

Целта на тези инструкции е да ви помогнат да построите ЛЕГО Mindstorms EV3 робот без колела. Трябва вие сами да помислите как точно да поставите колелата. Какви колела бихте използвали отпред? Как ще построите третото колело? Ето тук има някои препоръки за това как да построите третото колело - 1, 2, 3, 4
Можете да добавите хващач към тази конструкция по инструкциите тук.

Използвайки настройката Включен за градуси (ротации) на Блокчето за управление на среден мотор, ние задаваме на мотор колко градуса да "измине". Понякога, обаче, ни е необходимо да му задаваме на каква позиция в градуси искаме да отиде мотора. Това може да го постигнем с даденото блокче. То взима за 0 градуса позицията в която се е намирал мотора при стартиране на програмта. След това като му зададете дадена стойност, то отива на тази позиция, без значение от текущата му. Така например, ако в момента мотора се намира на -20 градуса и изпълним блокчето със зададени 30 градуса, мотора ще "измине" 50 градуса. Но, ако мотора се намира на 10 градуса и изпълним същата програма, тогава мотора ще измине само 20 градуса.

This is an EV3-G block for displaying the values of array cells in an EV3-G program.
The project contains two programs, which are demos of the blocks for displaying Boolean and numeric arrays.
You can import that blocks in your programs. They are designed to show you in real time what are the values in your array and let you go to the next bit of your program. The blocks operate with the UP and DOWN brick buttons to iterate through the array. And the CENTER brick button to advance to the program.
The blocks are very useful for students to show them in real time what values they have stored in their arrays. Because there is no easy way to see real-time what the values are in the array even if it contains only a few elements.
The block shows you how many elements there are in the arrays and the values in the following way:


This is a program for communicating with LEGO Mindstorms Bluetooth between two bricks. The goal of the program is to control one of the bricks with another brick. The controller has two touch sensors that control the direction and two buttons on the brick itself that control the power.
The control brick has two motors attached that are controlled.
The goal of this program is to be used as an example of how to use the EV3-G Bluetooth. Yes, it requires two bricks, but most of the schools have two bricks and could test the program.


Сензорът за разстояние работи на принципа на изпращане на ултразвукови вълни към обект. Едното "око" е предавател и изпраща ултразвукови вълни, които се отразяват в обекта и се връщат в другото "око" - приемник.

Лего врата, използваща сензор за допир за език на бравата, за да знае кога е отворена. Има си стопер и даже издава добре познатия звук на скърцаща врата.

Компактен робот, който може да разбере дали има нещо върху него, използвайки сензор за допир.
Този робот има две функции:
Embark on a daily robotics adventure with A Robot a Day Keeps the Questions Awake (Version 2.0). This course is designed to ignite curiosity and foster independent learning in students, offering a structured yet flexible approach to exploring robotics at home.
The course is tailored for self-guided learning, requiring minimal parental assistance, making it ideal for students to progress at their own pace. Whether you're a beginner or looking to sharpen your skills, this course offers a comprehensive and enjoyable pathway into the world of robotics.

Mantissa, a LEGO Mindstorms Robot, moves and attacks. It uses the ultrasonic sensor and it's two special hands. Follow the building instructions and download the prepared program to directly use the robot.

Do you have a friend for a sleepover? This might be the perfect robot for you! It is a football gate, guarded by Fint, the goalkeeper robot. You can control him, by using the remote controller, that consists of two Touch Sensors. Take turns making penalty shots and have a blast with this awesome robot!
What we recommend:

Cápa означава акула на Унгарски.
Роботът прилича на жива акула чук. Използва среден мотор за да движи опашката си, която се използва за да завива роботът. Роботът се движи с голям мотор и две гуми. Челюстите му се отварят и затварят чрес друг голям мотор. Двата сензора за допир отпред са изцяло за красота, но може да ги ползвате както ви харесва. Ултразвуковия сензор на носа се използва за да може акулата да усети плячката си. Това наподобява употребата на "чука" на истинска акула чук.

This robot is a spin-off of the Useless machine built from LEGO Mindstorms EV3. This robots mission is to be the last to press the button it holds.

Become the best remote control driver at VEX IQ competitions. Test your skills in a number of challenges now. Pass them successfully and become a "Class R1" driver.
The goal of "FLLCasts Certified VEX Driver - Class R1" is to certify your abilities to remotely control a VEX IQ robot. Everything is prepared for you. The course book contains a robot to build, remote control program to download and challenges to complete. If you complete each challenge below a certain time, and prove it, you will receive the "FLLCasts Certified VEX Driver - Class R1" certificate.
Find the Complete Guide at VEX IQ Robotics Competition
The first level of the course book is currently available for a free as it is in a Pre-release.
