

Improving FLL Robot Game. Driving the scissors mechanism. Change gear orientation
In this tutorial, we would drive the scissors mechanism and there are a number of rules that we must follow
- #454
- 22 Mar 2017
In this tutorial, we would drive the scissors mechanism and there are a number of rules that we must follow

Before moving forward here is the simple task of building the mechanism and extending the legs. Extend the legs to fifteen LEGO units.

The final way for lifting our box robot is by using a scissors mechanism. In this Episode, we would discuss the benefits and advantages of this mechanism.

How to align the wheels and how much should you push for this solution?

There were a few problems with the 40 teeth gears that we were using. Let's list some of them

Build a similar mechanism to this one. Similar, but for your robot. This is the task for you. Try, give yourself half and hour or even an hour.
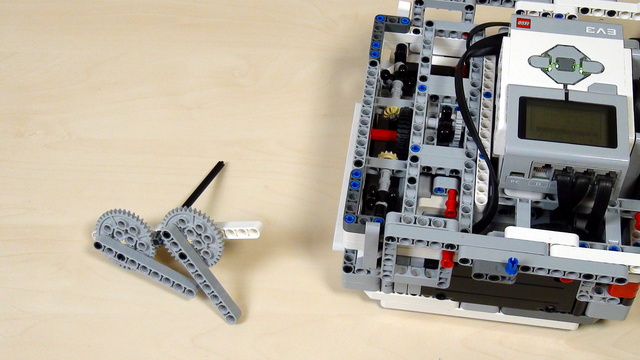
Time to lift the robot. The first approach is by using the 40 teeth gear wheels that come with the LEGO Mindstorms EV3 and NXT robotics sets.

Remember the passive/active attachment separation that we are making at FLLCasts.com. This applies for all the attachments and in this Episode, we are looking at how to use a passive attachment.

What is the end result? - have the attached on the mission model. What is the mechanism the would make the robot hang on the mission model.

Note for the teacher on how to organize the class to use different robot base constructions to accomplish the mission for lifting.

Build a robot base to use in the course. You can use the robot base provided by us or you can build one yourself.

Don't limit yourself to the box and think of different ways to lift the robot.

How to organize the different robots and group of students when working on lifting the robot.

Where should you lift the robot? Especially if you don`t have the mission model that we are using

How should an instructor use this course when working with students and a group of students in school

We've already build a number of resources for lifting at FLLCasts.com. But at the end of this course we would have a robot that lifts itself and hangs on the mission model.
The FIRST LEGO League competition is similar each year. With a little experience you could accomplish most of mission. The goal of this episode is to introduce you to the course, its purpose and approach.

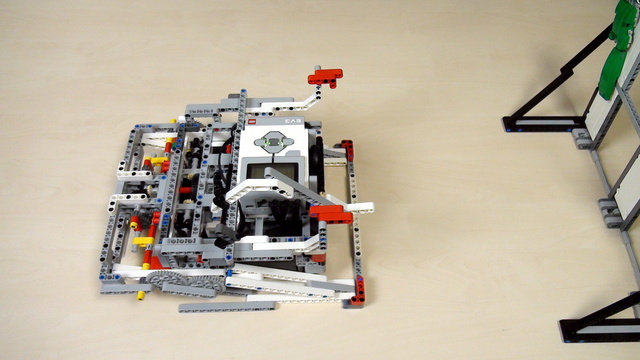
The robot uses one middle motor. This middle motor with the use of a few gear systems controls for different axsels. We have attached wheels on this axles so it is very easy to extend the robot construction for additional LEGO Mindstorms active attachments

This robot has a color sensor and this sensor is used for following lines. Additional Mindstorms EV3 sensors could be place on the robot, like a Gyro sensor or a second Color sensor.

One of the very good things about box robots is that you could easily align with them both to the front, to the back or to the rear sides. This aligning is helpful for FIRST LEGO League, World Robotics Olympiad or other robotics competitions with LEGO Mindstorms EV3/NXT robots.

With the EV3 Mindstorms set you receive three motors. Two are large and one is medium. These three motors could be used in different configurations and in this video we show how to use the motors on the second box robot for competitions that we build.

Cable management is very important on each competition. Cables could get in the way of attachments, levers, different wheels and so on. Brick accessibility is also very important. Do not forget that the brick should be charged from time to time and that you should also be able to access the buttons.

This robot could quite possibly be build from a single EV3 core and EV3 resource sets. It uses fewer parts and only three motors. There are additional parts that could be skipped when building the robot and we have added these parts only as to make the construction more complete.

Here we start with a second box robot that we would like to build. It is in a way improvement to the first robot and we would take a look at its features.

One more example for an active attachment with a system of gear wheels. This time the system is constructed so that the attachment could lift heavy objects.

This is a third example for adding an active attachment. This third attachment is now connected to the wheel at the front of the robot. Again, the attachment could be easily extended.

Second active pinless attachment for the robot construction. It is placed in the top/right corner of the robot and includes an interesting gear system for transferring the power. The attachment is suitable for complete rotations.