
Connect Front Steering Motor to Raspberry Pi - 3D Scheme
A 3D scheme on how to connect the front steering motor to the Raspberry PI. This includes the Motor Driver and the batteries. The rear motor is also on this scene.
- #507
- 10 Apr 2018
These are all the robot building instructions. By visiting each building instruction you could see the Tutorials and Courses and Lessons in which it is used.
A 3D scheme on how to connect the front steering motor to the Raspberry PI. This includes the Motor Driver and the batteries. The rear motor is also on this scene.
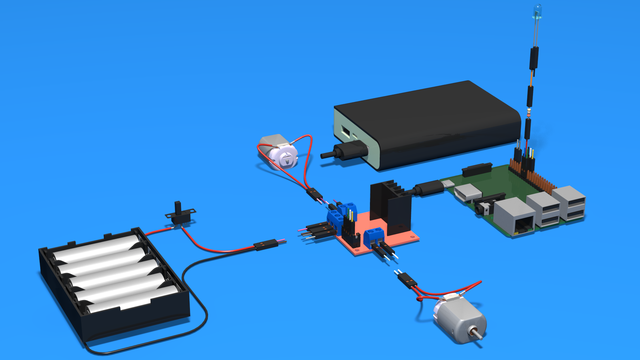
The is the whole step-by-step process of connecting the motors with the Raspberry PI with the driver and the batteries. No scheme needed. Everything is already here. In the course, the motors are part of the car and the batteries are in the batteries holder, but with this scheme, you could see the whole process.
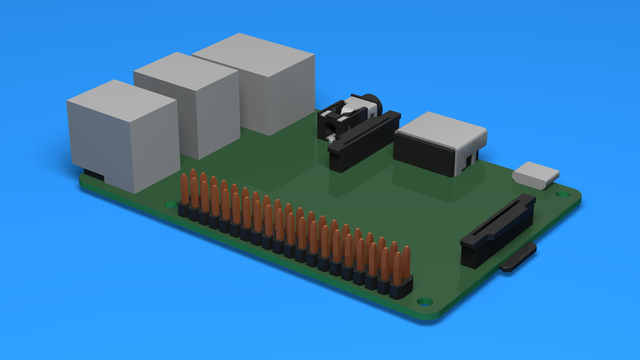
Step by step guide on how to add the SD card to the Raspberry pi.
The Raspberry Pi must not be powered.
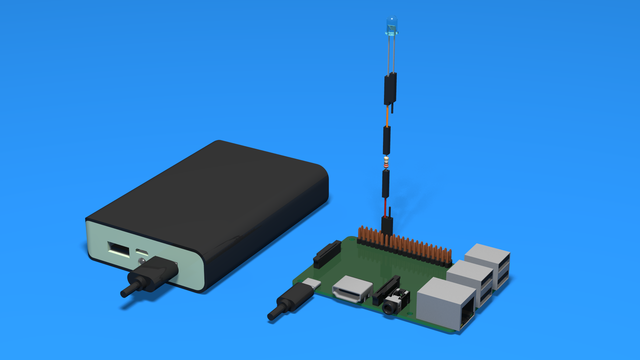
3D Instructions on how to add a diode to the Raspberry Pi and indicate when the Raspberry Pi is turned on.

In this 3D scheme, you can see how the motor driver is connected to the Raspberry Pi and to the motor. Follow the steps in the instructions one by one and you will have successfully connected the motor to the Raspberry PI

3D scheme with instructions on how to connect the L298N driver to the batteries and to the motor. Just that. Connecting to the Raspberry Pi is at a later stage of the course.

This is a disk image containing a Raspbian OS. The image is modified and set up specifically for the Perfect course. It contains all the needed files, libraries and additional tools that we would use in the course. The file is quite large so be prepared to wait some time while downloading.
Checksum: 4d85292f49a9350fcef9f2eb8fd86b77f1c6bd65ce1344848de3e201c9e1d20d
