
Have fun playing with the Remote Control Car before disassembling it
This is a remote control car. Have fun with it before disassembling it.
- #672
- 01 Feb 2018
This is a remote control car. Have fun with it before disassembling it.


We should multiply the error by a certain number and then add it to the steering of the LEGO Mindstorms Steering block. In this way, by changing the coefficient we change how much/fast should the proportional part influence the steering of the robot.

After we take each sample, we perform calculations and these calculations could take different time. It is important to know how much time does it take to perform the calculations. In this video tutorial, we would data log the time and plot the data.

Let's record the values of the Gyro Sensor while the robot is moving and is trying to keep its orientation straight. This is an interesting experiment and we will have to use file access to write the values to a file.

This video tutorial contains the final 2 programs for moving straight with a LEGO Mindstorms EV3 robot. The first program is for proportional compensation that just keeps the robot orientation straight, while the second program is for Integral compensation that returns the robot to the straight line when the robot makes a mistake.

Sometimes when we are working with sensors it is important that the time between two consecutive samples is the same. This will make each sample equally important and independent of how much time it took to take it. In this video tutorial, we would use the EV3-G timer block to make a "WaitForTick" program where the time between each sample of the EV3 Gyro takes exactly 0.02 seconds.

In this video tutorial, we would do a few experiments with the coefficients for the Integral compensation. There are actually two coefficients - "c" and "b"

This video tutorial is about understanding the "magic". In this video tutorial, we would conduct an experiment and will look at how exactly does the integral part of the PID algorithm compensate for the error that the LEGO Mindstorms EV3 robot makes.

The integral part "remembers" the errors that the robot has made in the past and we can compensate for those errors. This will make the robot return back to the line that we would like to keep it aligned.

This is where the confusion really comes. We are keeping the robot orientation straight while the robot moves, but at the end the, robot is not at the fiinal location that we would like it to be. The robot is still about 2-3 centimeters away after moving for about a meter.

We keep the robot orientation straight while moving, but when we stop the robot could be in a different orientation. This applies for both using the Mindstorms Gyro Sensor when moving straight or the Mindstorms Color sensor when following a line. In this video tutorial, we will do a few examples of when an how this could happen.

The first part of making the robot move straight is to keep it oriented straight. While it moves it could make an error and turn slightly to the right and then the program should turn in back to the left to make its orientation straight. In this video tutorial, we would discuss how to implement a program to keep the robot orientation straight even when we are pushing or pulling it to either side and in the same time it has different wheels.

The LEGO Mindstorms EV3 set comes with two LARGE motors. But even though these motors look almost the same they are not quite the same. There are always some differences in their behaviour. If you have more than two motors, because you bought them or you won them somewhere at a competition, it is worth doing an experiment to find which pair of motors works best.

The robot can move with different speed by applying different power to the motors. It will most of the time make smaller deviations when it moves slower. But you can't just move with a power of 10 all the time. This is a way too slow especially for competitions like FIRST LEGO League or World Robot Olympiad. In this video tutorial I would like to discuss the balance between motor power and robot movement error, how does the battery influence the power of the robot and to conduct an EV3-G experiment that will record the values of the Gyro Sensor along with the current power.
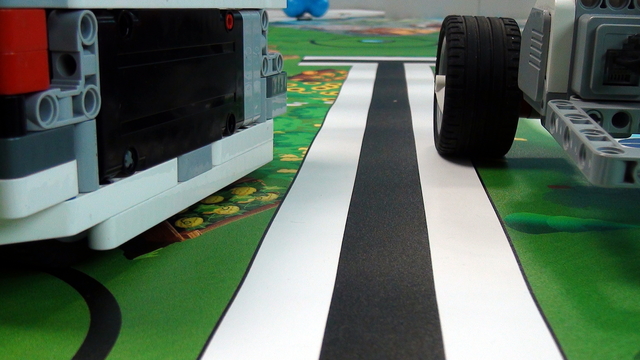
Should the robot be with a Front Wheel Drive or a Rear Wheel Drive to make it more precise? The answer is - front wheel will probably give you better results, but the wheel drive is not the most important thing. In this video tutorial on the LEGO Mindstorms Robots, we will do a few experiments to discuss the influence of the wheel drive on the precision of the movement.

You could use the LEGO Steel Balls as a third wheel on the robot. It is a caster wheel. But this is steel and as we know from basic existence on this planet, where there is steel there is also rust. The steel ball could get quite rusty and this could have an influence on the behaviour of the robot

DIfferent wheels and tires will result in different behaviour of the robot. That is actually pretty common sense. The real question is what is the influence. Would the robot make smaller deviations if it has smaller wheels or it will make larger deviations? The tires could also be quite dirty or brand new. Or the wheels could be attached in different ways.

The balance of the construction of the robot has a great influence on how it will move. This is especially true if you would like to move in a straight line. If the robot is slightly heavier on the right it will move to the right. Here we have two robots - a Five Minute robot and a Box Robot and we will discuss the differences in the constructions and why the box robot is much better than the Five Minute even though it is using the same parts.

Present the details

Following the Advanced Sensor Calibration course section, it is time to extract the logic for getting a calibrated value into a new block. This block will have an input and on this input, we give the port number. The block will return the calibrated value for this port number. We've built all the other blocks only because of this almost final video here.

One of the smartest things you could do in any software program is to extract logic in small reusable, simple, understandable units. In EV3-G these are called Blocks and we are going to extract the logic for finding a minimum and maximum for each of the sensors in a new block.

In this tutorial, we show you how to display all the values from an EV3-G array on the EV3 brick display. We are using an array Read Operation along with a loop. We are also detecting the loop counter and using it as an index to an array. It's basically the only viable way to do it. The process is commonly referred to as - "Iteration over an array" (although we still do not have an iterator in the programming language, we promise that one day we would do the super advance videos on "iteration" using the LEGO MINDSTORMS robots")

A common question is how to display arrays on the LEGO Mindstorms EV3 brick screen. Displaying values from an array is not different from any other display operation. In this tutorial, we would look at displaying two specific values. The minimum and the maximum for a specific sensor from the Advance Calibration Course Section

Following the Advance Light/Color sensors calibration for a minimum value for a single sensor tutorial, in this one, we continue with finding the maximum value detected by a sensor and storing this value in an array.

Implement a program for stopping at a black line with the blocks containing the implementation details for the InitArray, Calibration and Getting the calibrated result.

Following the previous tutorials from the course, implement the calibration of the minimum and maximum values.

As an exercise try to implement the calibration of the minimum and maximum values for a single sensor.