Resistors are essential electronic components that limit the flow of electric current in a circuit. Because they’re so small, their resistance value (measured in ohms, Ω) is usually marked with colored bands instead of numbers. Here's how to read them:
Необходимо е да се абонирате за FLLCasts.com, за да достъпите това видео
- #2510
- 23 Oct 2025
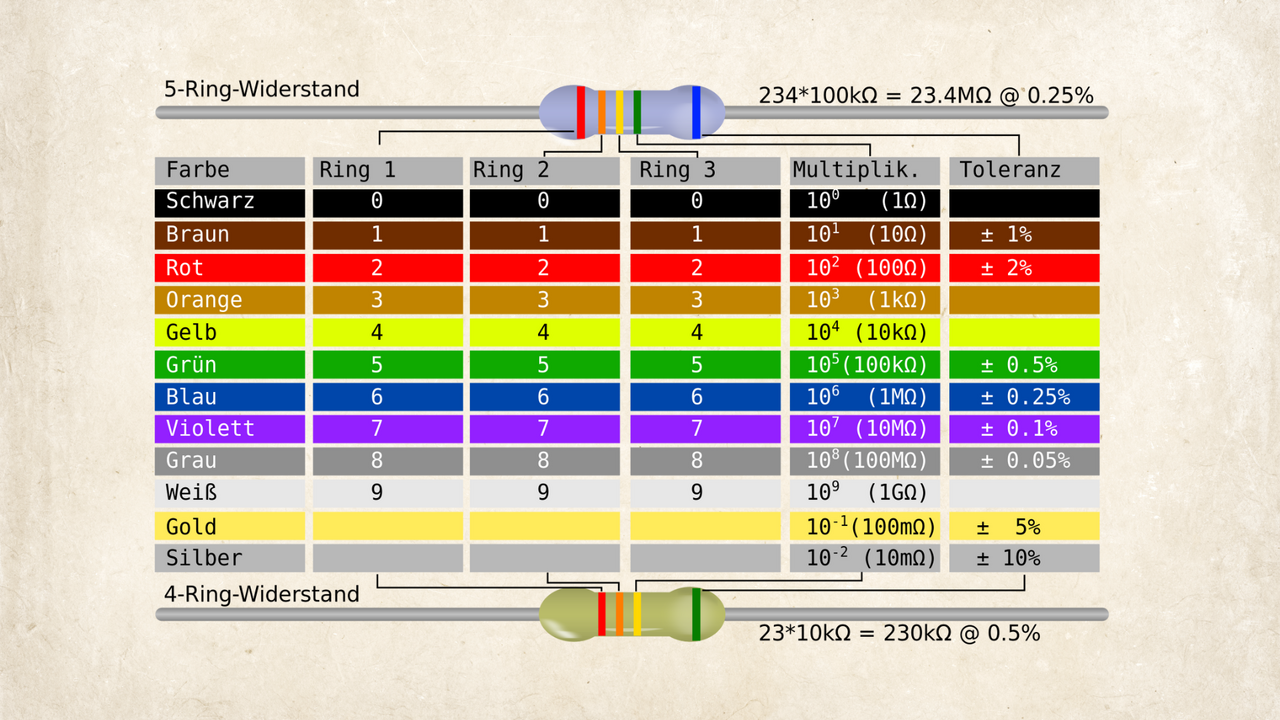
Each color on a resistor represents a number according to a standardized color code:
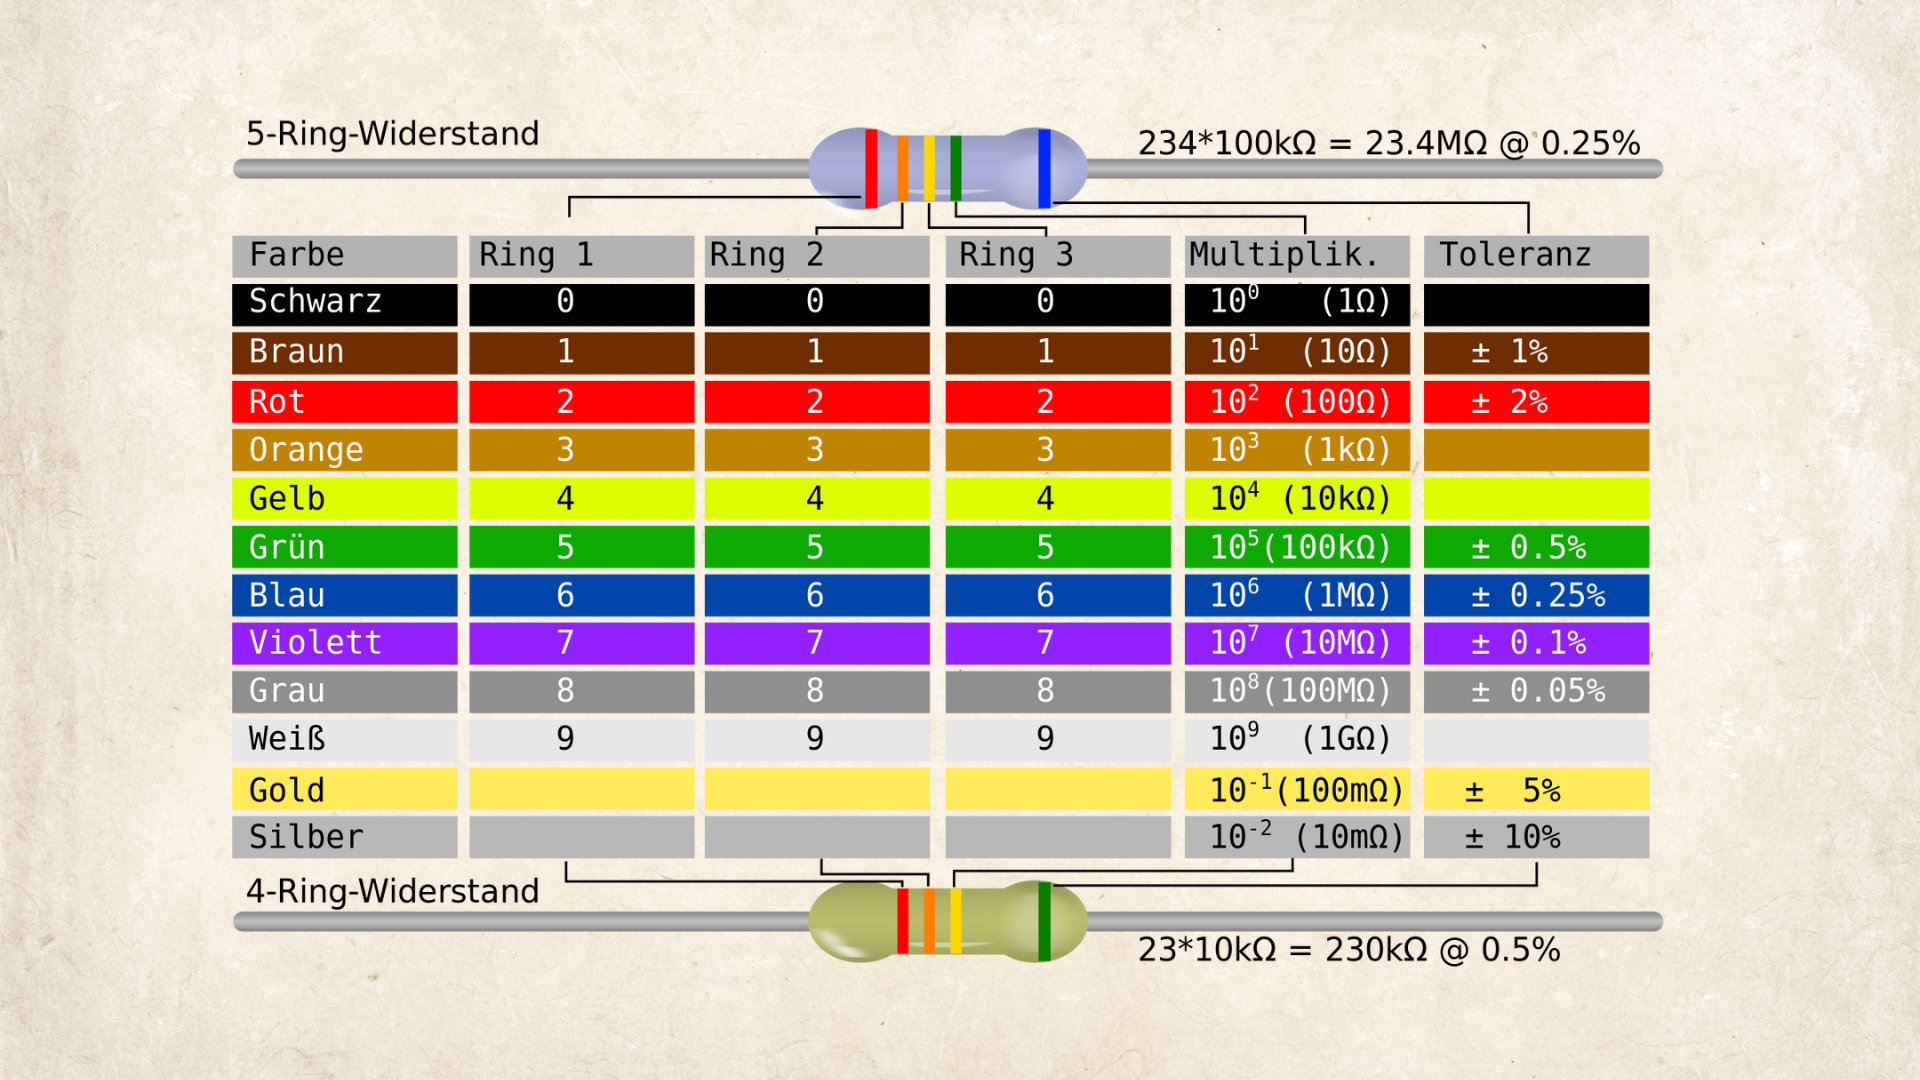
Most resistors use 4, 5, or 6 color bands.
A 4-Band Resistor is read as follows:
Band 1: 1st significant digit
Band 2: 2nd significant digit
Band 3: Multiplier (power of 10)
Band 4: Tolerance
A 5-Band Resistor is read as follows:
Band 1: 1st digit
Band 2: 2nd digit
Band 3: 3rd digit
Band 4: Multiplier
Band 5: Tolerance
Example:
Brown (1), Black (0), Black (0), Red (×100), Gold (±5%)
Resistance = 100 × 100 = 10,000 Ω (10 kΩ) ±5%
Example:
Brown (1), Black (0), Orange(×1000), Gold (±5%)
Resistance = 10 × 1000 = 10,000 Ω (10 kΩ) ±5%
Both ways are correct for marking a 10 kΩ resistor.
A 6-Band Resistor is read the same as a 5-band, but with an extra band at the end that shows the temperature coefficient. If you need to use this, then you're probably to advanced to be needing this tutorial!
How to Identify the Reading Direction
The tolerance band (gold, silver, or brown) is usually spaced farther apart or on one edge of the resistor.
Start reading from the opposite end.
Курсове и занятия включващи този Урок
Този Урок е използван в следните курсове и занятия.
Build a DIY Rotating LED Clock Display – For Parents and Kids (Online and Self-Guided)
Discover the fun of DIY electronics with your child in this self-paced, beginner-friendly online course, where parents and kids work together to build a rotating LED strip display!
Designed for those with no prior experience, this project-based course walks you through the entire process of assembling a spinning LED display that uses persistence of vision to create a glowing clock.
- 60
- 0:00
- 56
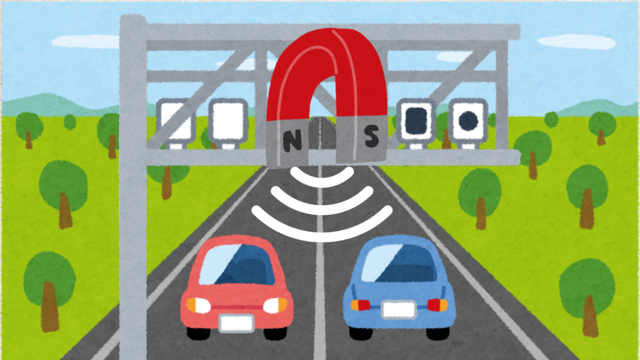
Sensing the Finish – The Last Solder
Radar Gun
The goal of this lesson is to attach the sensor that measures the speed of the LED display. This is the last lesson where you’ll need to do any soldering!
- 4
- 2
- 3
- 3d_rotation 0