Programs - -
Filters:
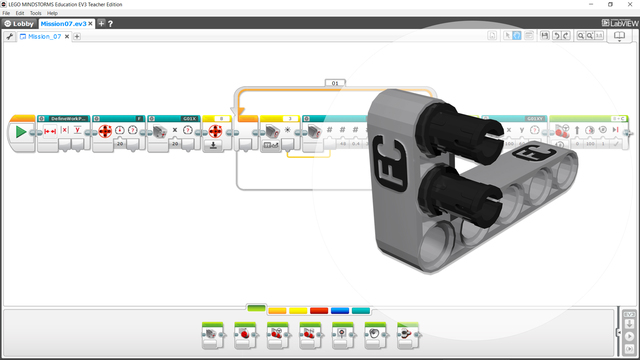
FLL 2019: Program for The City Shaper Swing (07) Robot Game Mission
Program for the FIRST LEGO League 2019 City Shaper Swing mission. The attachment is attached on the robot and it we just start the program
- #7cld4p
- 07 Aug 2020

FLL 2019: Program for The City Shaper Elevator (08) Robot Game Mission
EV3-G program developer for the FIRST LEGO League 2019 City Shaper Elevator Mission. The robot calibrates the possible of the attachment and then moves forward and backward to complete the mission
- #oc0tpa
- 07 Aug 2020

- #ive3kc
- 07 Aug 2020

Scratch (World Block) program to accomplish FLL 2019 M8 Elevator Mission with SPIKE Prime robot
The program should be easy to execute. It basically moves the robot forward
- #dp3yxn
- 01 Jun 2020
Accurate Turn Block for LEGO Mindstorms EV3 Robots, written in EV3-G
MyBlock that makes a turn on specific degrees with minimal inaccuracy.
Input parameters:
- TurningAngle - The angle on which you want to turn your robot.
- MotorPower - The power with which your robot will rotate at first time
- CorrectionPower - The power with which your robot will correct it's turning to make it perfect
- #xyvsjw
- 01 Jun 2020
Scratch (Word Block) program for FLL 2019 The City Shaper Elevated places (01) Robot Game Mission With Spike Prime
When running the program place the robot as already aligned to the black line before the mission model
- #riq6uw
- 01 Jun 2020
Smooth Turn Block for LEGO Mindstorms Robots written in EV3-G
The block that constanlty increase the speed while turning. The goal of this is to reduce the acceleration of the robot when it starts turning so that no modules will fall.
There is only one input parameter in this block and this is the Angle on which you want your robot to rotate.
- #q3087g
- 01 Jun 2019

Module With Aligning Attacher for M08 - Aerobic Exercise - program
This Program controls the Module With Aligning Attacher for M08 - Aerobic Exercise. This is a demo program to show how to move robot acurately to the modul. Also how to attach the robot to the modul and acomplish the mission.
- #1zfoc7
- 27 May 2019

Program for Self Aligning Module Attacher for M06 - Space Station Modules
This is the program for the self aligning passive attachment for rendezvous and meeting between the tube module and the habitation hub. The material is Self Aligning Module Attacher for M06 - Space Station ModulesCreator
- #3qwcl5
- 27 May 2019
Nightbeast FLL Program Run 1
The program that Nightbeast team use for their first Run in FLL Into Orbit Challange. In this run they solve two missions: SpaceTravel and Solar Panel .
- #lzthqr
- 27 May 2019
Nightbeast FLL Program Run 2
The program that Nightbeast team use for their second Run in FLL Into Orbit Challange. In this run they Inserts the Tube Module into the Habitation Hub port on the west side, move all four Core Samples so they are no longer touching the axle that held them in the Core Site Model and place the Gas Core Sample completely in Base.
- #9qkh3e
- 27 May 2019
Nightbeast FLL Program Run 3
The program that Nightbeast team use for their second Run in FLL Into Orbit Challange. In this run they еject the 2x4 Brick by placing a Regolith Core Sample into the 3D Printer, make the Crater Crossing mission and scores a meteoroid (shoot a ball).
- #r49ncv
- 27 May 2019
Nightbeast FLL Program Run 4
The program that Nightbeast team use for their second Run in FLL Into Orbit Challange. In this run they tries to make missions M10–Food Production, M12–Satellite Orbits and Move the Cone Module to base. But this program should be upgraded.
- #en09y3
- 27 May 2019
Nightbeast FLL Program Run 5
The program that Nightbeast team use for their second Run in FLL Into Orbit Challange. In this run they solve Mission 11–Escape Velocity and Mission 13–Observatory.
- #u86d31
- 27 May 2019

Lifter - an attachment for SUV Box Robot and Into Orbits M09–Strength Exercise Program
This program is for Lifter - an attachment for SUV Box Robot and Into Orbits M09–Strength Exercise material. In this program you may need to change the values in the Wait - Color Sensor blocks if the program is not working properly. The program ses also Gyro sensor, that mean that you have to check do you have a gyro drift. If you have such, turn of the robot and start it again. After turning it on, do not touch the robot until it is completely loaded and ready to run. In that way you are going to cancel the gyro drift.
- #hm9c06
- 27 May 2019

FLL 2018: Attachment To Accomplish The Into Orbit Space Walk Emergency (07) Robot Game Missions - Program
This Program controls the FLL 2018: Attachment To Accomplish The Into Orbit Space Walk Emergency (07) Robot Game Mission. This is a demo program to show how to use this attachment. Also to use this program with 100% succes rate you will have to use starting guider in the base.
- #w415dz
- 19 May 2019

Display Array Blocks
This is an EV3-G block for displaying the values of array cells in an EV3-G program.
Project
The project contains two programs, which are demos of the blocks for displaying Boolean and numeric arrays.
Two blocks
You can import that blocks in your programs. They are designed to show you in real time what are the values in your array and let you go to the next bit of your program. The blocks operate with the UP and DOWN brick buttons to iterate through the array. And the CENTER brick button to advance to the program.
The blocks are very useful for students to show them in real time what values they have stored in their arrays. Because there is no easy way to see real-time what the values are in the array even if it contains only a few elements.
The block shows you how many elements there are in the arrays and the values in the following way:
For Numeric

For Boolean

- #f4c710
- 21 Jan 2018