Пример как да използваме блокче за проверка "ако"
Ако за първи път чувате за блокче за проверка, изгледайте следното видео.
- #1604
- 30 Mar 2020
Ако за първи път чувате за блокче за проверка, изгледайте следното видео.
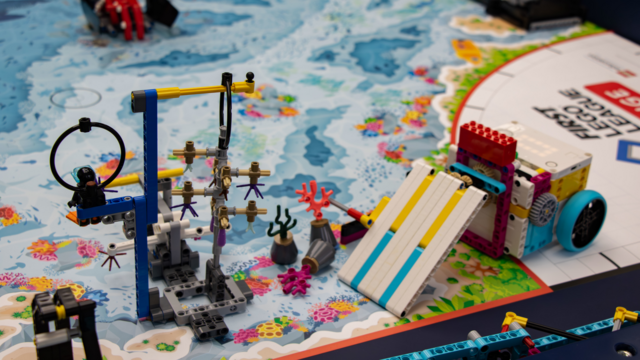
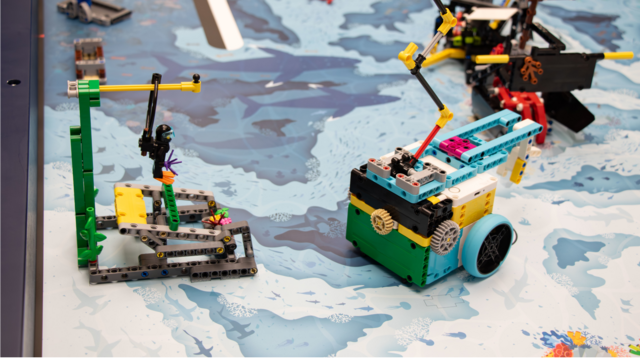
This video tutorial demonstrates how the MiniBox robot completes M11 and M15 of the FIRST LEGO League 2023-2024 MASTERPIECE Challenge season. The robot is a LEGO Education SPIKE Prime box robot, equipped with a mechanism to rotate the M11 Light Show tower. However, we've opted for a more interesting approach. Let's check it out in the video!
This is a 10 out of 10 video recording about the FIRST LEGO League 2020 RePlay competition and the mission called Boccia Target. We are using LEGO Mindstroms Robot Inventor. The 10 out of 10 recording shows how reproducible the solution to the mission is. You will see a demonstration of a complex attachment that does 3-4 things at once - it alights, pushes, drops, which are all things that are commonly seen at FLL competitions.
This robotics tutorial is about the different tools that you could use to collect the balls in a pipe on a FIRST Technical Challenge competition.
This is a 10 out of 10 video tutorial, in which we demonstrate how Kufar, a LEGO Education SPIKE Prime out-of-box robot, accomplishes M03, M15, M11, and M04 of the FIRST LEGO League 2023-2024 MASTERPIECE Challenge season ten times in a row!
As we said in the previous tutorial, Kufar executes several complex moves while navigating the mat. At the front, the robot features a scissor-like attachment triggered by rubber bands. At the back, there is a mechanism that carries a couple of mini-figures and the M04 art piece. Enjoy!
In this video tutorial, we push two of the mission models with a pinless active attachment with gears. The goal is to push the mission models after the blue lines. This attachment is interesting as it demonstrates a non-straightforward idea of how we can push the mission models. We explain the Scratch program and how we use the motion sensors - you will learn how to turn to a specific angle by using the motion sensor.
In this video tutorial we demonstrate the importance of properly shielding and protecting the light/color sensors of your LEGO Mindstorms Robot Inventor robots. These principles generally apply for all kind of robots. The problem is that external light sources from the venue could change the behavior of the robot - like have you ever been to a competition venue where the lighting just makes the robot behave in different ways? - well this tutorial is for you!
This is a 10 out of 10 tutorial demonstrating the accuracy of an active gear attachment that accomplishes the Treadmill mission from the FIRST LEGO League 2020 RePlay competition. When the robot is well aligned to the line before that it is easy for the robot to accomplish the mission. You will see how we make use of the friction of the wheel to rotate the mission model.
In this FLL video tutorial we accomplish the step counter mission. We use a LEGO Mindstorms Robot Inventor robot. The idea of the mission is to control the robot in a very precise way so that it could slowly push on the mission model and accomplish it. In the tutorial we demonstrated exactly this slow push, but in a different way.
We have two power sources (batteries) - one power source is for the controller, the Raspberry PI, and one power source is for the motors. What is the separation between the power sources and why it exists? Why do we need two power sources? We need the different power sources because there is not enough power otherwise.
This is a 10 out of 10 tutorial in which we focus on accomplishing M02 and M15 of the FIRST LEGO League 2023-2024 MASTERPIECE Challenge competition. We use the MiniBox, a LEGO Education SPIKE Prime box robot.
In this scenario, the robot uses a complex attachment that combines several mechanisms. One of these mechanisms is detachable, meaning it disconnects from the robot after pressing down and changing the scenery of the M02 Theater Scene Change. Once this mechanism is activated, it triggers the rubber band mechanism, which collects the M15 minifigure. Be sure to study the attachment carefully before attempting to complete these missions.
Here, we discuss the effects of applying this method to the two-state duck-following algorithm.
In this video tutorial, we accomplish three missions in a row. It is a little longer and more detailed tutorial, but hey, 3 missions, one after the other. These are the Wind Turbine, where we have to push 3-4 times and collect the energy units, the Watch Television, where we reach the mission model and slightly push, and, of course, the Rechargeable Battery - where we collect the energy units.
Instead of aligning forward as in the previous tutorial we felt there is a need to demonstrate how we could align backward when moving with the robot. This is not a rare case. The attachments of the robot are generally at the front of the robot and especially during FIRST LEGO League competitions the robot must move backward very often. It is helpful to have in your toolbox the ability to align backward with the robot.
This video tutorial is about a detachable attachment. In various FIRST LEGO League competitions there are missions that could be accomplished with an attachment and when you accomplish the mission you must somehow leave the attachment along with the mission model. Probably as a support - most of the time it is as a support. But we've seen some pretty powerful concepts that include things like leaving a clock mechanism that will continue to work for 30 seconds accomplishing the mission.
10 out of 10 tutorials are about accomplishing missions in a reliable and repeatable way. In this video tutorials we accomplish the Step Counter mission 10 out of 10 times. We can push on the mission model, but if we push too hard we would lock it and there is no way back. So we use a slightly different approach. Check out the video to see how.
In this video tutorial we accomplish the Pull-Up bar mission from the FIRST LEGO League 2020. This is a 10 out of 10 tutorial for demonstrating the accuracy of the robot and the attachment. What you will learn is how a two part attachment works.