
Arduino IDE libraries dependencies
Some programs use preinstalled libraries, and running them from your machine may result in errors while uploading the program. In this tutorial, we will learn to identify such errors and fix them.
- #2712
- 04 Nov 2026
Some programs use preinstalled libraries, and running them from your machine may result in errors while uploading the program. In this tutorial, we will learn to identify such errors and fix them.
In the previous lesson, you assembled the electronic circuit for your memory game. Now it's time to bring it to life!
In this lesson, you'll learn how to upload a ready-made program to your ESP32 controller so your memory game can start working. You won't need to write any code.
You'll follow these steps:
Download the program: Get the ready-to-use code for your memory game.
Install Arduino IDE: Set up the software used to upload programs to electronic controllers.
Configure the controller: Select the correct ESP32 board type in Arduino IDE.
Connect the ESP32: Connect your controller to your computer using a USB cable.
Upload the program: Transfer the program to your ESP32 and get the game running.
By the end of this lesson, you'll have a fully working memory game that you can test and play.

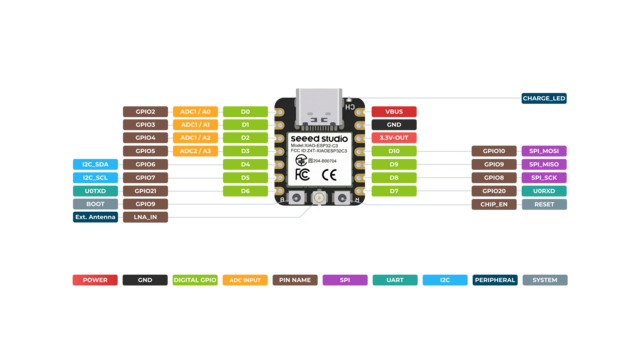
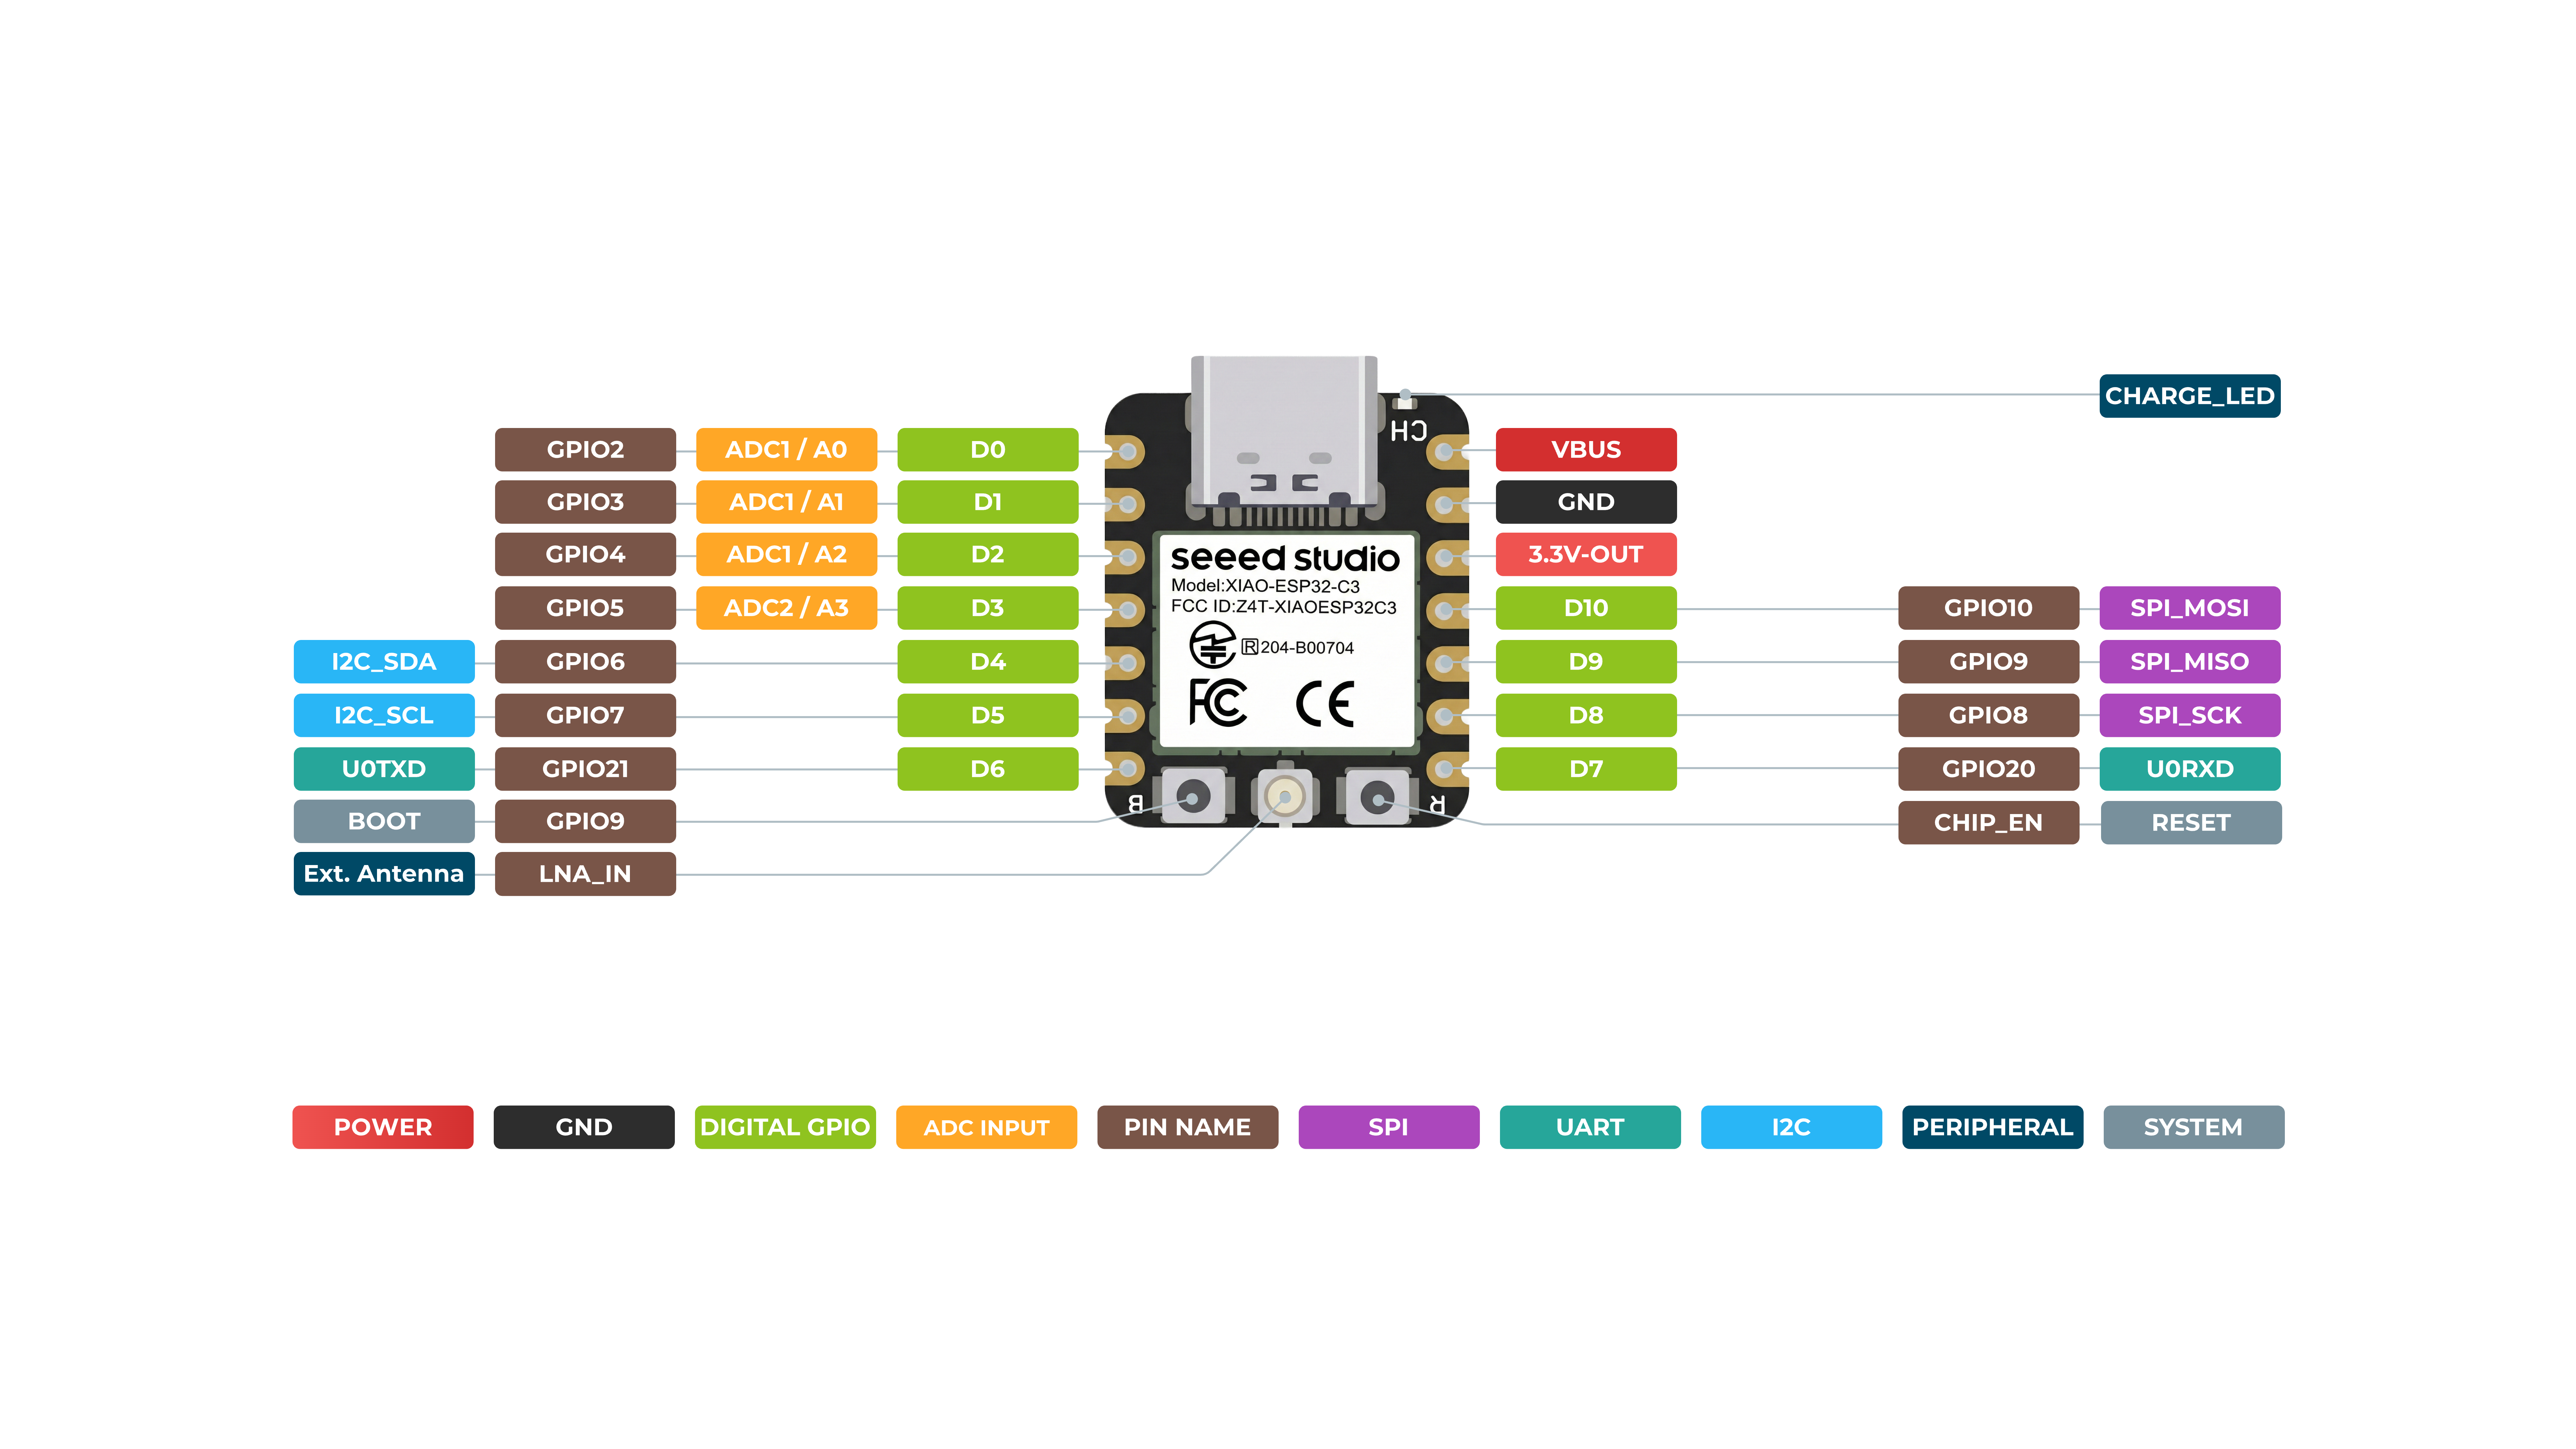
The Seeed Studio XIAO ESP32C3 is a tiny programmable computer. It can switch on lights, listen to sensors, control gadgets, and even communicate using Wi-Fi and Bluetooth.
In this tutorial, we will go over its pins and what they do.

SPI (Serial Peripheral Interface) is a communication method that allows electronic devices to exchange information quickly.
In this lesson, you will learn how SPI works, what wires it uses, and why it is useful. People commonly use SPI to connect microcontrollers to sensors, displays, and memory modules.

Here’s a list of all the parts you need to build the table tennis scoreboard. Each part links to Amazon. If a link doesn’t work, don’t worry - we’ve also added tips on how to find a replacement.

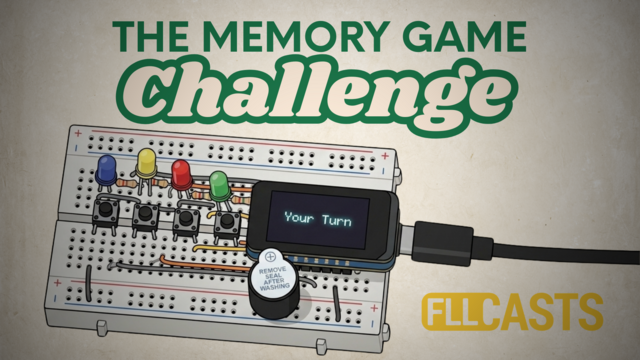
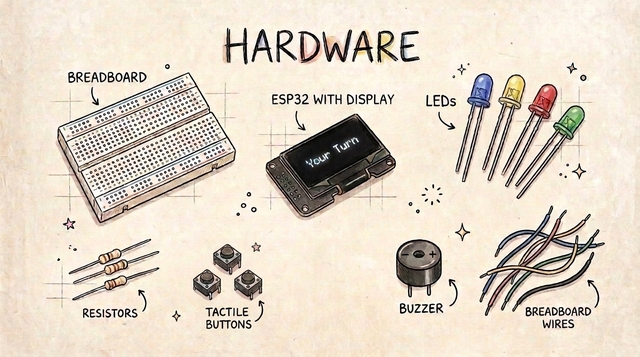
In this self-paced, beginner-friendly online course, you will learn how to create a memory testing game. And don’t worry if you’ve never wired a circuit or touched an ESP32 before. We guide you from the very first step all the way to powering on your finished game.
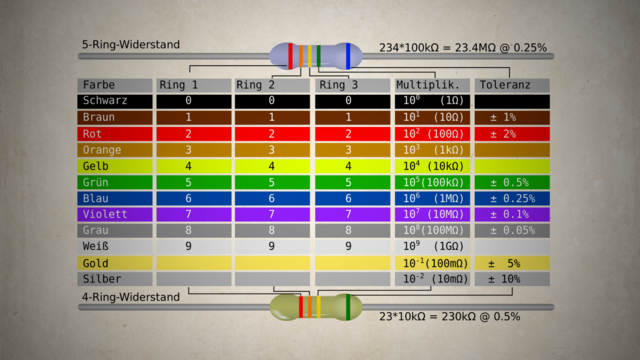
By the end of this journey, you’ll both have learned how to read resistor color codes and work with common electronic components - all while building something that looks impressively “advanced” but is totally achievable for beginners.
Before you jump into the build videos, this first lesson gives you a clear picture of what you're creating - and what materials you’ll need to make it happen. We want you to have full confidence in what you’re investing in. There are no surprise expenses later: everything required is listed upfront, along with tips on where to buy each part.
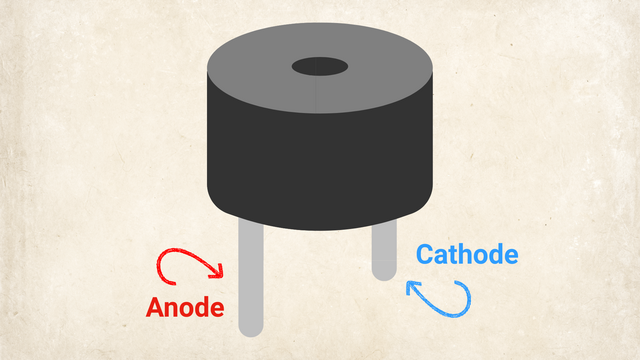
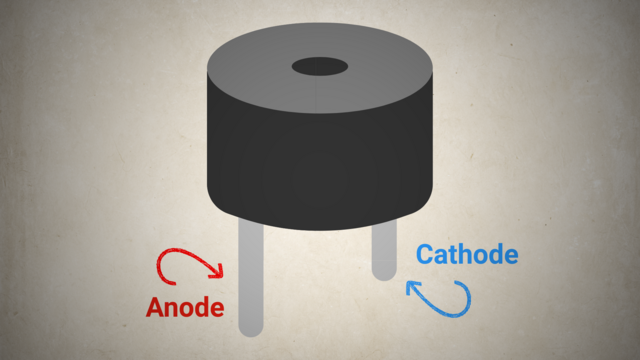
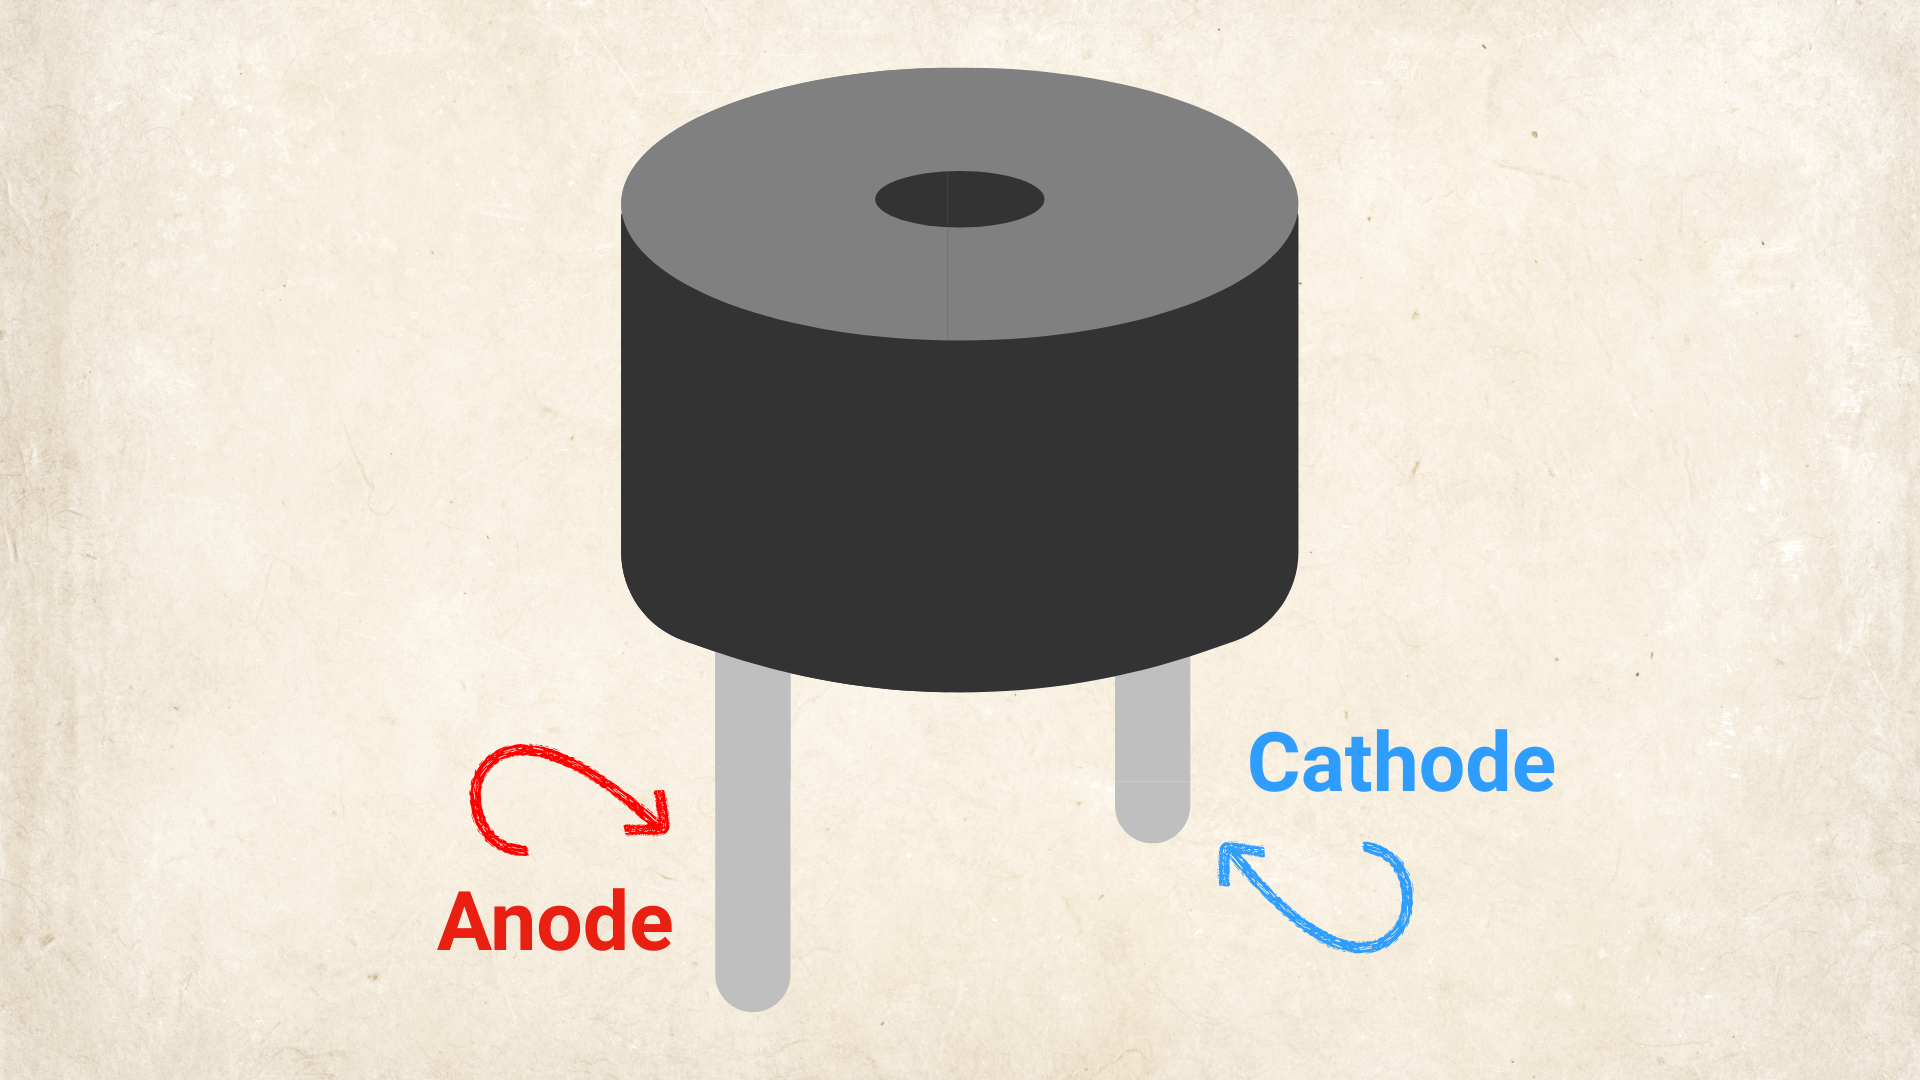
When you need a loud, straightforward alert for a project, like a timer, a security alarm, or a button-press confirmation, you don't always need complex music or variable tones. Active buzzers are simple "plug-and-play" components. Give them power, and they instantly make noise, saving you code and wiring hassle.
In this quick tutorial, you'll discover:
What an active electronic buzzer is and how it differs from a passive one.
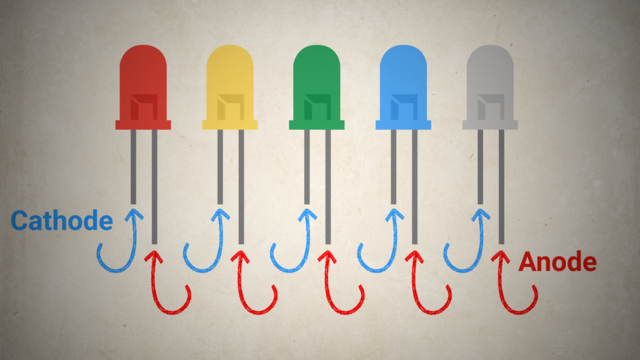
How to identify the anode (+) and cathode (-) pins.
How to wire and trigger an active buzzer using simple DC power or a microcontroller.
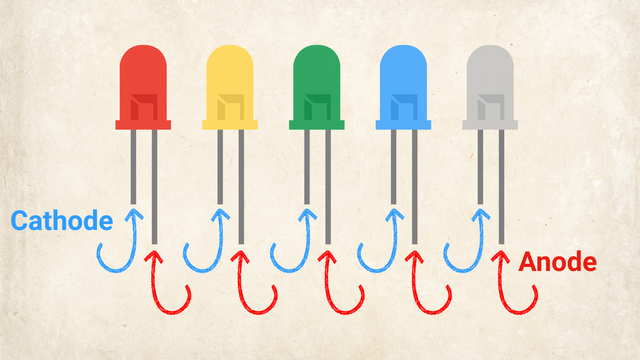
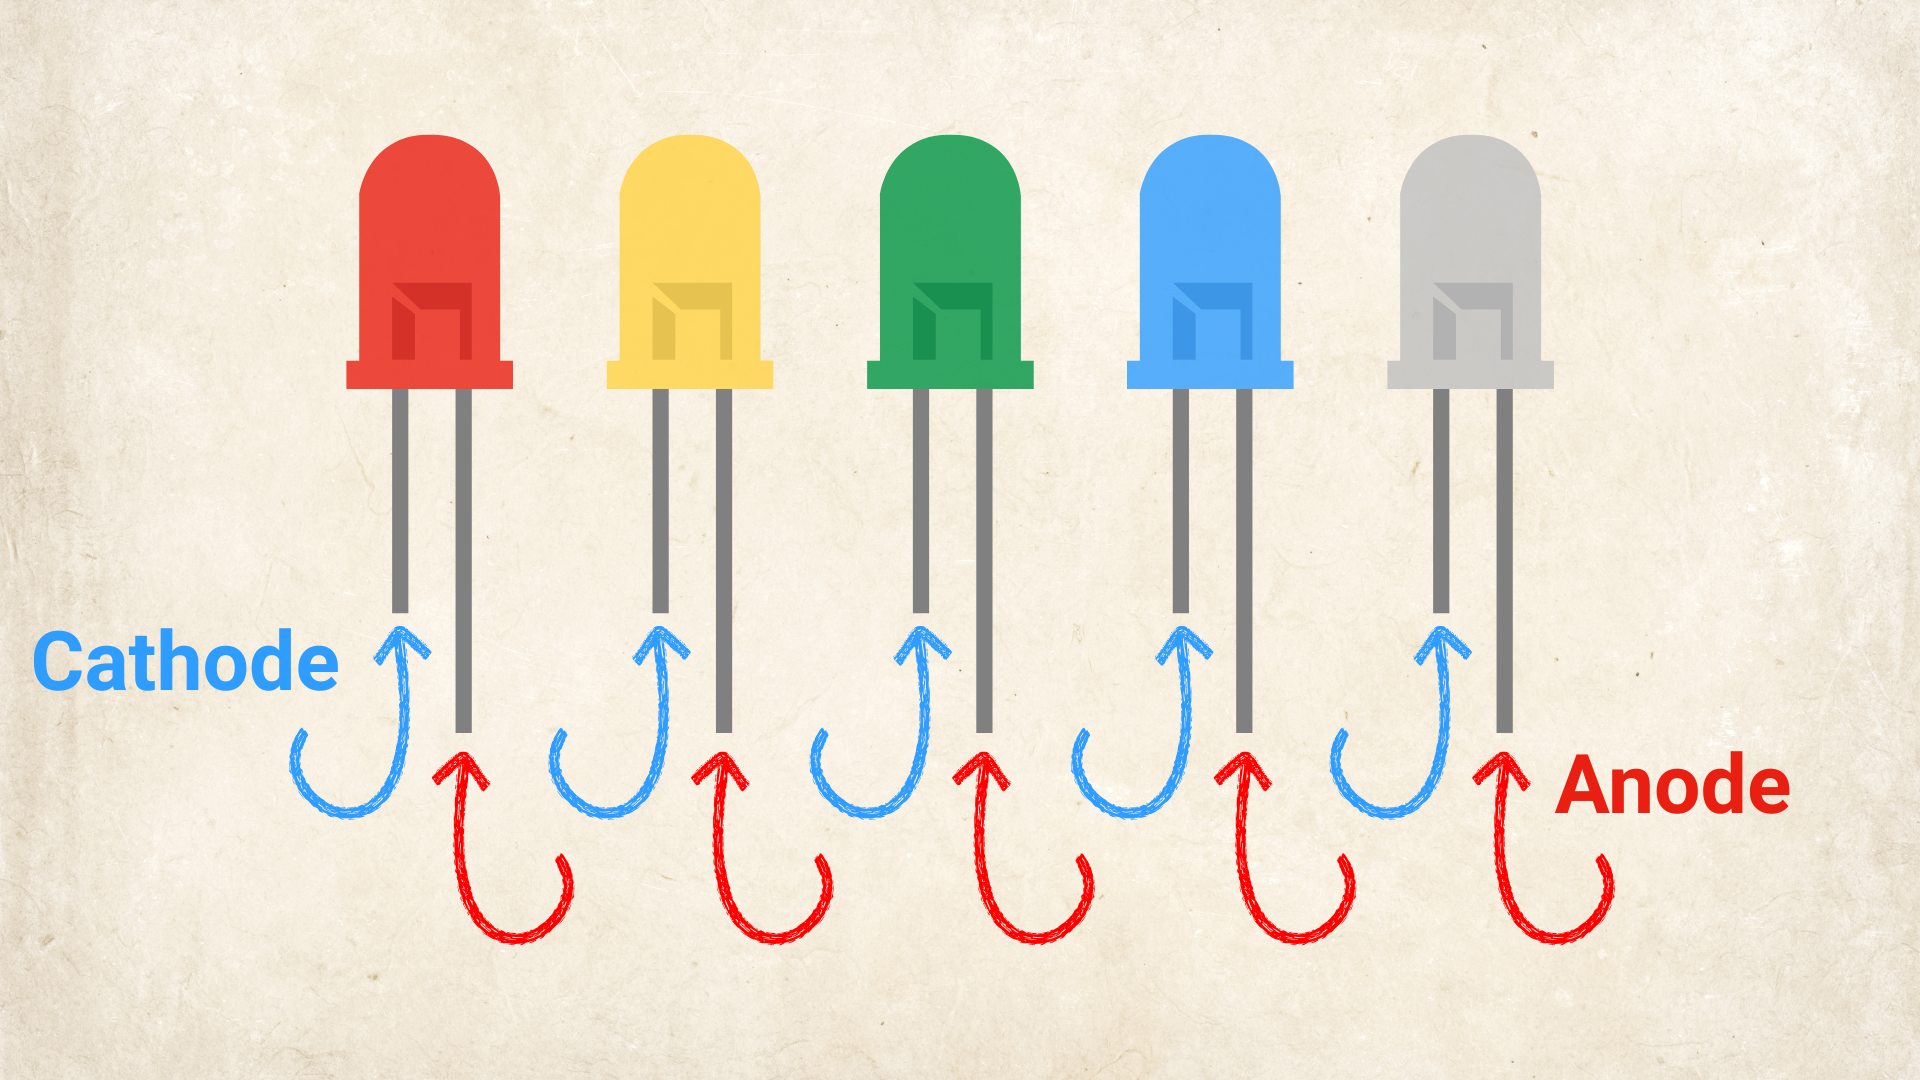
This tutorial covers the fundamentals of LEDs: how they function, how to identify their terminals, and how to safely power them without damaging the component.
Understanding LEDs is essential because they are the standard light source in modern electronics. Used in phones, monitors, custom PC builds, and basic microcontrollers like Arduino or ESP32.
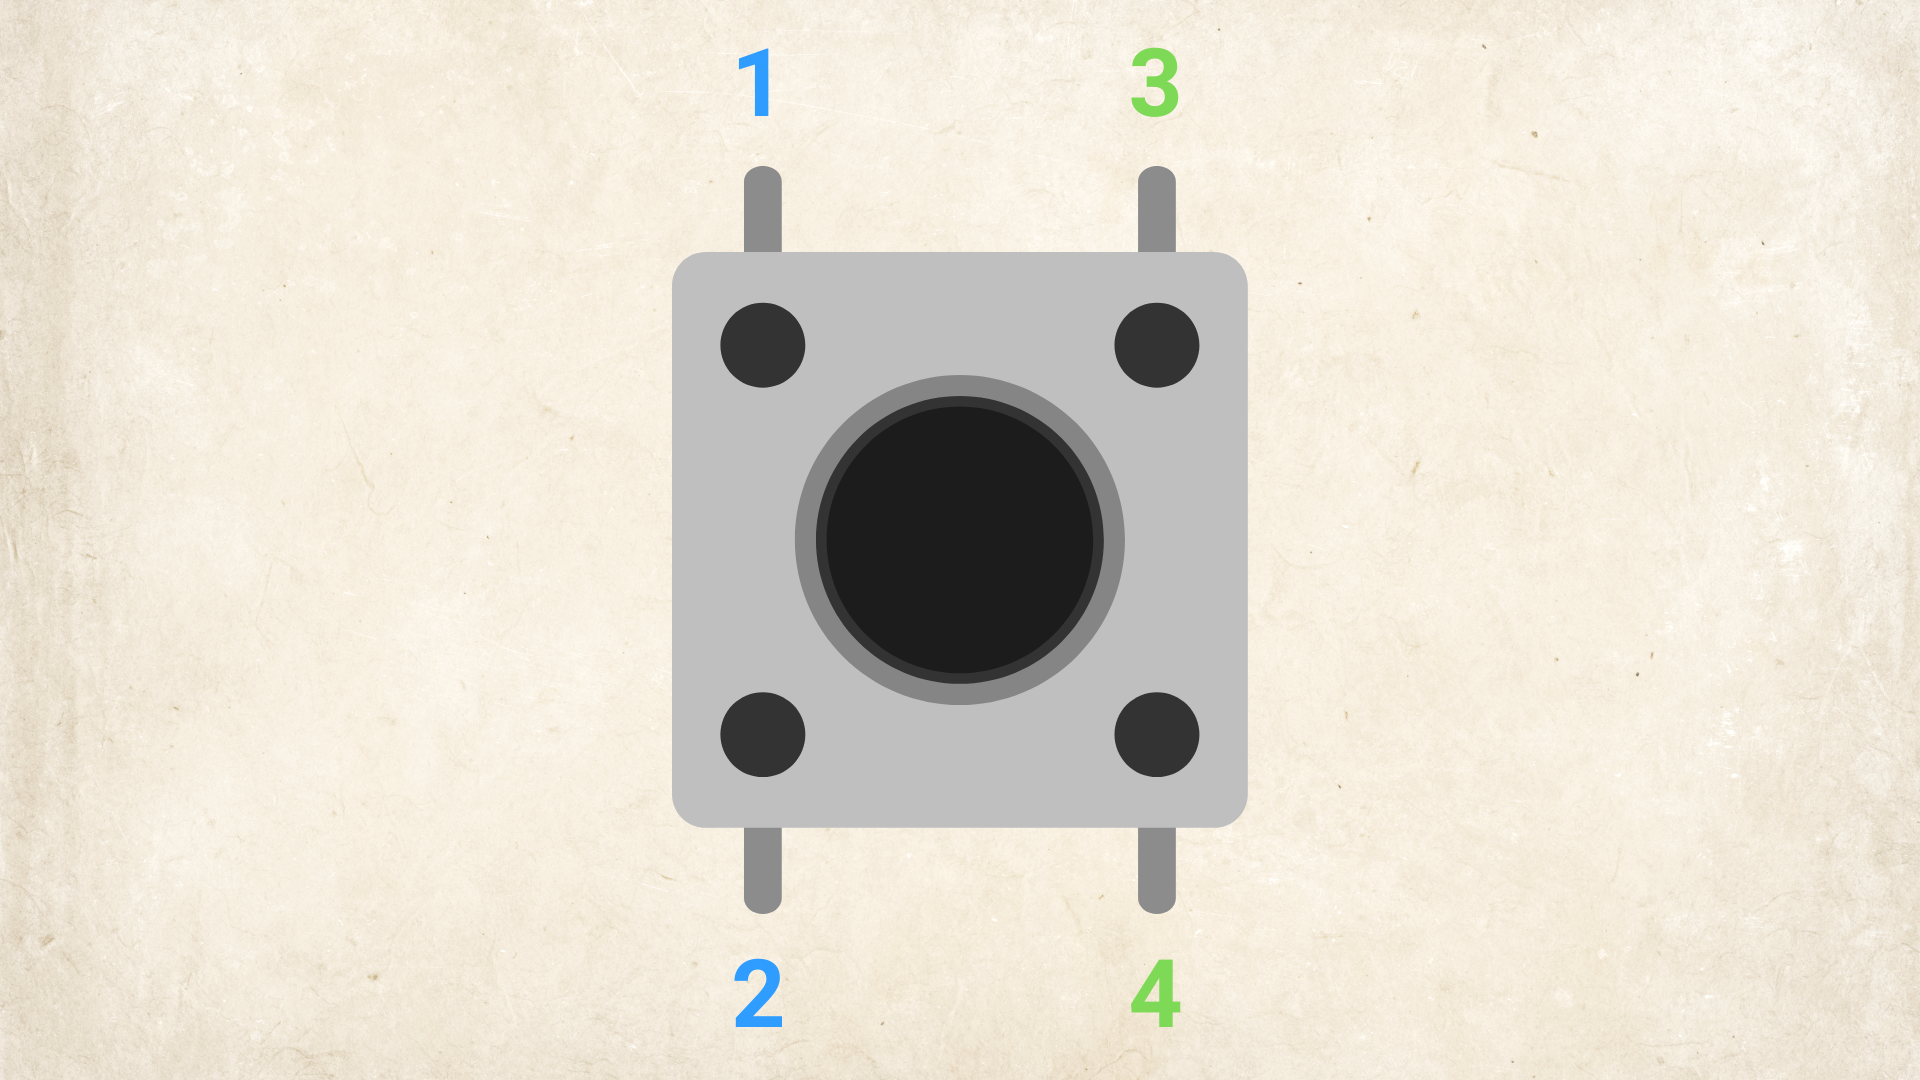
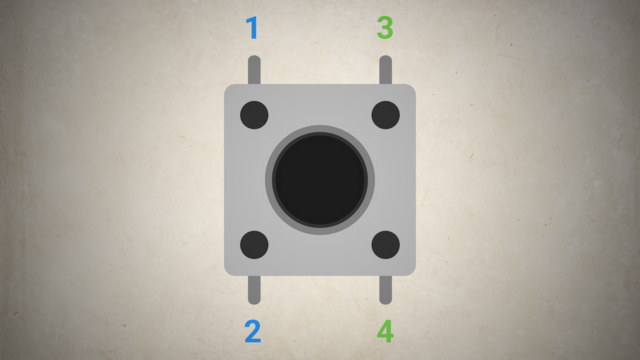
Push buttons allow users to interact with electronic circuits. Whether you are building an Arduino project, a game controller, or a custom gadget, you need these buttons to trigger actions, start programs, or change settings.
What you will learn:
What a tactile push button is.
How the 4 pins connect internally.
How to place the button correctly on a breadboard.
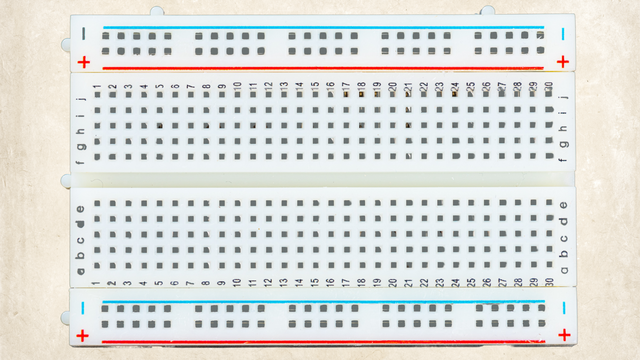
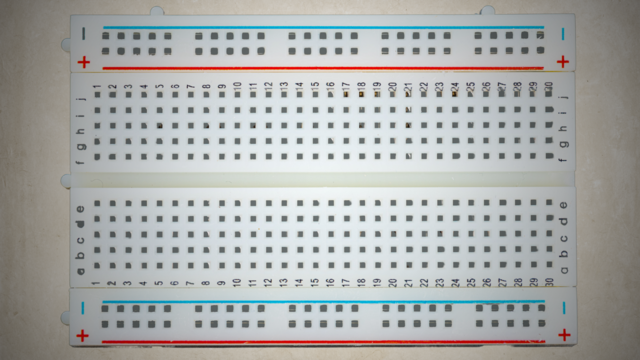
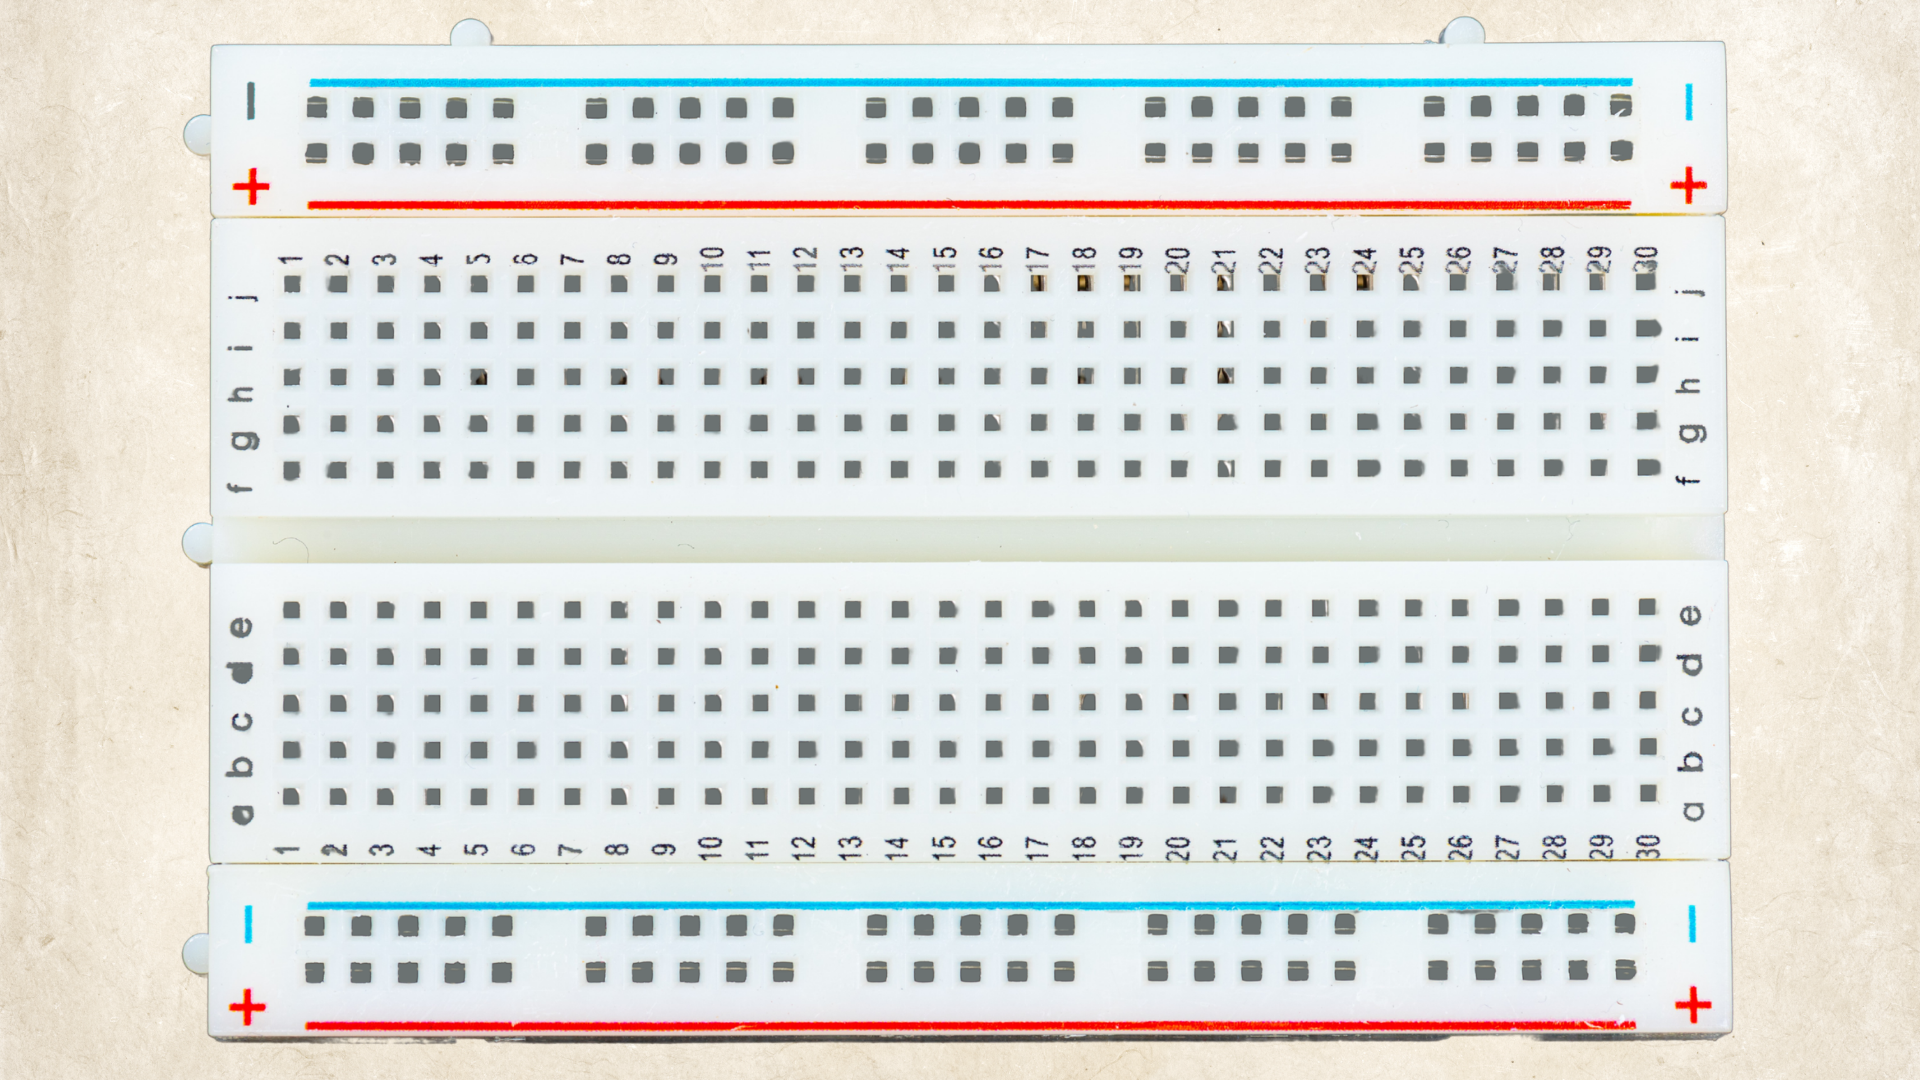
A breadboard is your best friend for prototyping. It lets you test circuits safely, make mistakes, pull wires right back out, and try again in seconds, all without needing any special tools.
In this tutorial, you will learn:
What a breadboard actually is and why it has that weird name.
How the secret hidden connections work underneath the plastic.
How the rows and columns are marked so you never plug a wire into the wrong spot.
Here’s a list of all the parts you need to build the Memory Game Challenge. Each part links to Amazon. If a link doesn’t work, don’t worry - we’ve also added tips on how to find a replacement.

In this self-paced, beginner-friendly online course, you and your child will learn how to create a rotating LED strip display—a glowing clock that seems to paint time in mid-air. And don’t worry if you’ve never soldered, wired a circuit, or touched an Arduino before. We guide you from the very first step all the way to powering on your finished display.
By the end of this journey, you’ll both have learned real hands-on skills—like how to solder, drill clean mounting holes, read resistor color codes, and work with common electronic components—all while building something that looks impressively “advanced” but is totally achievable for beginners.
Before you jump into the build videos, this first lesson gives you a clear picture of what you're creating—and what materials you’ll need to make it happen. We want you to have full confidence in what you’re investing in. There are no surprise expenses later: everything required is listed upfront, along with tips on where to buy each part.

The hall effect sensor can't detect a magnet, without there being one in the first place. While we can use glue or other ways of attaching a magnet to the clock face, we decided to use a second magnet on the other side of the face to hold the main one attached to it.
Make sure the connection between the clock arm and the clock's body is strong. Otherwise, it may sleep when you turn it on.
The 330 Ω resistor on the LED strip’s data pin acts like a tiny speed bump for the signal. It protects the LEDs by keeping the data signal from being too strong or too fast, which helps the strip work correctly and last longer.
The ground connection to the LED strip can be connected to any ground connection of this circuit. There is no danger of anything burning.
Be careful with the power connection of the LED strip. If you connect it to the 9V battery line, it will fry the LED, and the strip will be ruined.
Measuring the center of mass of the arrow arm, in its unfinished form, will be inaccurate, but we can come closer to being accurate if we place as many of the components on it before making our guess.
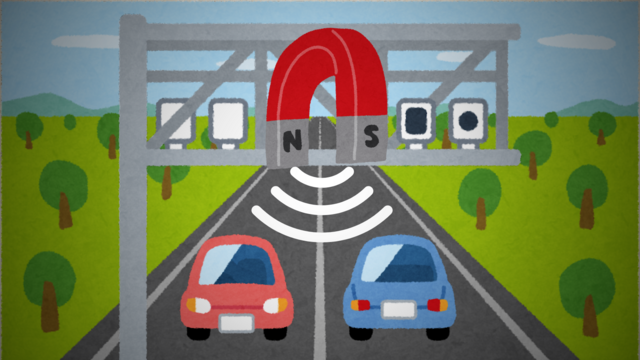
A pull-down resistor keeps the Hall sensor’s signal at zero when no magnet is near. Without it, the sensor could get confused and give random on/off signals. It makes sure the circuit can clearly tell when a magnet is present or not.
A Hall effect sensor is basically a tiny magnet detector. When a magnet comes near it, the sensor can “feel” the magnetic field and tell the circuit, usually by turning its output on or off. We can use it to detect things moving, like wheels spinning or doors opening.
Some microcontroller pins can act like tiny batteries (power) or tiny paths to ground. By setting a pin HIGH, it gives a little voltage to power something. By setting it LOW, it acts like ground, letting current flow back. This is useful for testing or powering small sensors,
In short: Hall sensors feel magnets, and digital pins can sometimes act like tiny power sources or grounds to help run them.