In many tasks and challenges students will have to upload a picture to the platform as a form of validation that they've completed the tasks.

Необходимо е да се абонирате за FLLCasts.com, за да достъпите това видео
- #793
- 22 Mar 2018
- Electronics
- Learn At Home, Reverse Engineering, Raspberry PI, Teacher's Note, Basic, Classes with students
How to take a screenshot
If required students must take a screenshot of their current computer screen and upload it. Print Screen button is located in the upper right section of the keyboard. Then it is just Browse... that's it.
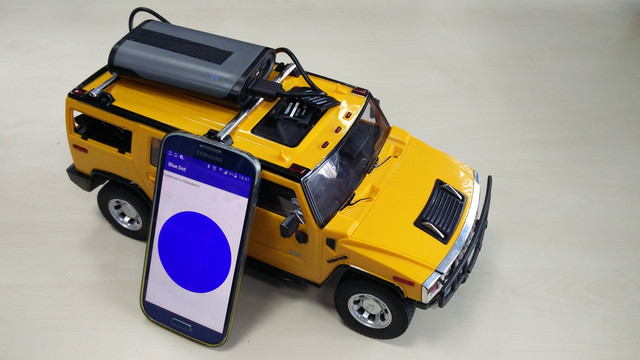
How to take a picture with the phone
The students might be logged in to the platform from their phones. They could directly use the phone to upload a picture using the browser on the phone. Or if they are not logged in from the phone, they should download the picture from the phone to the computer. Generally, this happens with Bluetooth or with a USB cable.
Why
Pictures help keep a record of the achievements. You can confirm the completion of the task based on this pictures. The pictures could also be shared with other groups of students as a form of clarification of what exactly should be done and how others have done it.
Курсове и занятия включващи този Урок
Този Урок е използван в следните курсове и занятия.
Perfect STEM course. Module 1 - Smart Car with Raspberry PI
Disassemble a remote control car. Change the brain of the car with a smart computer like Raspberry Pi. Build a smart device with artificial intelligence that you could control from your phone and that could freely navigate itself in the real world and on the Internet. Use your hands. Develop programs for your robot and your phone. Be curious and invent.
The perfect course lives up to its name. You move through the content, we check it and return feedback to you.
In the end, you should be able to better understand how to program and design smart devices that would make the world a better place. For everybody age 12+, 16+, 21+, 35+, etc. The hardware costs about 150$. It changes through the years so it might take some time for you to find it as Raspberry PI, motor drivers, power banks and h-bridges.. they change. Note that the course was designed to be led by a teacher with a decent knowledge in embedded hardware and software. This, on the other hand should not stop you, if you are curious.
- 118
- 42:47
- 136

Closing the car
After we've placed the Motor Driver, the Raspberry Pi and all the other elements it is time we close the car.
- 2
- 0
- 3
- 3d_rotation 0
Perfect STEM course. Module 1 - Smart Car with Raspberry PI
Disassemble a remote control car. Change the brain of the car with a smart computer like Raspberry Pi. Build a smart device with artificial intelligence that you could control from your phone and that could freely navigate itself in the real world and on the Internet. Use your hands. Develop programs for your robot and your phone. Be curious and invent.
The perfect course lives up to its name. You move through the content, we check it and return feedback to you.
In the end, you should be able to better understand how to program and design smart devices that would make the world a better place. For everybody age 12+, 16+, 21+, 35+, etc. The hardware costs about 150$. It changes through the years so it might take some time for you to find it as Raspberry PI, motor drivers, power banks and h-bridges.. they change. Note that the course was designed to be led by a teacher with a decent knowledge in embedded hardware and software. This, on the other hand should not stop you, if you are curious.
- 118
- 42:47
- 136

Play (with the car)
This is a remote control car. Have fun with it before disassembling it.
- 4
- 0
- 4
- 3d_rotation 0
Perfect STEM course. Module 1 - Smart Car with Raspberry PI
Disassemble a remote control car. Change the brain of the car with a smart computer like Raspberry Pi. Build a smart device with artificial intelligence that you could control from your phone and that could freely navigate itself in the real world and on the Internet. Use your hands. Develop programs for your robot and your phone. Be curious and invent.
The perfect course lives up to its name. You move through the content, we check it and return feedback to you.
In the end, you should be able to better understand how to program and design smart devices that would make the world a better place. For everybody age 12+, 16+, 21+, 35+, etc. The hardware costs about 150$. It changes through the years so it might take some time for you to find it as Raspberry PI, motor drivers, power banks and h-bridges.. they change. Note that the course was designed to be led by a teacher with a decent knowledge in embedded hardware and software. This, on the other hand should not stop you, if you are curious.
- 118
- 42:47
- 136
Marking Motors and Lights components in the Car
After opening the car you should mark all the cables before our next step is to disconnect the cables. Why is this important? Because if you lose track of which cable leads to where you will not be able to make the car work
- 5
- 0
- 3
- 3d_rotation 0
Perfect STEM course. Module 1 - Smart Car with Raspberry PI
Disassemble a remote control car. Change the brain of the car with a smart computer like Raspberry Pi. Build a smart device with artificial intelligence that you could control from your phone and that could freely navigate itself in the real world and on the Internet. Use your hands. Develop programs for your robot and your phone. Be curious and invent.
The perfect course lives up to its name. You move through the content, we check it and return feedback to you.
In the end, you should be able to better understand how to program and design smart devices that would make the world a better place. For everybody age 12+, 16+, 21+, 35+, etc. The hardware costs about 150$. It changes through the years so it might take some time for you to find it as Raspberry PI, motor drivers, power banks and h-bridges.. they change. Note that the course was designed to be led by a teacher with a decent knowledge in embedded hardware and software. This, on the other hand should not stop you, if you are curious.
- 118
- 42:47
- 136
Extending cables with Heat-shrink tubing
At the beginning of this video tutorial, we would have two separate cables. At the end of the tutorial, we would have a single, longer cable. The two cables will be connected to each other using a Heat-Shrink Tubing
- 3
- 0
- 5
- 3d_rotation 0