Yes, we know. Starting with the phone when you have a toy car and a Raspberry Pi might seem strange, but this is why we do it.

Необходимо е да се абонирате за FLLCasts.com, за да достъпите това видео
- #712
- 01 Feb 2018
- 1:46
How are we going to arrive at a working car?
Here is a very short summary of the steps and explanations for you to be prepared:
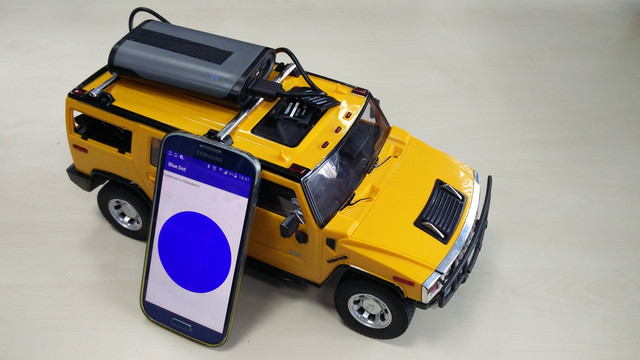
- Download an application on the phone that could communicate with the device. This application is developed by us.
- Start the application and see that nothing happens, because there is nothing to communicate with.
- Power the Raspberry PI and see that even though we have powered it we cannot communicate with it.
- Prepare the SD card with the operating system for the Raspberry Pi.
- Plug the SD card in the Raspberry Pi and a diode will blink.
- Connect with the Phone to the Raspberry Pi.
This is the short summary. First, we start with setting up the phone and we continue from there.
English
The next step of the course is to prepare your phone. And it might sound very strange to start with the phone when you have a remote control car and a Raspberry Pi but it's really mandatory and this is why we are doing it. It is the easiest way to get going and to actually start with something that is already working. And our first goal is to be able to communicate between the phone and the Raspberry Pi right here. And how do we establish this connection? It will take some time to do this. And the general way in which we are doing it is the following. We first download an application to the phone. And this application is developed by us and it could communicate with the Raspberry Pi. After we download this application we start the application and we see that nothing happens. So, we just start it and nothing happens. Then we power the Raspberry Pi with the power bank and again nothing happens. And these two devices - the phone and the Raspberry they cannot communicate with each other. Then we prepare the SD card right here. And we download and install an operating system on this card, we then take the card, plug it into the Raspberry Pi right here and then we can connect the phone with the Raspberry Pi. These are some six steps. It's a very short summary. It'll take some time so let's go.
Курсове и занятия включващи този Урок
Този Урок е използван в следните курсове и занятия.
Perfect STEM course. Module 1 - Smart Car with Raspberry PI
Disassemble a remote control car. Change the brain of the car with a smart computer like Raspberry Pi. Build a smart device with artificial intelligence that you could control from your phone and that could freely navigate itself in the real world and on the Internet. Use your hands. Develop programs for your robot and your phone. Be curious and invent.
The perfect course lives up to its name. You move through the content, we check it and return feedback to you.
In the end, you should be able to better understand how to program and design smart devices that would make the world a better place. For everybody age 12+, 16+, 21+, 35+, etc. The hardware costs about 150$. It changes through the years so it might take some time for you to find it as Raspberry PI, motor drivers, power banks and h-bridges.. they change. Note that the course was designed to be led by a teacher with a decent knowledge in embedded hardware and software. This, on the other hand should not stop you, if you are curious.
- 118
- 42:47
- 136

Set up phones
Yes, we know. Starting with the phone when you have a toy car and a Raspberry Pi might seem strange, but this is why we do it.
- 5
- 0
- 1
- 3d_rotation 0