Based on feedback from many of you in this episode I would like to show you how to build an active attachment that changes the orientation of a gear wheel placed vertically to a gear wheel placed horizontally. This attachment could be used in competitions and shows a basic principle of changing the orientation. All attachments could follow the same principle.
- #55
- 16 Oct 2014
- 6:56
This video is all about constructing and is starting a news series. Appart from changing the orientation I also stop at how to improve the stability of the construction which would be shown in Episode 56
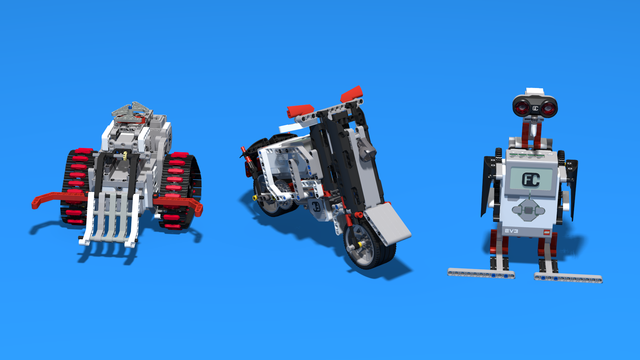
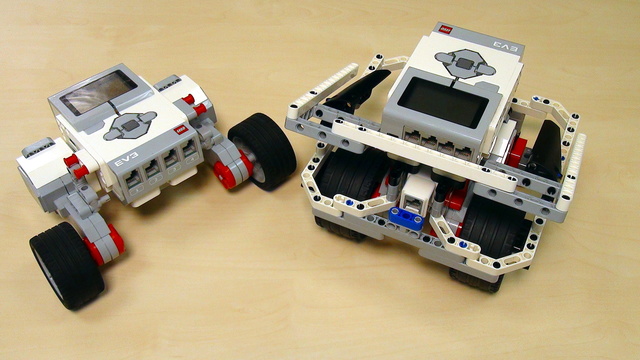
The robot used will be presented in next videos.
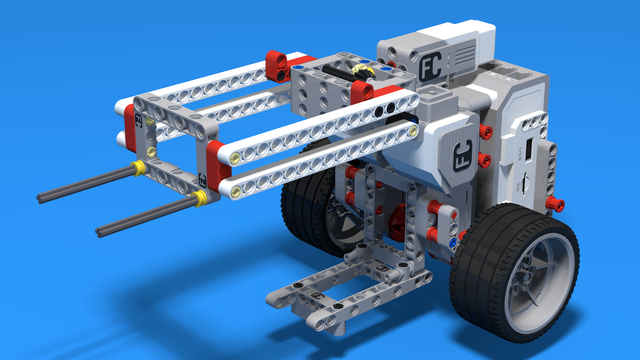
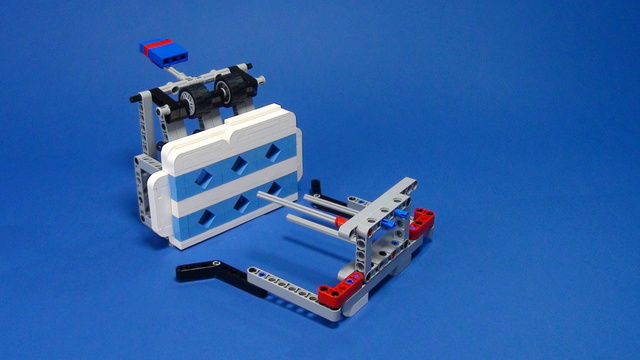
Active attachment for changing gear orientation
Building instructions for a LEGO Mindstorms EV3 Active attachment for changing gear orientations

![]()
English
In this video I would like to show you how you can change the direction of a gear that's positioned vertically, like this, to a gear that's positioned horizontally. Given that we have our current competition robot and the motor is positioned in a way that the gears are vertical, we would like to transfer the movement to a gear that is horizontal. A useful example is if you'd like to accomplish the following mission - lift the flag (this is from the Senior Solutions, I think). If we can transfer the movement from vertical to horizontal, we can, for example, use this to lift the flag.
Now, let's start from what is initially given. We have our robot with a motor at the front. We will attach one of the gears to this motor. Like this. And now we should find a way to position this gear horizontally so that both gears work. We can do this in several different ways and I'll show you just one of them. For example, we can use the following parts. It will be an attachment that looks something like this - at the front of the robot. Let's try it.
OK. If we place the attachment like this, we can position this on the robot but now we should find a way to position this wheel on the attachment. I know that we can use this part - with the hole in the middle.
Now we need one additional axle to actually
position the gear horizontally.
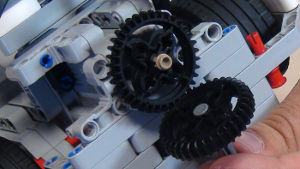
OK. Generally, this should work but as you can see, (I will lift that closer) the two gears cannot work together as there is a gap between them. Now, the question is how to solve the problem with this gap. The black gear wheels (30/60, I think) always make problems like this. There will always be a gap between the gears when you turn them from vertical to horizontal. You can solve this by using the following little yellow parts. They are a half of a Lego unit.
One half here and one half with the other gear.
Now we have both gears placed. I'll turn on the robot and I'll add the following black parts. The robot is working. This attachment could be used during the competition. It is quite easy to place as you have these two black attachments. Just attach it and make sure that both gears are connected. The robot is on. I'll try to make a small test with the motor control.
As you can see, the gears are turning. Now we can attach our beam to the horizontal gear and we could actually accomplish our mission.
I'll have to hold this.
I suppose it should be a little slower so we should program the gear. There is one more important thing to consider during the competition. It takes some time to position the attachment. I know that it seems quite easy but it might become a matter of time during the competition. Even if it is seconds. So, you can position the attachment like this.
Make sure the gears are connected. Or we can find other ways. For example, it might be easier (we should experiment with this) to use these parts. I'll remove the black ones
and position the red ones under the beams.
And attaching the attachment to the front of the robot would look something like this.
You might find this easier for some cases and harder for other cases. You could find the instructions for constructing this attachment below the video. You can use them for your robots. I would welcome any comments. Please, feel free to comment below the video.
Курсове и занятия включващи този Урок
Този Урок е използван в следните курсове и занятия.
A Robot A Day Keeps The Questions Awake
"How to use the LEGO robots to facilitate the learning of robotics by my student at home" or simply put - "what to build now?"
After enrolling in this course we will send you a few (1-2-3) emails each month with a title "A robot a 'day'". Each email contains a robot building instructions and/or video tutorials and/or tasks that should be accomplished. After a task is accomplished we might sometimes ask for a video or picture.
This process gives a structure of the learning process where you can learn from the content. The student participates in a course, but from home and on the schedule that you decide.
- 26
- 98:39
- 47
MotoCar Bot. Work with gears and levers. Two magic tricks at once. Robot 5
„Как да построим виличен повдигач, като използваме само зъбни колела и лостове без рейка“… Добре, трябва да признаем, че това е труден въпрос. Дори звучи трудно. Затова нека започнем с нещо лесно. Един ЛЕГО Mindstorms EV3 робот. Той повдига обекти във въздуха. Използва две зъбни колела, които работят заедно и се движат в различни посоки, като са перпендикулярни едно на друго… Това изречение започна отново да звучи трудно… Нека опитаме отново.
Следвайте инструкциите с тези 70+ стъпки и ще получите чудесен робот, като заедно с това ще научите лесен трик за използване на зъбни колела и промяна на посоката, в която те се въртят.
- 8
- 0
- 3
- 3d_rotation 1
EV3 Basic Course. Introduction to robot programming, construction and sensor use
This course is designed for students, mentors and teachers that are completely new to LEGO Mindstorms EV3 robots and would like to start using them to learn, in classes or at competitions. It is quite different from previously built resources at FLLCasts because it makes no assumption on any previous knowledge and tries to introduce everything step-by-step.
- 38
- 193:26
- 30
LEGO Gears. Changing Orientation
Based on feedback from many of you in this episode I would like to show you how to build an active attachment that changes the orientation of a gear wheel placed vertically to a gear wheel placed horizontally. This attachment could be used in competitions and shows a basic principle of changing the orientation. All attachments could follow the same principle.
- 4
- 0
- 0
- 3d_rotation 12
FIRST LEGO League Competition. Attachments
This course is a collection of materials for many of the attachments that we've built at FLLCasts before introducing courses. The videos were built as separate different attachments for different competitions and with the following course, we try to give it a structure.
- 60
- 347:26
- 0

How to on Attachments with Gears
Зъбните колела могат да бъдат силен инструмент в ръцета на този, който знае как да ги използва. В този материал ще се запознаем с основни определения и понятия , свързани със зъбните колела.
- 6
- 0
- 0
- 3d_rotation 8

FIRST LEGO League with LEGO Education SPIKE Prime. "Challenge" competition for 9-16 years old
This is the most detailed course we've ever created on preparing for a FIRST LEGO League robotics competition. It focuses on using LEGO Education SPIKE Prime to build a simple Box Robot. The course includes 25 lessons, making it suitable for both beginners and advanced students. It builds on over 10 years of experience providing example solutions and explanations for FIRST LEGO League robotics competitions.
This course is one of the popular courses in the FIRST LEGO League Robot Game. The Complete Guide. We highly recommend checking out the full guide!
- 40
- 127:22
- 24

Active Attachments for changing gears orientation
We call active attachments those that are powered with a motor. This one is in the the mission of lifting levers which is common at robotics competitions like FIRST LEGO League/World Robotics Olympiad. The attachment uses Luly, a small LEGO Education SPIKE Prime competition robot with 3D building instructions as a robot base.
- 4
- 0
- 1
- 3d_rotation 7

FIRST LEGO League with LEGO Mindstorms Robot Inventor. "Challenge" competition for 9-16 years old
The goal of this course is to take you through some of the most useful principles for building and using attachments to accomplish missions at FIRST LEGO League competitions. The whole course is based on a LEGO MINDSTORMS Robot Inventor and you need a single 51515 set and without additional parts (you will need a second color sensor for the lessons for using two color sensors, but feel free to skip them if you don't have it). For every mission there is a Scratch and Python program attachment. The course consists of 25 lessons suitable for beginner and advanced students. Every lessons consists of a video tutorial demonstrating the principle and how the mission could be accomplished along with building instructions for the robot, the attachment and programs for controlling the robot.
- 43
- 131:34
- 21

Active Attachments for changing gears orientation
In this video tutorial we demonstrate how the robot could accomplish the Power Switch mission. Power Switch consists of a cube with a lever and the lever should be rotate to 180 degrees. This mission model was very close to a FIRST LEGO League 2012 competition mission which was called - Oven. The robot, the attachment adn the mission model are built form a single LEGO Mindstorms Robot Inventor 51515 set and with the tutorial you will learn how to use an active attachment with 2 gear wheels to complete such missions.
- 3
- 0
- 1
- 3d_rotation 5