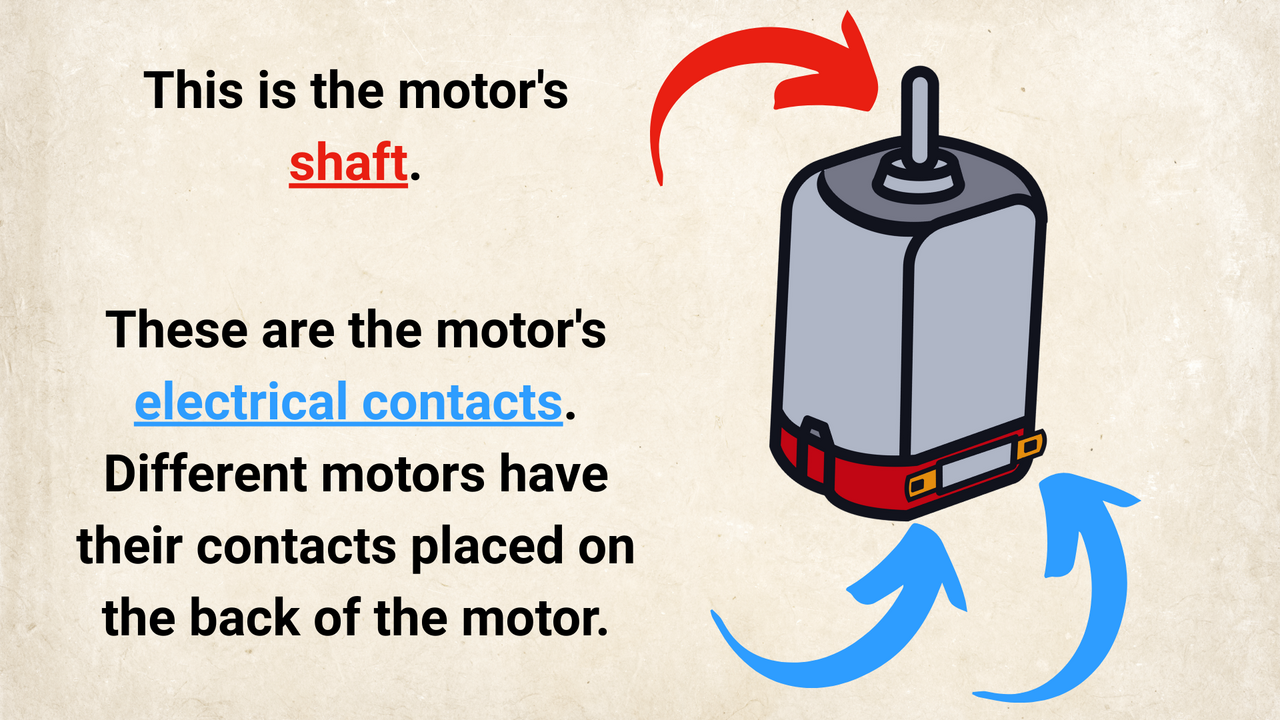
In the image below, you can see the "electrical contacts" of the motor pointer with blue arrows.
Необходимо е да се абонирате за FLLCasts.com, за да достъпите това видео
- #2482
- 09 Sep 2025

Sometimes, the electrical contacts are at the back of the motor, not on the sides. That’s actually very common, and the motor we suggested is designed this way.
Курсове и занятия включващи този Урок
Този Урок е използван в следните курсове и занятия.

Build a DIY Rotating LED Clock Display – For Parents and Kids (Online and Self-Guided)
Discover the fun of DIY electronics with your child in this self-paced, beginner-friendly online course, where parents and kids work together to build a rotating LED strip display!
Designed for those with no prior experience, this project-based course walks you through the entire process of assembling a spinning LED display that uses persistence of vision to create a glowing clock.
- 60
- 0:00
- 56

Start Your Engines – Wiring the Motor
A simple circuit

The goal of this lesson is to build a simple circuit to control the motor. We’ve split the steps into small tasks.
If any step is unclear, there’s a 3D model at the end that shows what the finished circuit looks like. Feel free to take a peek.
- 5
- 2
- 4
- 3d_rotation 1